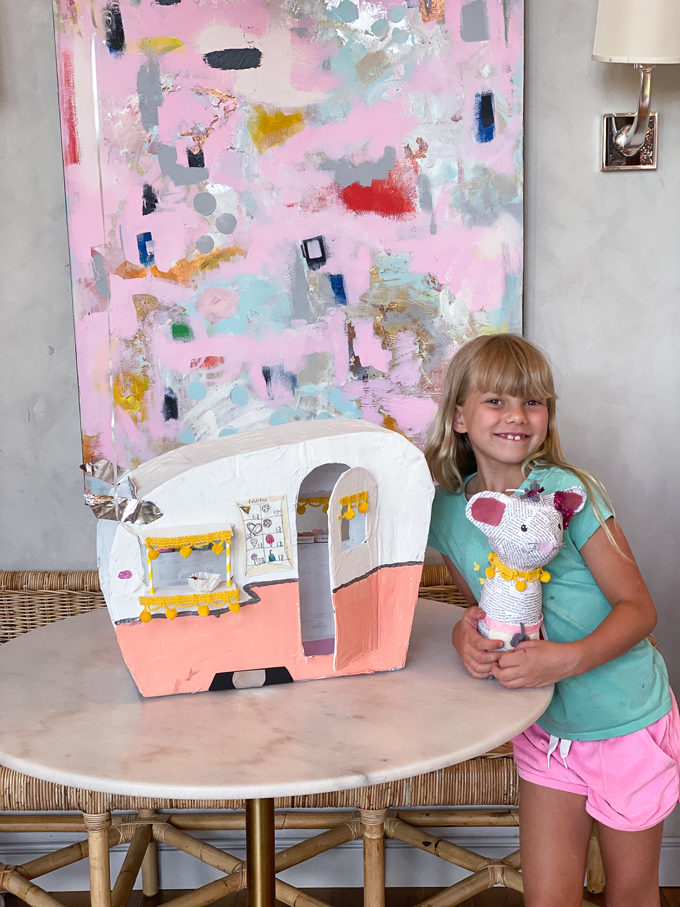
If you follow @handmakery on Instagram you know we LOVE creative camping and outdoor adventures! Here’s a mixed-media product & process we’ve always dreamed of making & creating with children! Thankful to have summertime to leap into delightful-n-dreamy workshops inside our sweet studio. Would you believe this week we’re launching ~ Early Bird Enrollment for Summer Art Camps!?! Take a peek into our creative & custom workshop ~ TINY TRAVELS: Trending Trailer + a Tailed Creature! Enjoy meeting a maker, peeking into the process, making your very own ~ Tiny Travel Trailer, and dream about joining us in the studio this summer!
Meet a Maker & Her Magical + Mobile Masterpiece:
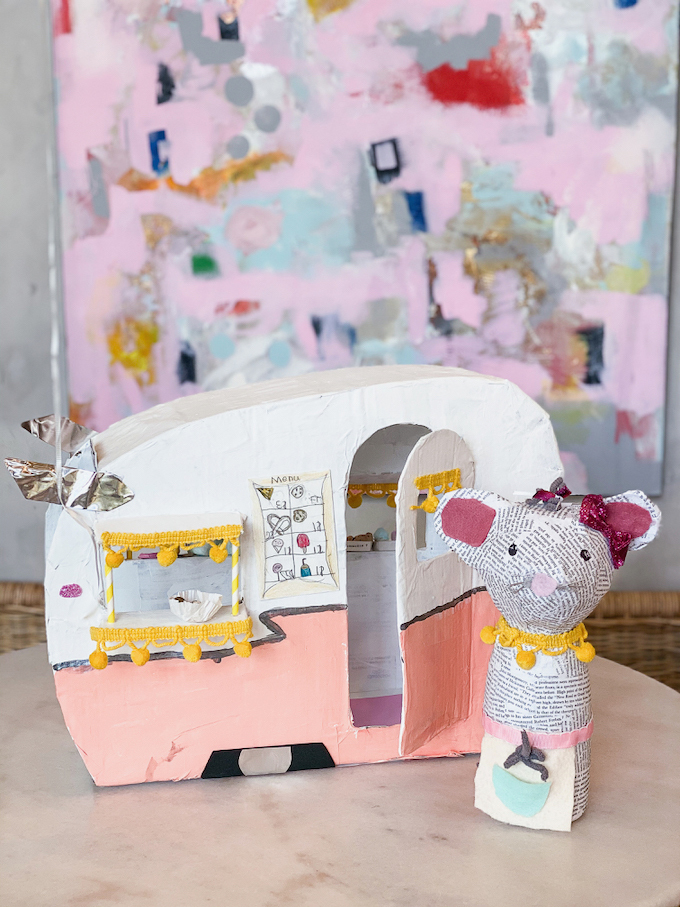
A painterly peek into the process, as we travel with one magical maker & her “mobile minimasterpiece for a marvelous milestone in the mountains” with oh so tasty treats to tempt.
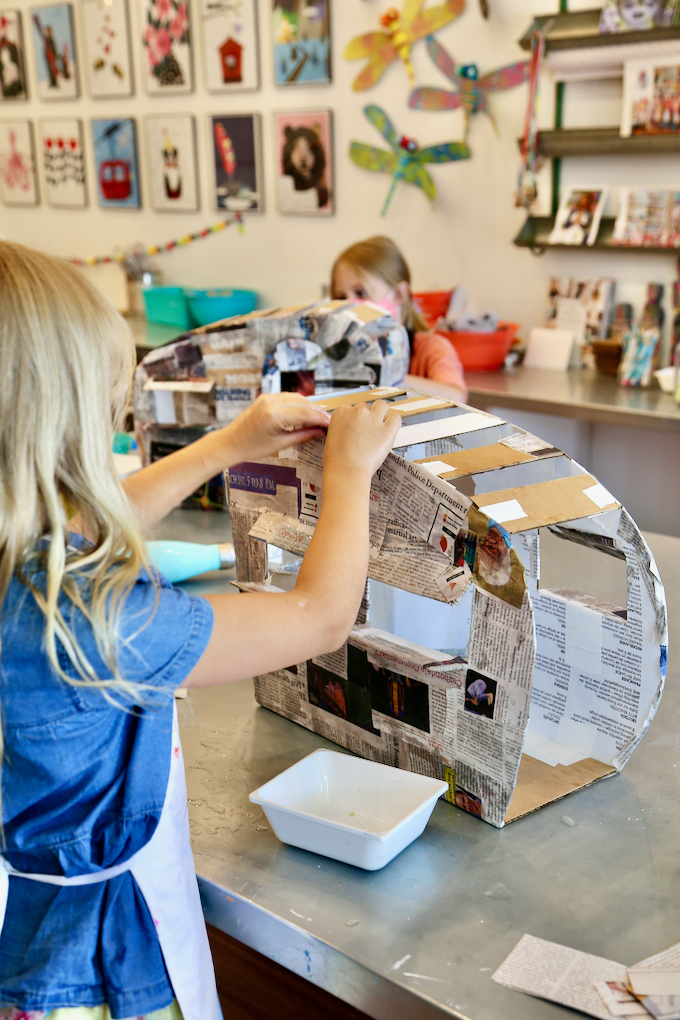
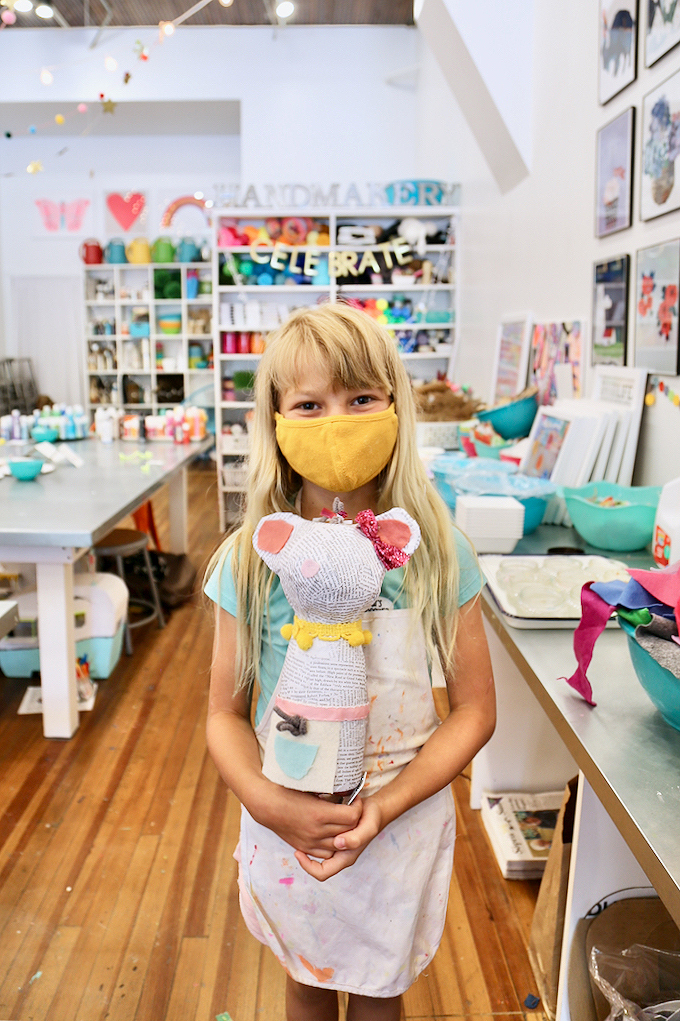
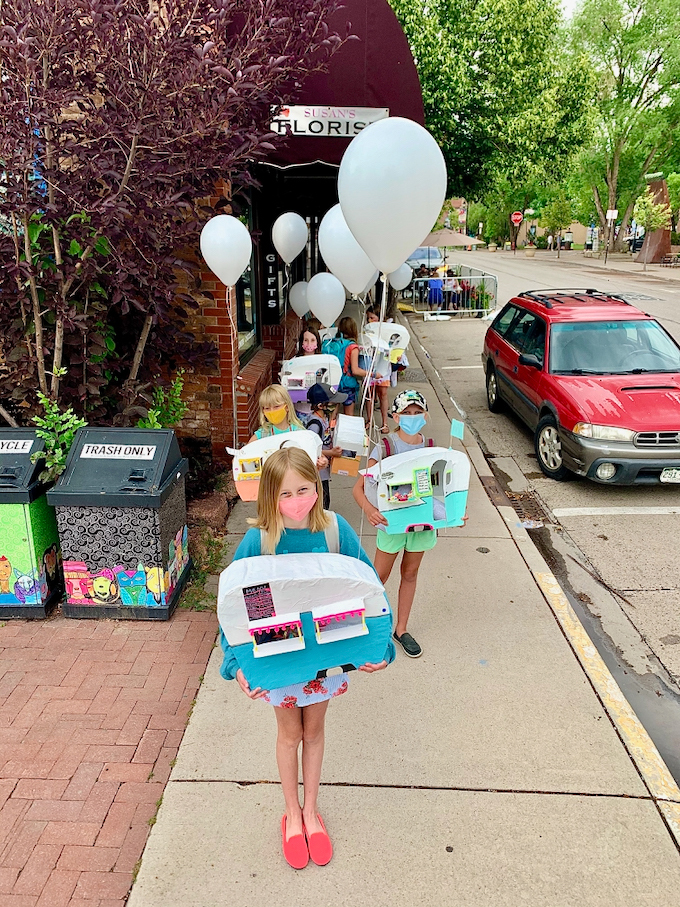
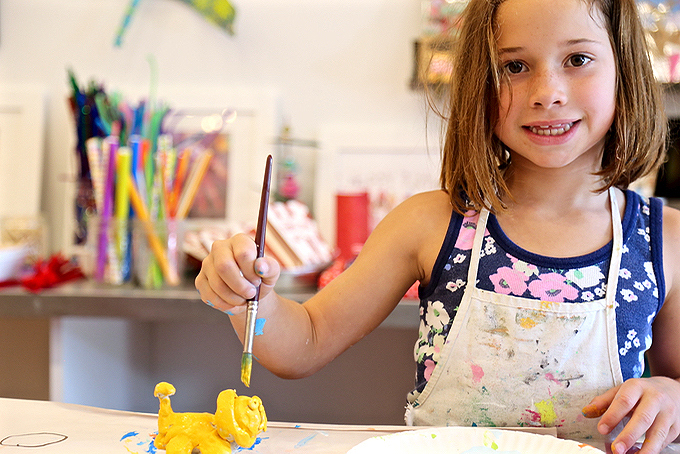
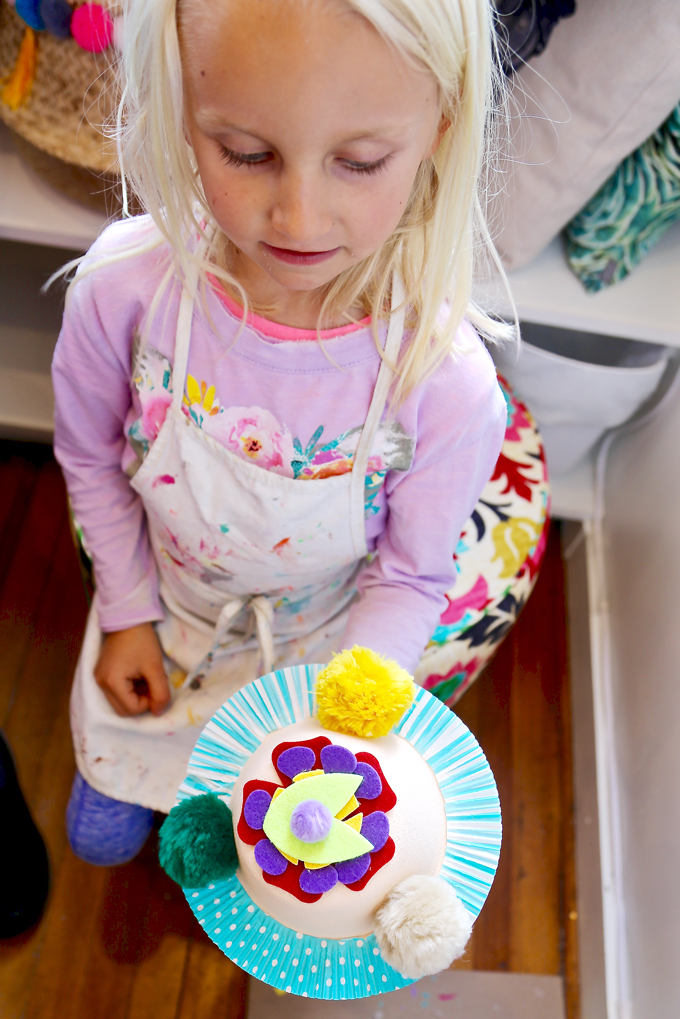
Seeing this little artist peeking into her very own handmade creation, completely captures a creative at heart! Love the wonder and magic of a creative-n-crafty childhood.
Thought we’d let you take a peek at some precious photos before diving into all the dreamy details of a DIY! Beyond thankful to have my talented photographer friend, Hilary Brock, creatively capture and curate these clever close–ups with her camera! Thanks a million for being part of the magic, hip-hip-hooray to Hilary!
A peek into the production + painterly process inside our sweet studio following a magical maker:
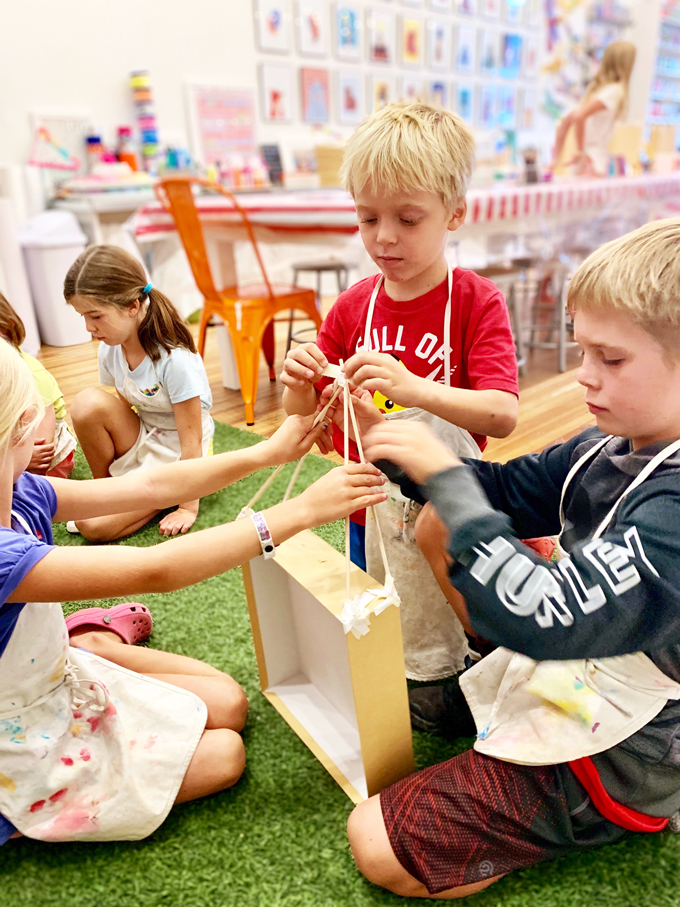
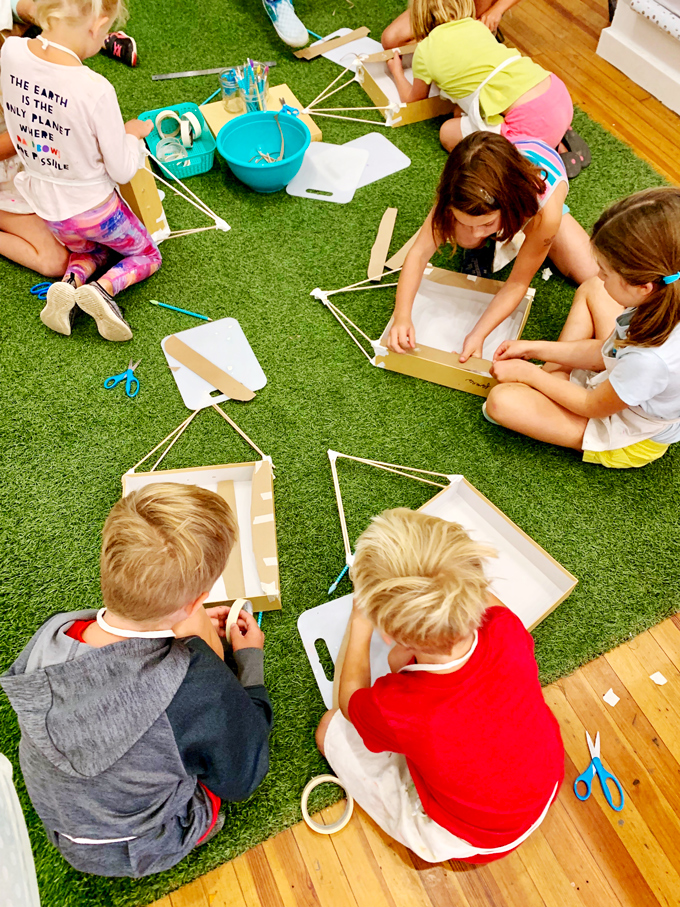
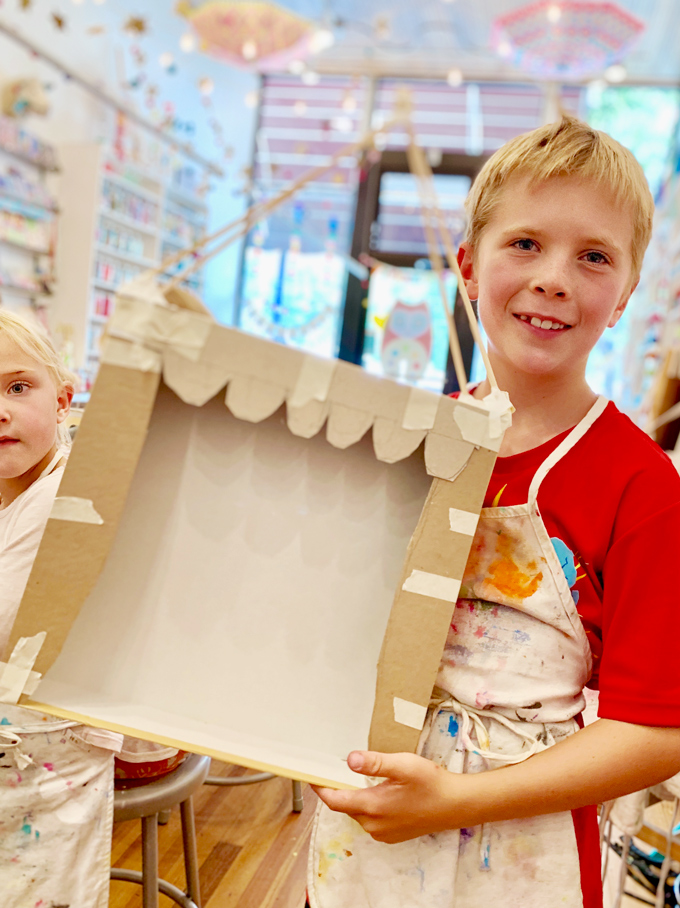
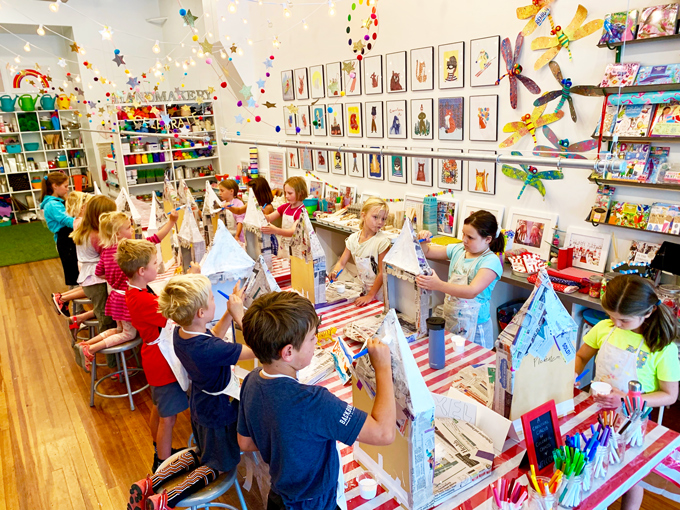
ONE Construct your own ~ Tiny Travel Trailer using precut/heavy-weight cardboard pieces which include ~ Side 1 + Side 2 (handcrafted & handcut with mid-level windows which magically fold out with a lower ledge and above window overhang) + Trailer Front + Trailer Base. Construct and secure all four pieces into place with duct tape. We hope to make a cardboard custom kit with time! Open pre-cut windows outward, upward /downward and tape at an angle of choice using duct tape. Duct tape can easily be precut with scissors into small strips. Use cardboard pieces (precut to the width of the trailer) to create the contour of the roof. Keep the back of the trailer open for interior design exploration & hours of creative play.
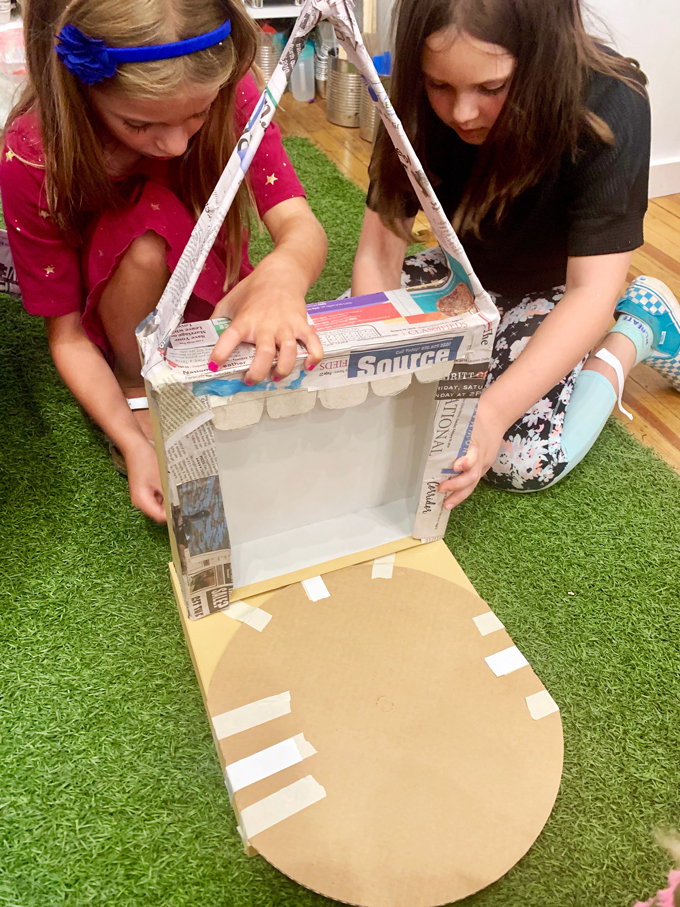
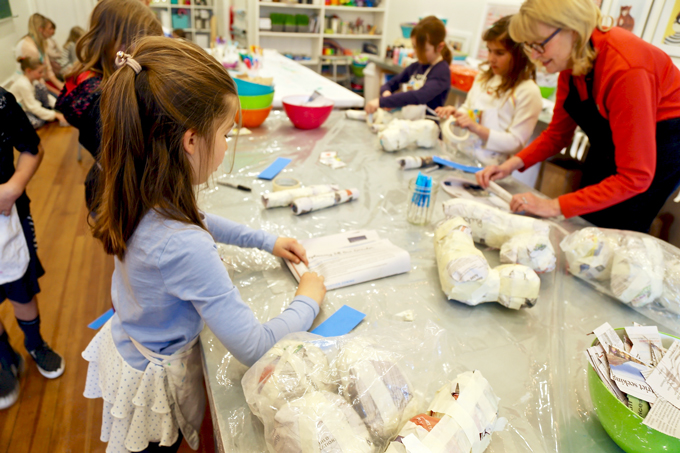
TWO Once all cardboard pieces are secure with duct tape and the trailer has taken shape, simply mix up a batch of paper-mâché in a plastic bowl. Cut several short strips of newspaper pieces to have on hand. Lay down a plastic shower curtain for easy cleanup. Dip individual newspaper strips and remove the excess mixture with fingertips. Place strips of dipped newspaper onto cardboard. Smoothing out paper strips is key. Strips can be applied in multiple directions for added strength. With the strength of the heavy-weight cardboard beneath, as the armature, young artists will only need to tackle 1-2 layers of paper-mâché. Dry fully sculpture on plastic egg cartons. Repeat the paper-mâché process as desired and be sure sculpture is fully dry before painting.
THREE Paint the trailer, both inside and outside, with a heavy-bodied white acrylic and wide brush to get a solid-n-sleek finish. Completely dry. Cut a large white piece of heavy-weight paper for the interior floor & ceiling, to give the interior a crisp-clean finish. Hot glue paper into place. Move to the exterior, use a ruler or straight edge to divide the upper and lower by forming a traditional vintage trailer zig-zag with a pencil. Mix up a vintage tint (color + white) for the lower half of the trailer. Paint. Dry. Use silver acrylic to steadily detail the traditional zig-zag horizontally on both sides.
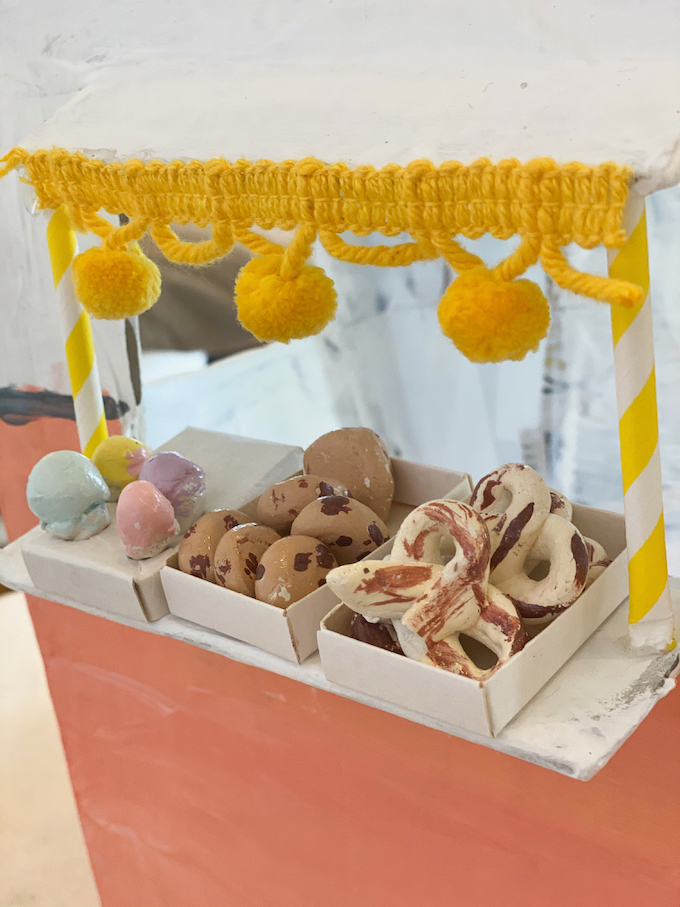
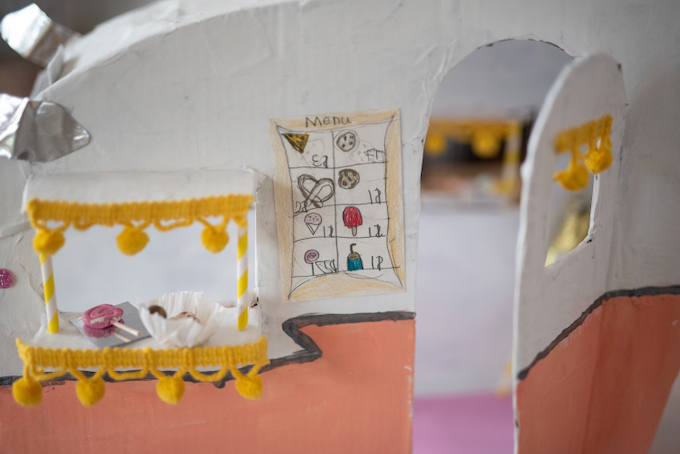
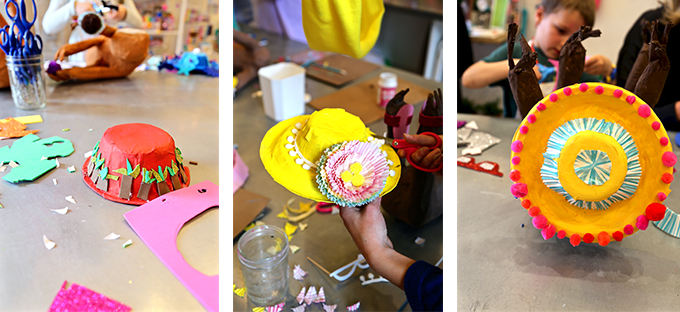
FOUR Add dazzling details around the windows to personalize and accent. This amazing artist used pom pom ribbon as her darling accent, but other artists used pom poms, felt, ribbons, and more! Paper straws can be cut to size to prop the window overhangs and to steady the window ledge. Simply measure the straws for the windows, cut with scissors, and glue.
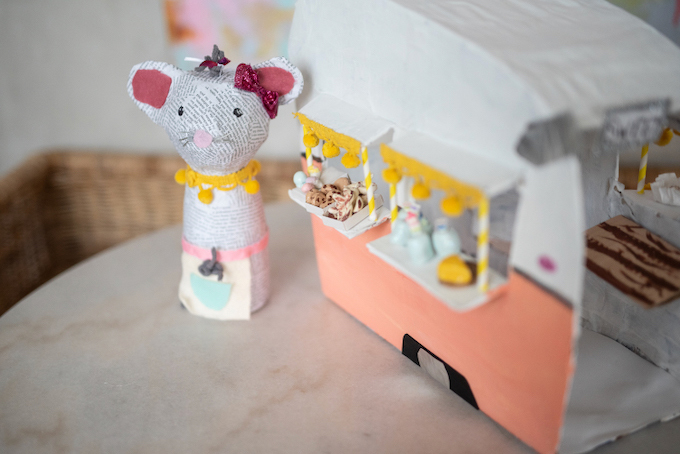
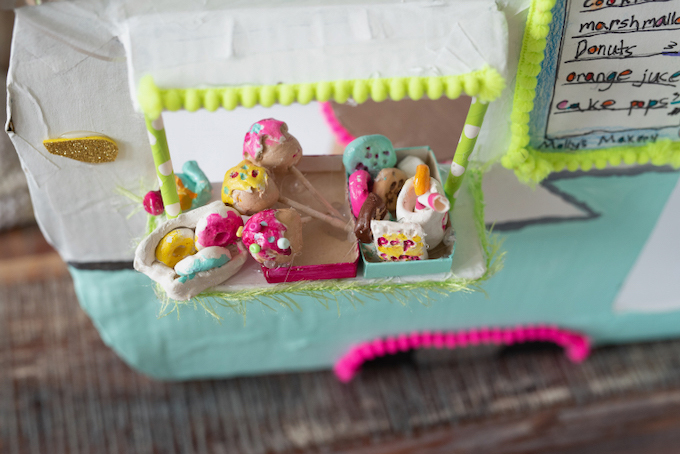
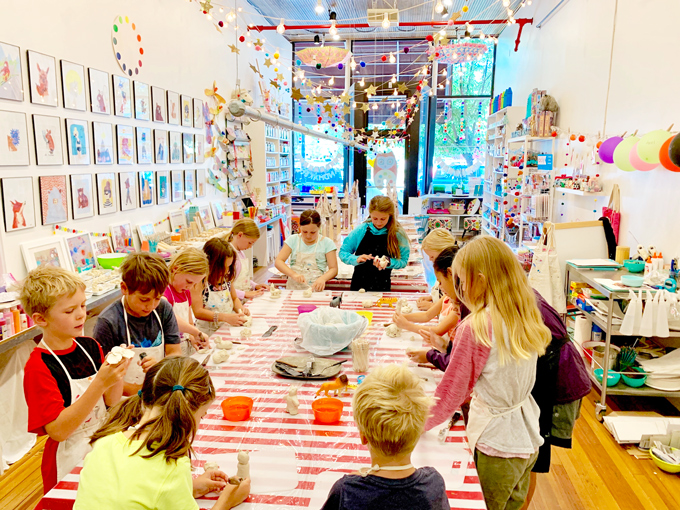
FIVE Artists made tasty-n-tiny treats, total mouthwatering treasures, sculpting their clever creations using clay ~ muffins, lollipops, pretzels, cotton candy, snow cones, pizzas, caramel apples, churros, cookies, milkshakes, smoothies, and more! Once treats were dry, they were carefully painted using a tiny brush and acrylic paint and sealed with some shimmer.
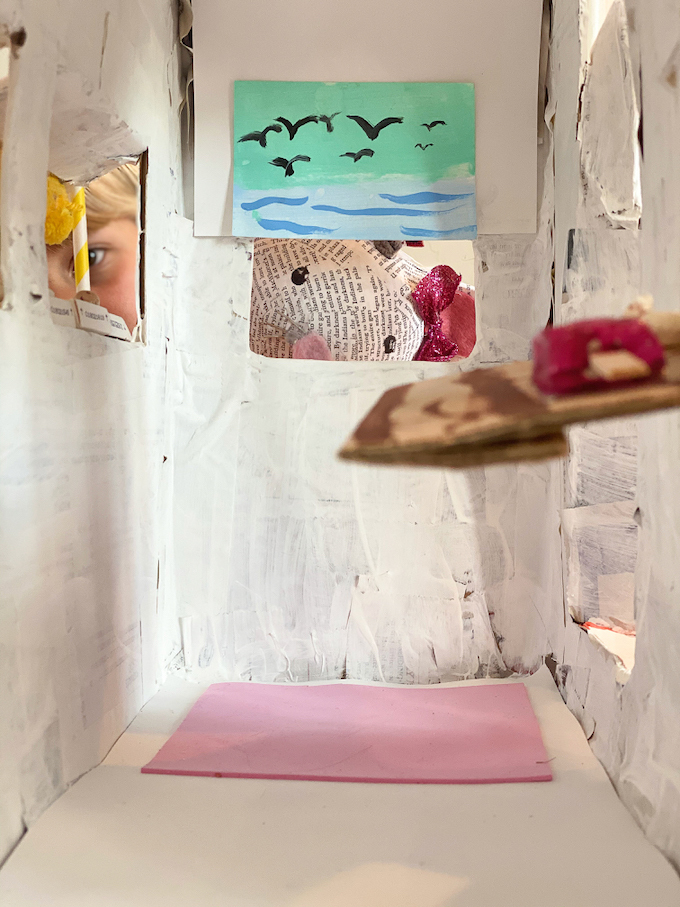
SIX Artists also created artistic menus to “melt a mama’s heart” using hand-drawn illustration and their heart-warming handwriting. These menus were personalized with colored pencils, markers, and/or chalk markers on blackboards (heavy-weight paper painted with black acrylic) or just heavy-weight white paper. Peek into this playful picture to see how this mini maker illustrated each of her handmade tasty treats!
SEVEN Another fancy detail! Add two traditional “wings” using copper foil, “wheels” can be created using black sticky foam with copper foil for the center, “exterior lights” can be made using sticky foam, and handcrafted “license plates” can be personalized & playful. If you don’t want to buy an entire roll of copper foil, metallic duct tape, sticky foam, foil, or cutting a lightweight tin might be just perfect!
EIGHT Artists can also artfully add to their trailer’s interior! Simple ideas include artwork, rugs, curtains, built-ins, and moveable furniture items such as tables and chairs made from up-cycled items such as cardboard, cardboard tubes, and fabrics to compliment.
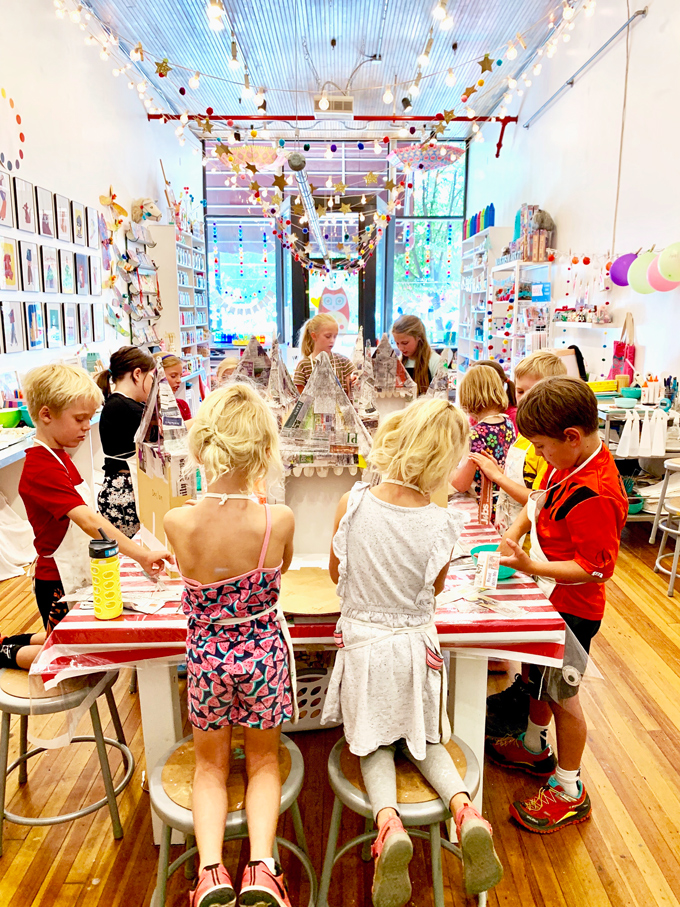
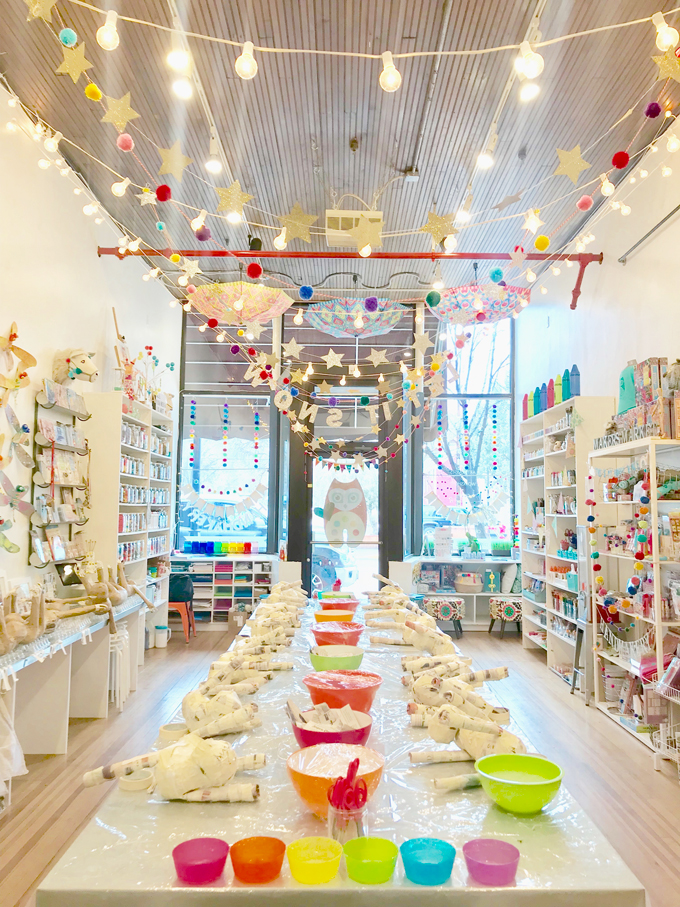
A peek inside our studio at 449 Main Street in the heart of the Carbondale Creative District in downtown Carbondale, Colorado!
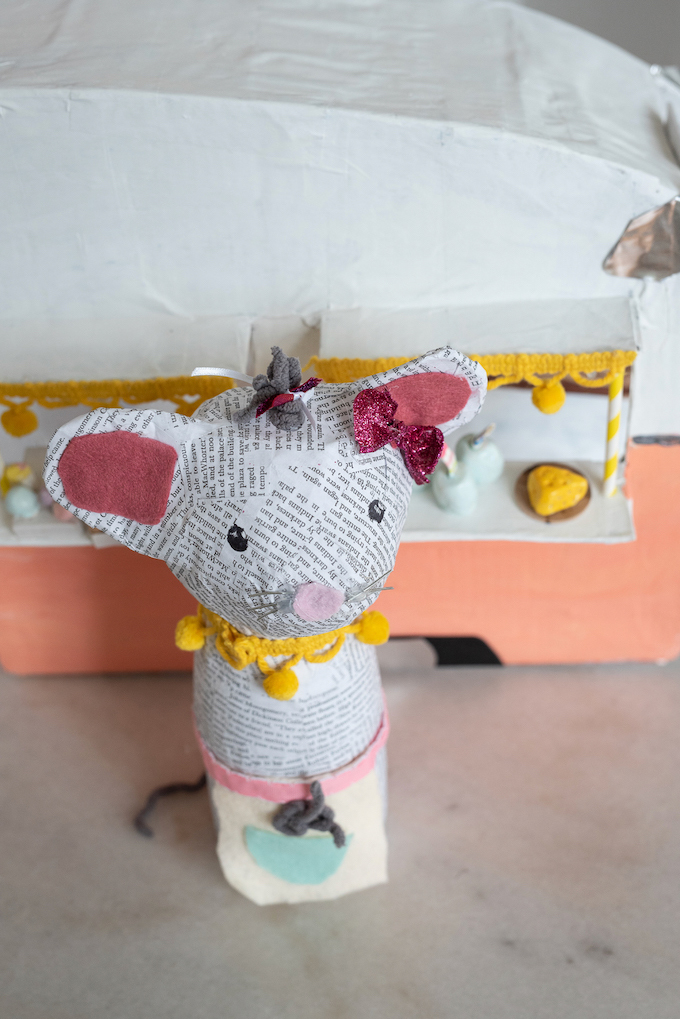
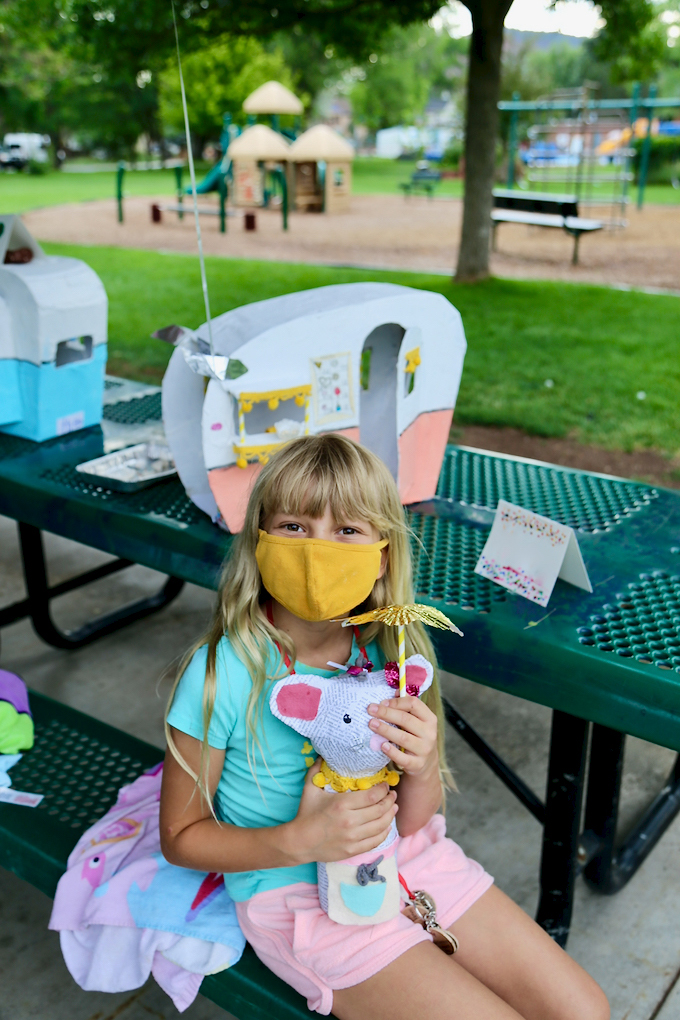
This is the mouse that sells all the tasty treats out of a ~ Tiny Travel Trailer! Each mouse was artfully inspired by artist ~ Vanessa Cabban. We artfully adore Vanessa’s use of text and fabric for all her playful paper-mâché clever critter creations, especially her much-loved mouse ~ Evangeline!
On a side note, how adorable is this Anthropologie ~ Mini Camper Play House to compliment a road trip custom cardboard creation for indoor and outdoor play!?!
An artful adventure awaits at the outdoor art show for artists:
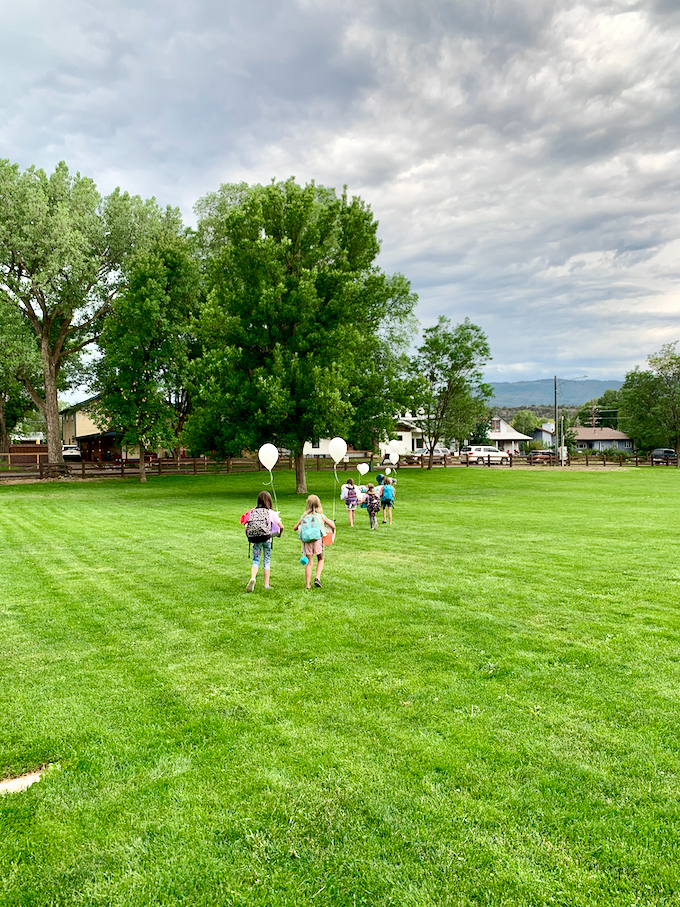
Artists skipped their handmade sculptures over to the local park for a little outdoor art show to celebrate their colorful summer camp creations!
Even though this beautiful day quickly turned into a radiant rainstorm, literally just as artists set up for the artshow in the grass, big smiles still radiated “undercover”! Thank you to this magic maker for letting us follow her artful adventure in HANDMAKERY’S ~ Summer {hands on + mixed media} Art Camp.
Thank you for joining us for a peek into a wondrous week with magical makers {inside & outside} our sweet & playful studio.
Tag us @handmakerywith your creations on Instagram! We’d love to see what delightful details you add to this summery + scrumptious + sculptural process with kids! Follow our blog for more inspiring process-based art projects! As always, thank you for following our artful adventure on Main Street in the heart of the Carbondale Creative District! Please send us a note anytime! We’d love to hear what you’re thinking, dreaming, envisioning, and creating! Much love and happiness creating in this creative + colorful world filled with collaboration + connection + community + arts & crafting!
Happy Back to School! We hope you’ve celebrated a savory + sweet + splendid summer! At the end of May, HANDMAKERY: A Children’s Art Studio received approval to proceed with in-person/in-studio/imaginative ~ Summer {hand on + mixed media + magical} Art Camps, navigating under NEW safety protocol. In early June, our studio hosted our first summer camp ~ TINY HOME ON TREND for children 6 & up, with many more constructive + creative + childhood-centered camps to follow! Every camp was on a waiting list and we can’t even begin to thank all our lovely locals for all their small business support! Looking back, it may have been one of the most magical + memorable summers with makers on Main Street! Creativity and childhood was completely celebrated in our colorful community of Carbondale, Colorado!
Focused on the forefront of safety in the studio & success for all artists this summer, HANDMAKERY stepped away from social media to take a fresh breath of mountain-air, but we’re incredibly excited to reconnect and soar into our ~ SCHOOL YEAR {hands on + mixed media + magical} ART WORKSHOP with a summer of safety and success in our painter’s pocket. We’re looking forward to re-kindling creativity & connection with YOU on Instagram.
Many of our specialty art workshops have recently launched for early bird enrollment. Definitely message us to get on our lovely ~ Local’s List. We’re thrilled to continue {in-person + in-studio + imaginative} art programming this fall, applying & adapting our experience from summer in the studio! You can simply learn more about our studio safety on our website. On a side note, be sure to also look for us in the upcoming MOUNTAIN PARENT!
Summer brought sunshine + smiles + simplicity + savory moments + soulful celebration + simple reconnection + satisfying success for all artists in the studio. We’re excited to give you a glimpse into our makers in the mountains, with momentum for magical moments!
YES, indeed! Even with mysterious masks, everyday was most mesmerizing! Would you believe, not one artist ever complained about wearing a mask all summer!?! Truth. We were amazed!. Artists were completely focused on the miracle of being a maker and it was magical! The studio buzzed with crafty-n-creative bees. Being back together again was absolutely the BEST!
In addition to instructing summer workshop in our very own sweet studio throughout the summer, HANDMAKERY also had the opportunity to create an online workshop for art educators around the world for our friends at Deep Space Sparkle in Santa Barbara, CA. This workshop was based on our in-studio/virtual springtime workshop for local kids ~ artful + abstract ASSEMBLAGE on canvas. A few precious pieces pictured by parents, above!
We also had the artful opportunity to teach another fun-filled summer workshop of printmaking (in-studio/in-person) to children at Anderson Ranch Art Center in Snowmass, CO. Would you believe our printmaking workshop, titled well over a year ago, was called ~ Dancing Behind the Mask!?! Literally, before anyone even knew we’d truly be dancing behind masks today! We can’t even wait to see what’s around the creative corner this upcoming year school year!
All precious projects, radiating laughter & L-O-V-E, and created in our {hands on + mixed media} summer art camps… we’ll share DIY STYLE on our blog throughout this upcoming year! Be sure to stay tuned for more creativity-to-come focused on a creative-n-crafty + imaginative + playful childhood!
Tag us on Instagram with your indoor + outdoor creative spaces and colorful + clever creations. We’d absolutely LOVE to see what you’re making and creating inside and outside! As always, thank you for following our artful adventure on Main Street in the heart of the Carbondale Creative District! Send us a note! We’d love to hear what you’re thinking, dreaming, envisioning, and of course, our favorite ~ CREATING!
Much love and happiness creating in this creative + colorful world, filled with collaboration + connection + community + arts & crafting! Happy School Year!
Summer for our family was filled with colorful Colorado ~ close-to-home camping, fun-filled photography, river floats & creek fishing, small-sized celebrations (my sweet daughter 11 and my beloved grandfather 91), creating in the studio with creative-n-clever children, road biking on the Rio Grande, a few favorite hikes, peach picking, paddle boarding, and more micro-adventures in the mountains! What have you been up to this summer!?! We’d love to know! …and YES, we just had to show you our artful overalls!
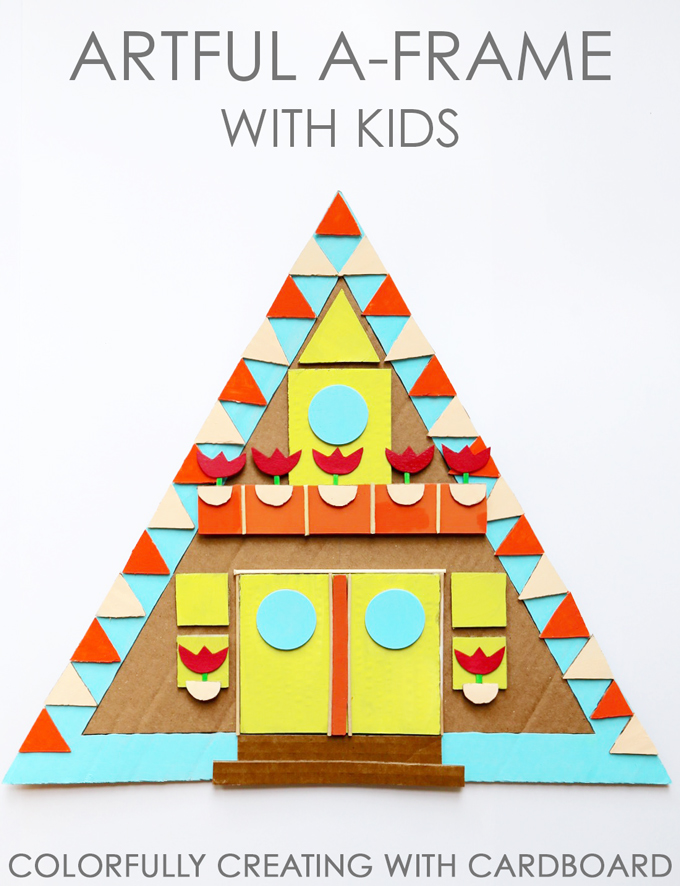
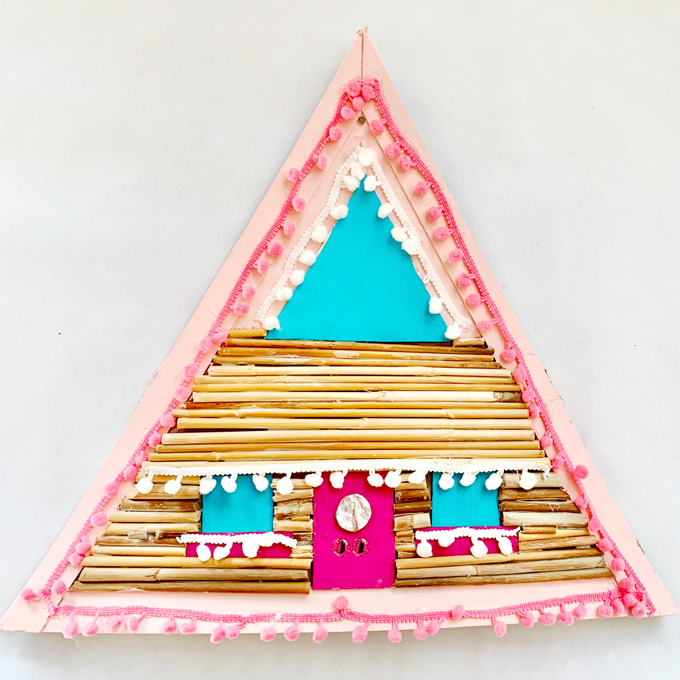
Get cozy, creative, and cardboardconstructive from your casita with our architecturally trending DIY ~ ARTFUL A-FRAME WITH KIDS! Take a peek at our {hands on + mixed-media} process creating with crafty kids in Carbondale, Colorado in our downtown art studio at 449 Main Street and be sure to follow our artful adventure on Instagram!
An A-frame is an architectural house style known for its steep-angled roofline that generally begins at the foundation and meets at the top in the shape of the letter A. They became quite popular around the world in the mid-50s through the 1970s, but they’re totally trending today!
SUPPLIES FOR ~ ARTFUL A-FRAME FOR KIDS:
Paper and pencil
A-frame online inspiration, included below.
Utility knife (adult-use)
Straightedge and geometric shape stencils
Wooden sticks and a tool for cutting (optional)
Glue
Scissors
Paints, brush, water & container
Embellishments (optional)
PROCESS FOR ~ ARTFUL A-FRAME FOR KIDS:
ONE Collect cardboard upcycled from a large pizza box top.
TWO Take a peek at trending #aframe inspiration on Instagram. We’ve included a lovely list below!
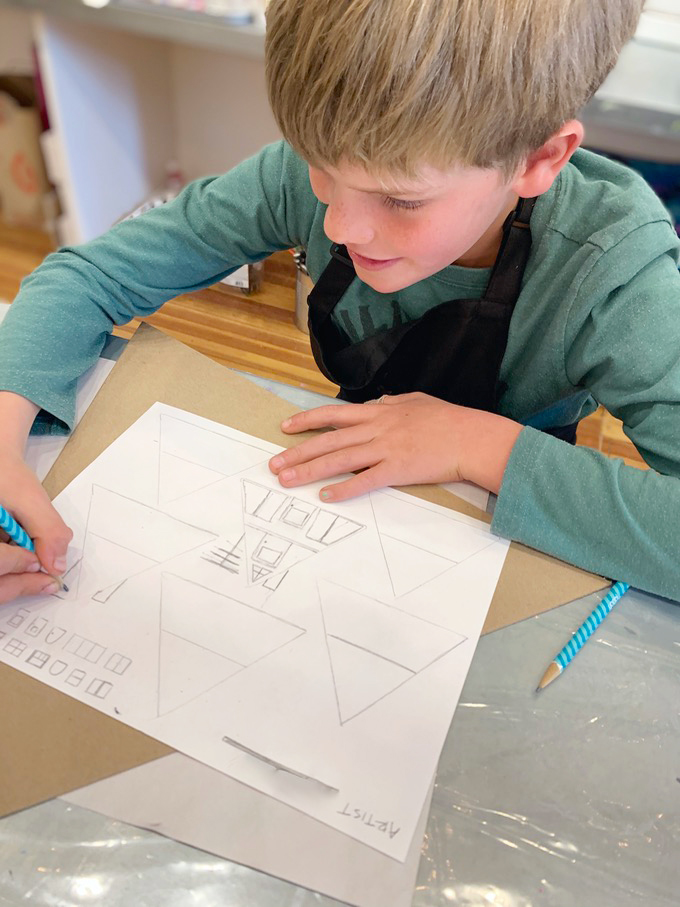
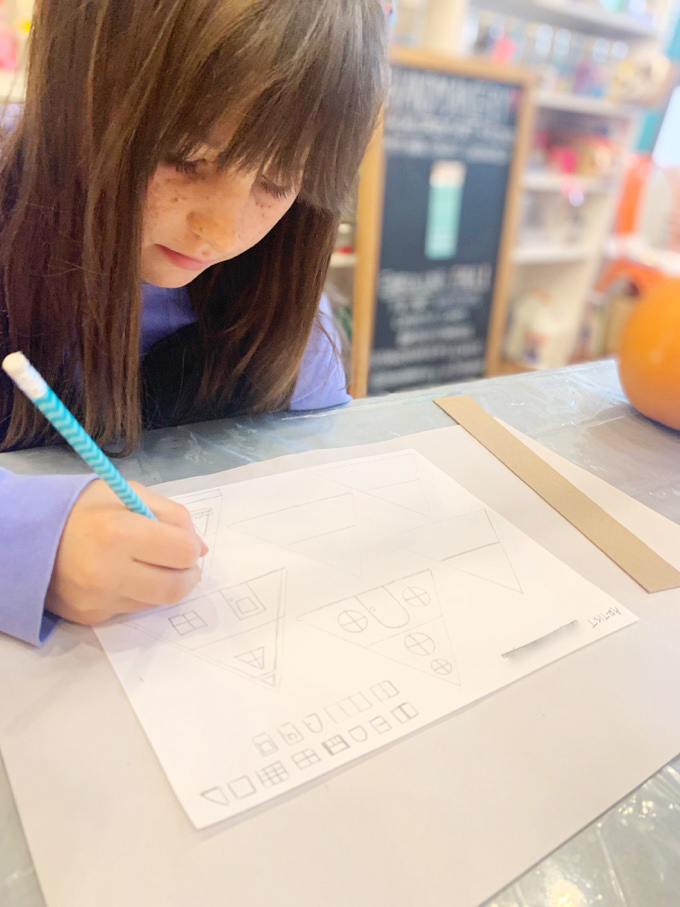
THREE Start with a few simple triangles, pre-drawn onto sketch paper, for mini open-ended sketches. Young artists can work towards their vision, sketching within these triangles, to then create their favorite design to construct. Focus on sketching the main elements which might include doors, windows, sliders, decks, and more. A-frames are most often two-stories and symmetrical, but the sky is the limit! Just be sure to set your sights high and soar!
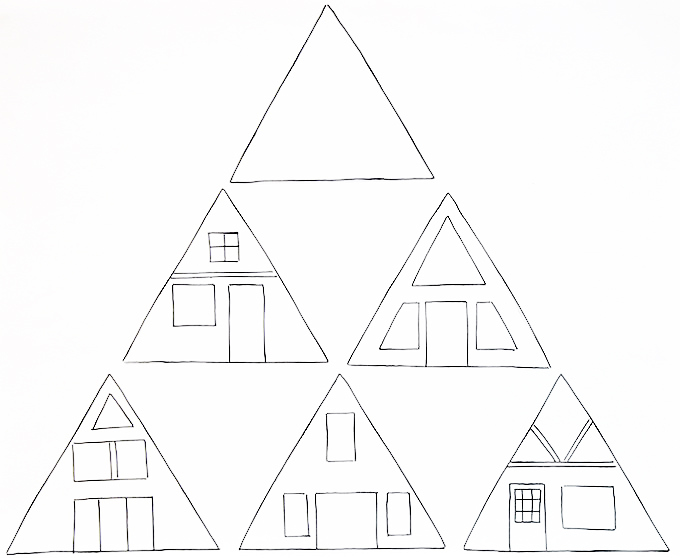
FOUR Use simple sketch ideas to begin construction. Here are some simple sample layouts for visual reference to artfully inspire.
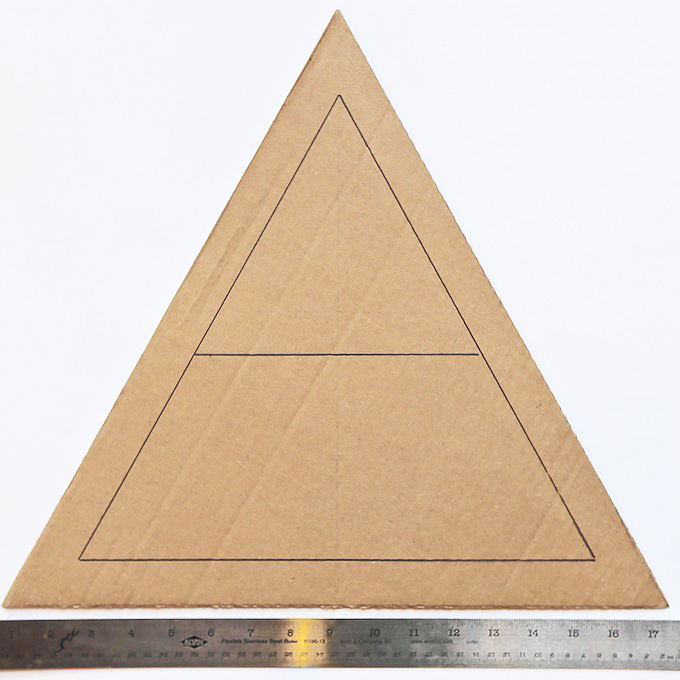
FIVE Precut a large cardboard piece into a triangular base using a utility knife (adult-use) at a 45° angle. Then measure a 1 1/4″ border around all the three sides using a pencil. Midway, mark the second story with a horizontal line or keep it open for a single story with a vaulted interior. The inside of your A-frame is a completely open canvas to artfully design.
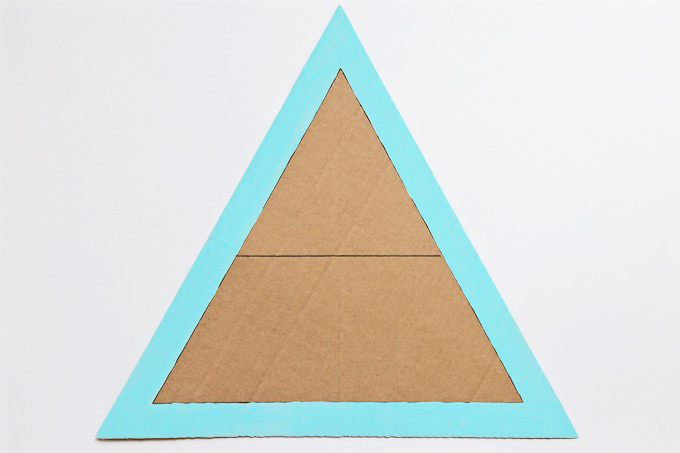
SIX Pick a favorite color. Using acrylic paint, cover all three sides with a solid coat. You can also use painter’s tape to get a crisp edge.
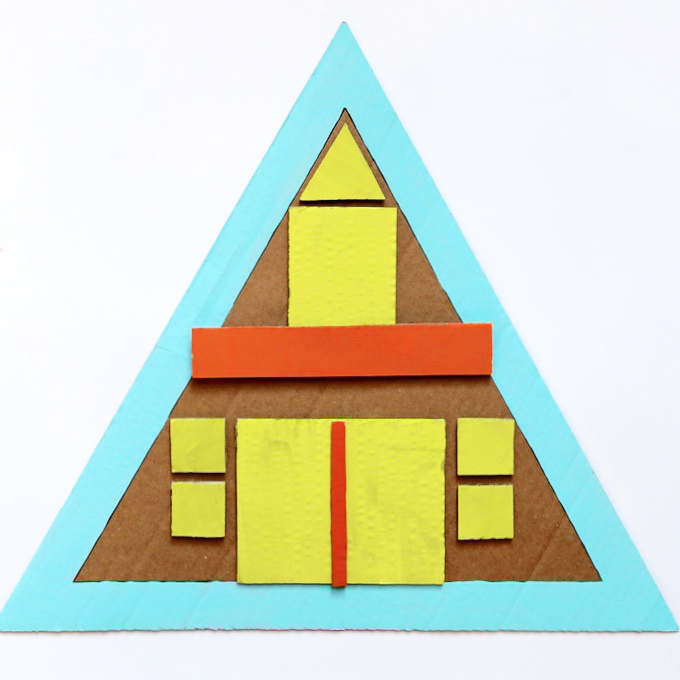
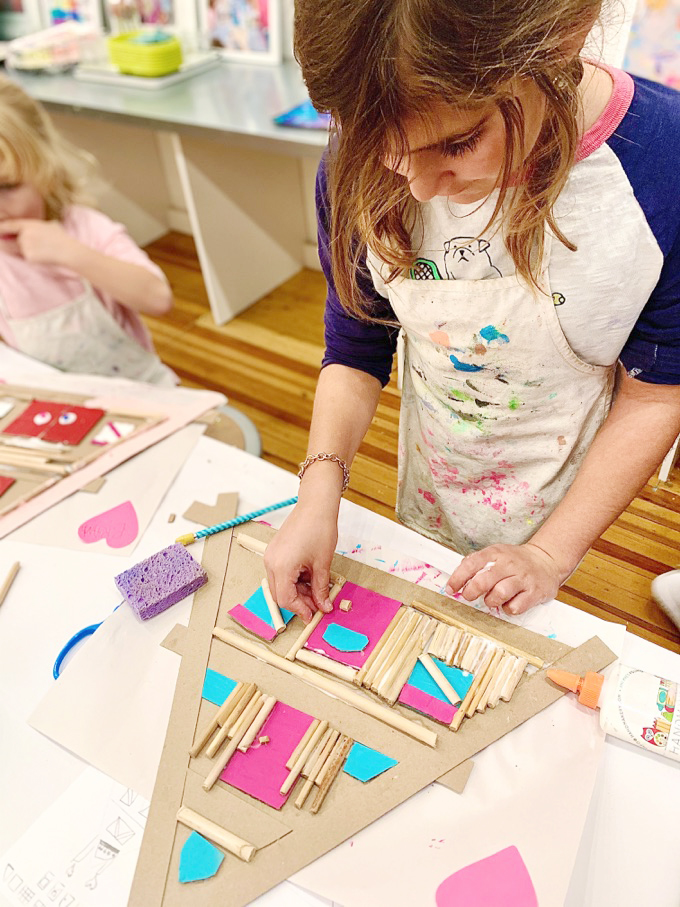
SEVEN Precut cardboard pieces into smaller, more manageable pieces for younger artists to explore. This makes cutting cardboard much easier for smaller hands. We usually have a bowl full of squares and rectangles in a variety of sizes. From these basic cardboard shapes, children can use a ruler or geometric stencils to create their own unique shapes for doors, windows, and additional parts.
EIGHT Select three main colors to complete your color pallet. On a separate work surface, paint individual elements, such as doors and windows using a medium-sized brush and acrylic paint. Dry all pieces separately. Keep interior pieces moveable so artists can rearrange and make changes to their layouts before finalizing piece placement by gluing down.
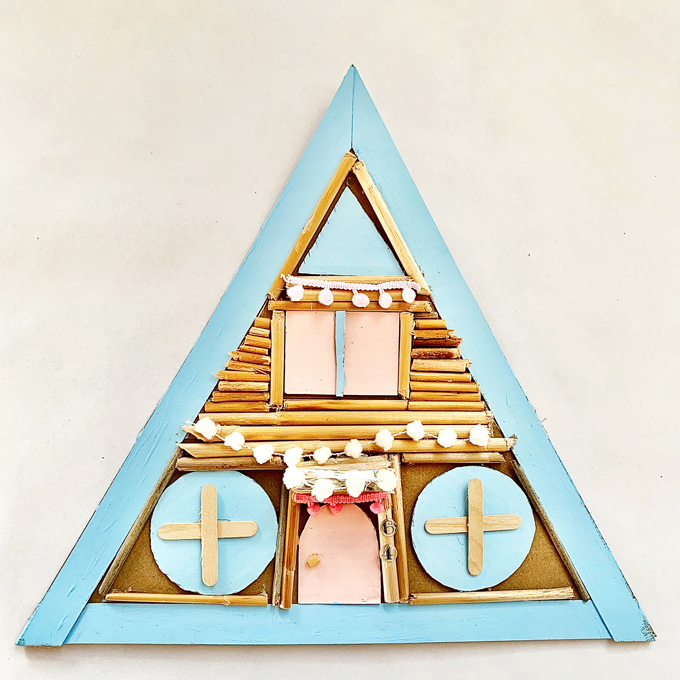
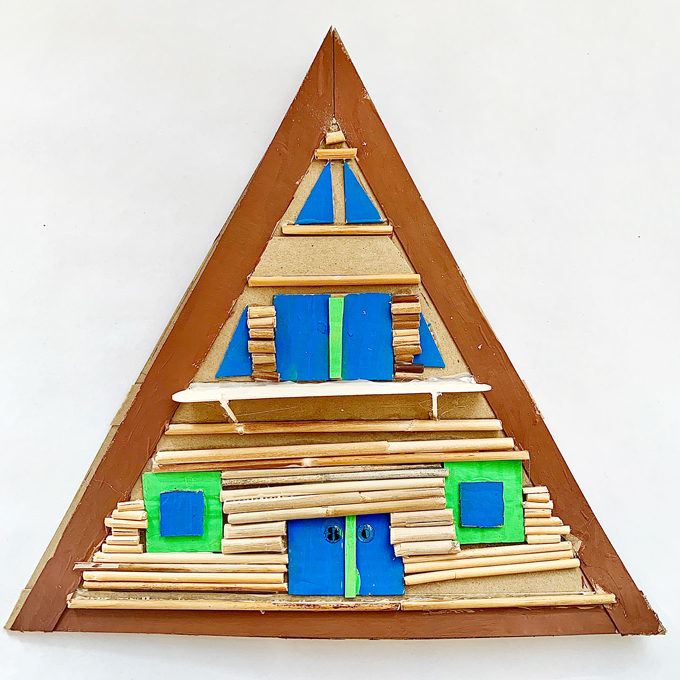
NINE Tiny cardboard pieces can be added to personalize. Take a peek at the divided lites in the windows in this A-frame. Many artists focused on symmetry for their A-frame but asymmetry is also a wonderful possibility. Young artists will love exploring this process and everything in between.
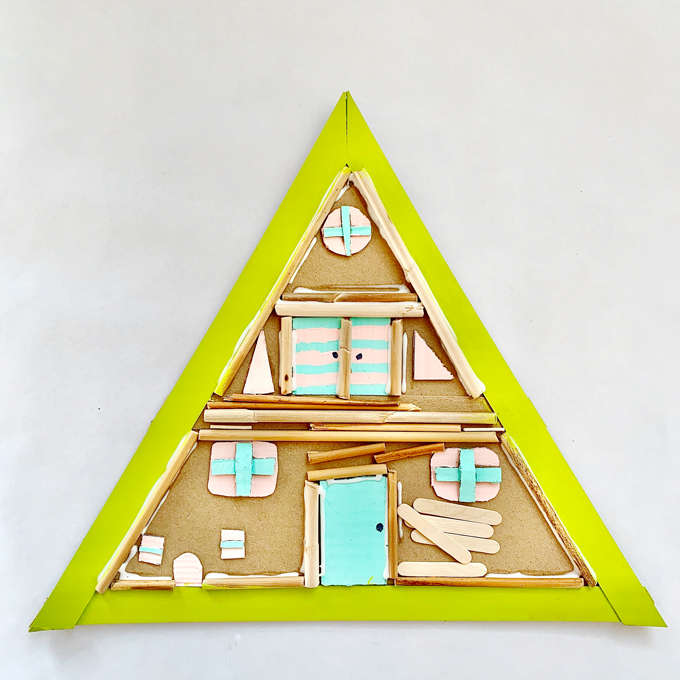
Love the circular and triangular windows on this blue A-frame with pom pom ribbon to compliment the archway entry!
TEN As a favorite “optional element” artists can add wooden pieces to make this project more real-world in construction. Kids LOVE working with wood! We collected cattails in the fall and most importantly pre-dried these sticks in the sun for several weeks so they wouldn’t shrink and pop off the cardboard when glued down. Cattails are an amazing and abundant resource in the great outdoors. They simply grow around wetlands and are easy to cut with heavier weight scissors. My daughter and I cut over 200 for this project. The best part about cattails you’re wondering? Cattails are smooth, straight, and simple to cut. Older children can cut cattails independently using small (6″) diagonal cutters or dikes, of course with adult supervision, to specific lengths. Younger artists can mark the length with a pencil and have an adult assist with the cutting. In the springtime, cattails have been drying out all winter so they’re ready to go without dry time. Collect, remove the top fluff, peel the outer layers to get to the center stick, and simply cut to any length! This element in nature is brilliant!
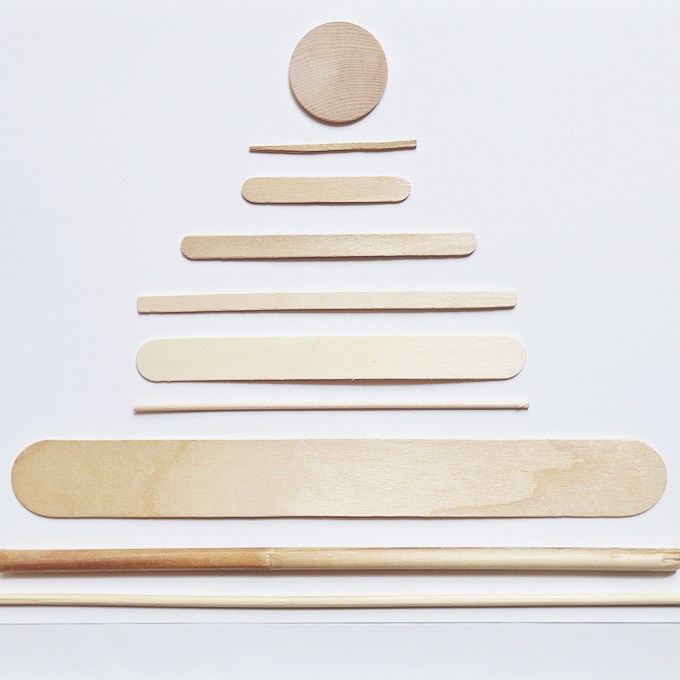
Additional wood pieces to artfully add might include, craft sticks, popsicle sticks, skinny sticks, mini craft sticks, natural mini wooden craft sticks, jumbo craft sticks (great for decks and porches), tiny dowels, wooden skewers, toothpicks, flat rounds, and more!
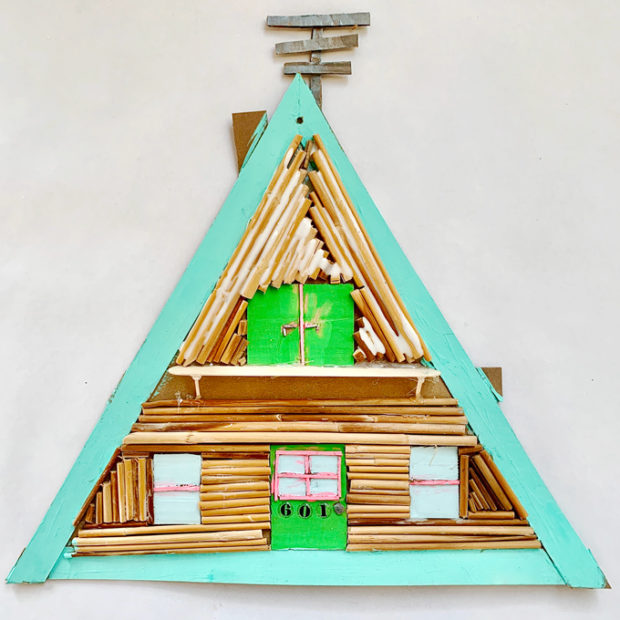
Most wooden pieces can be glued down with a generous application of white glue and dried overnight. A popout deck or balcony might need a little hot glue reinforcement. Doesn’t this A-frame have a wondrous in the woods or lovely log cabin feel?
Artists LOVED working with real wood as a “real world” architectural element for diversifying their siding in directions including vertical, horizontal, and artfully angled. The natural cardboard also remained as a natural compliment to spaces not covered in wood. Artists got clever and crafty adding window boxes, circular windows, stairways, railings around balconies and decks, entry archways, tv antennas, and more! Kids are just oh so clever and always so very crafty!
Tag us on Instagram with your creations. We’d absolutely LOVE to see what you’re making and creating! As always, thank you for following our artful adventure on Main Street in the heART of the Carbondale Creative District! Send us a noteanytime! We’d love to hear what you’re thinking, dreaming, envisioning, and of course, our favorite ~ CREATING!
Much love and happiness creating in this creative + colorful world filled with collaboration + connection + community + arts & crafting! Happy Springtime from our studio to your cozy, crafty, and creative cozy casita!
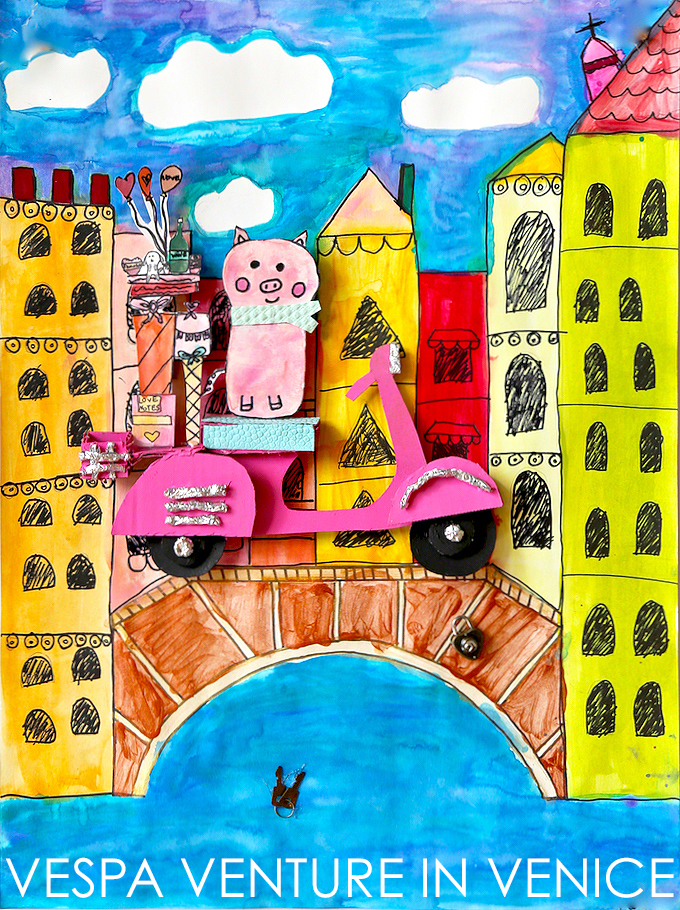
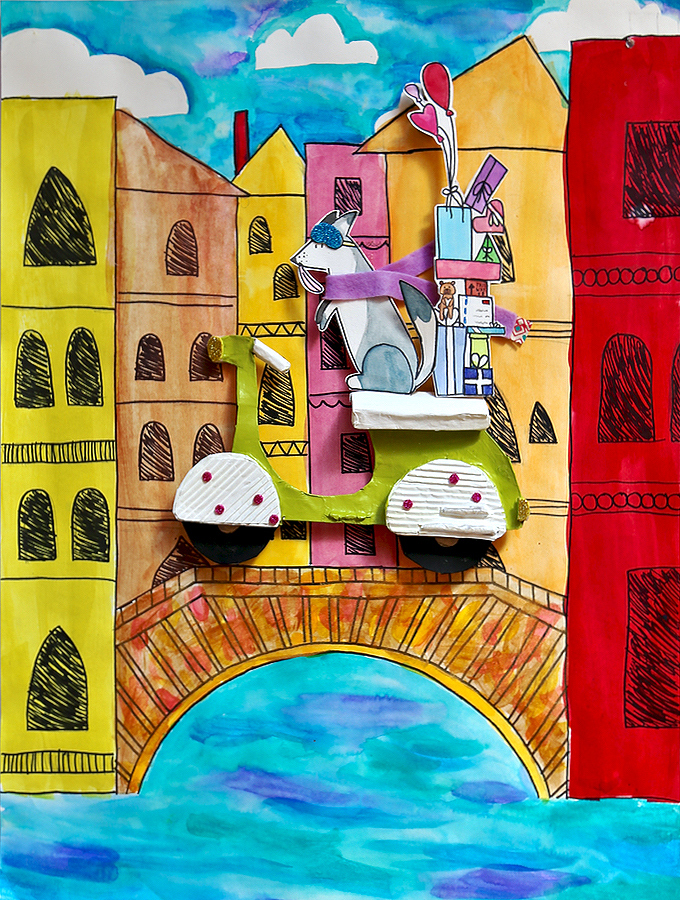
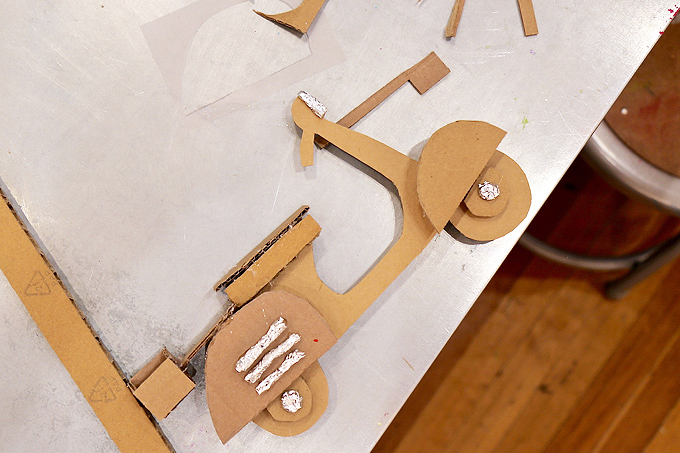
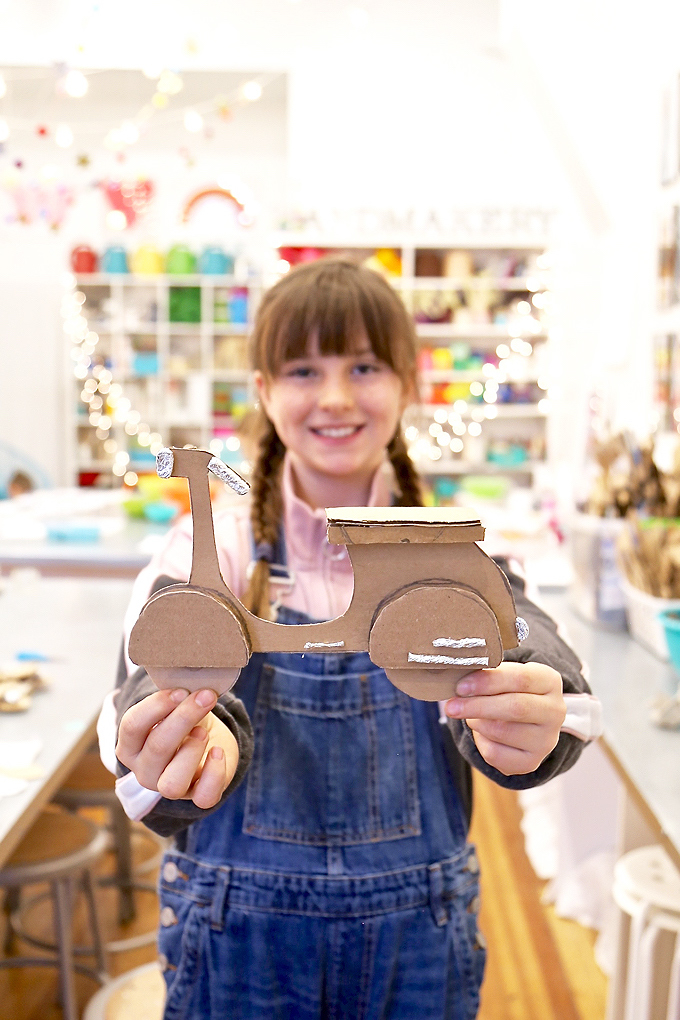
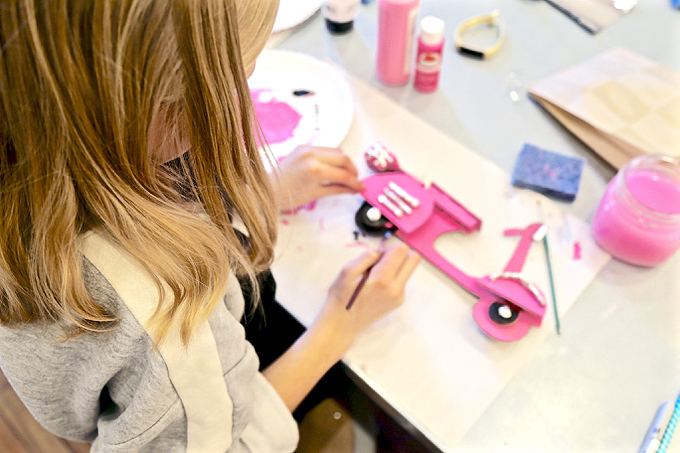
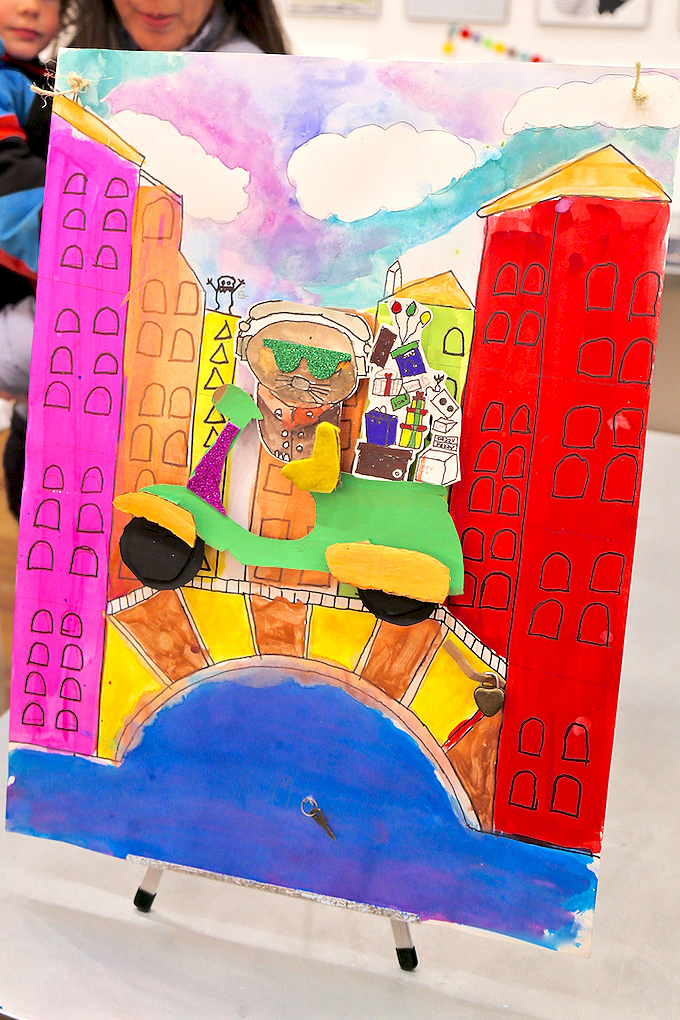
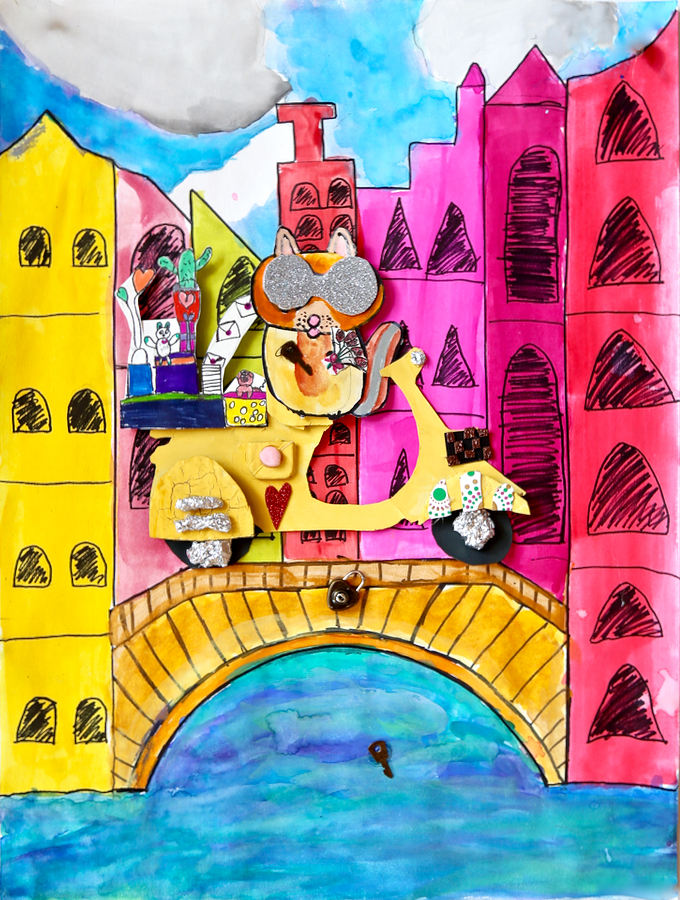
Meet and mingle with our ~ DIY Vespa Venture in Venice created by young makers! If you’re connected with us onInstagram, you’ve seen young artists creating these precious popped out pieces in an after school workshop just before Valentine’s Day, hence the love lock addition! The vision was to create a colorful creature, possibly a vivacious vole, venturing and vrooming through the streets of Venice on a vibrant Vespa, full of Valentine’s gifts galore…that’s a whole lot of V’s, right!?! Of course, you could design any type of pretty packages for transport or choose any cute creature to be captain. Take a peek at our {hands on + mixed-media} process creating with crafty kids in Carbondale, Colorado in our downtown art studio at 449 Main Street.
Have you ever wanted your very own Vespa scooter!?! They come in SO many beautiful colors under the sun! They’re simply so easy to spot on a summery street in all sorts of savory shades. How could you ever choose from seafoam green, luscious lime, savory sky blue, amazing aqua, sunshine yellow, outrageous orange, just to name a few of the “scoops of sorbet”! Someday I’ll own my very own but for now, these vrooming Vespas completely fill my heart. Children LOVE creating things that are cute, crafty, creative, connected, contoured, centered on cardboard, all with a clever catch! This project took a splash into artsy architecture, a love lock tradition on-trend, and added a speedy story to showcase. Then there was the venturing vole (you could create any creature or even a humanized character) making a vrooming Valentine’s Day special delivery by Vespa!
YES!!! Our SUMMER ART CAMPS just opened for early enrollment! We also have our last SCHOOL YEAR ART WORKSHOP coming up with just a few spaces ~ a TOUCAN’S TRIP TO TAHITI in TIE-DYE starting the week of April 13th! Take a feathery flight this spring and join us in the studio!
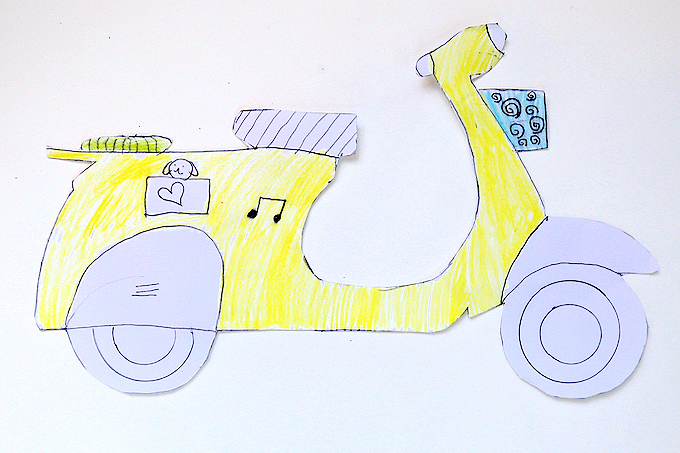
ONE Sketch a variety of Vespas using photos for reference. Select your favorite and get started on some exciting designing and color planning.
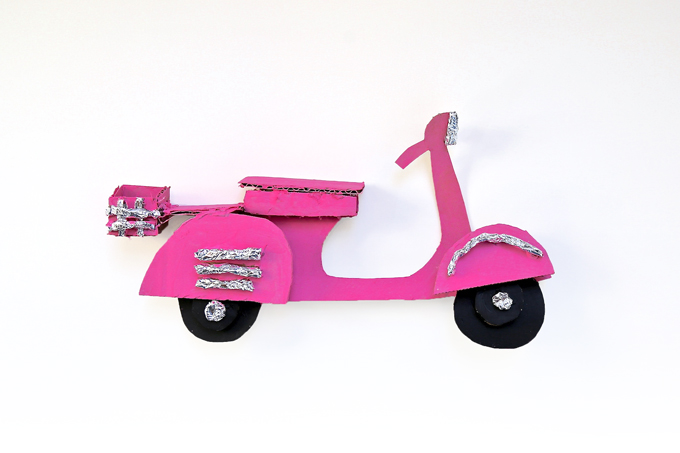
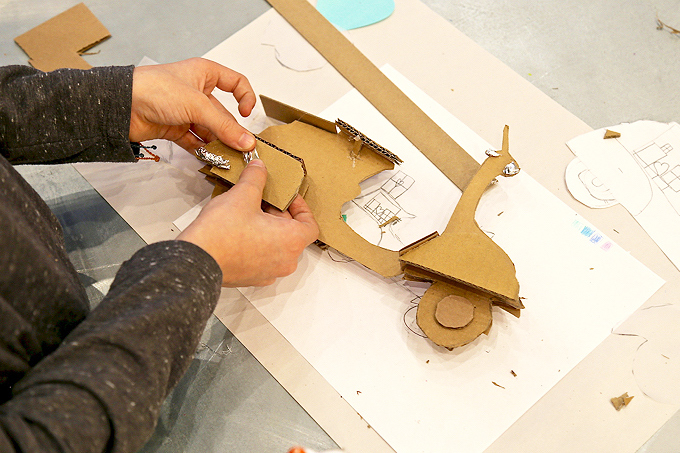
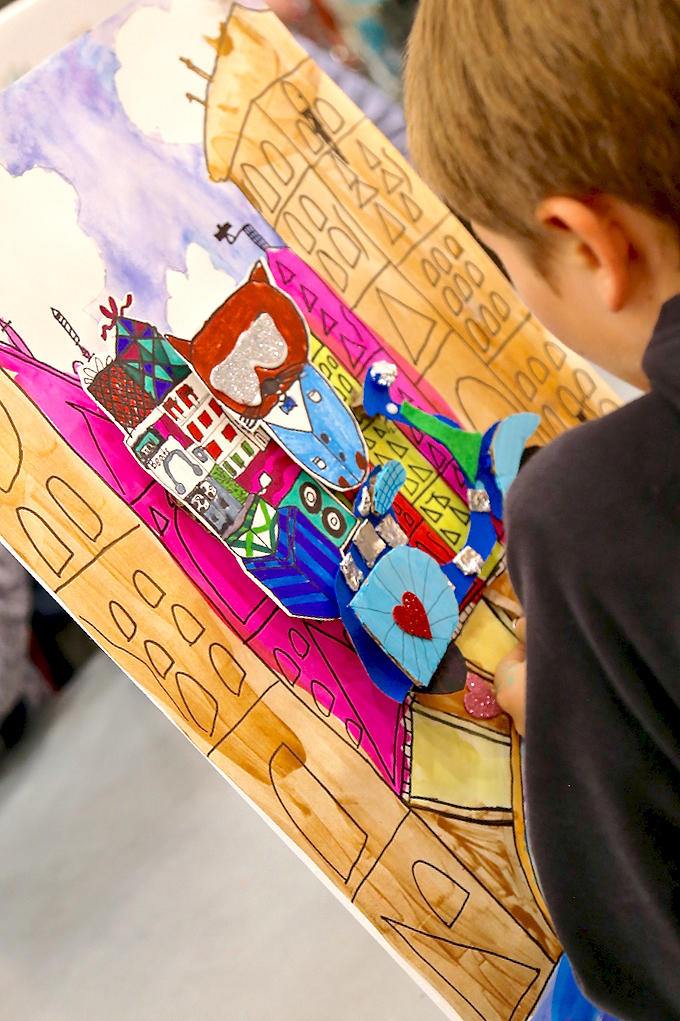
TWO Create the full body of your Vespa by sketching it out on light-weight cardboard. Cutout. Decide which components you’d like to pop out to create added dimension. Most of our artists popped their fenders, seats, racks, lights, and more! Smaller pieces take on more “pop” with traditional cardboard. We had an easy to cut, yet “thick cardboard” to create “spacers” between pieces to pop-out even more dimension. These pieces were simply glued between.
THREE Glue parts and pieces in place using white glue or a “cool temp” hot glue. Foil was a very moldable material for added detail but it needed to be hot glued. Some artists covered their foil with paper-mâché, while others used foil as a metal accent and left it artfully exposed.
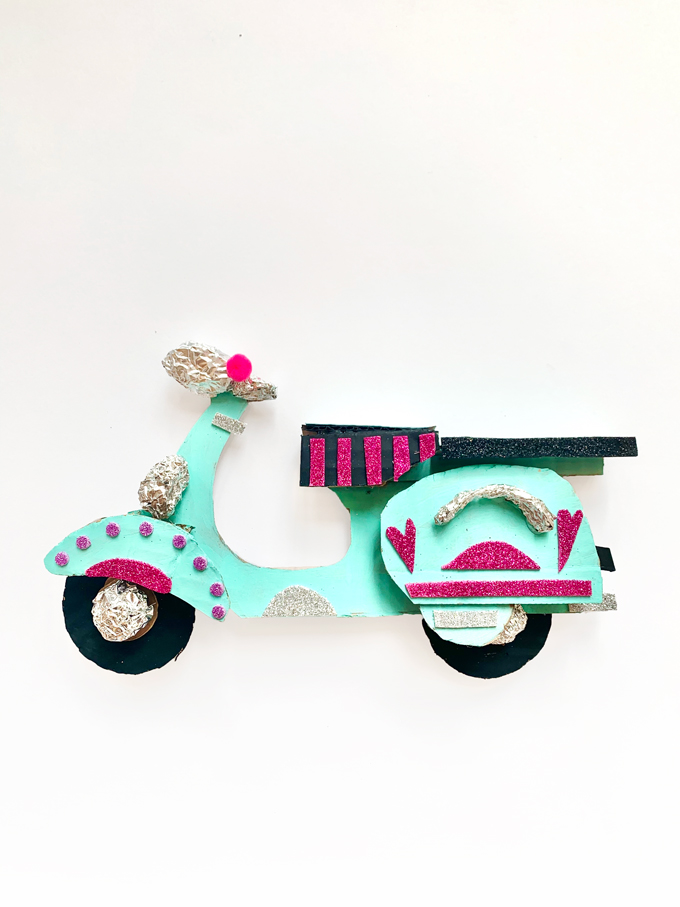
Waa-laa! Here you have a finished Vespa ready for a Venice venture. Did you know Vespa is an Italian brand of scooter? The name means wasp in Italian. The Vespa has evolved from a single model motor scooter manufactured in 1946, to a full line of scooters. To think it all started in Italy.
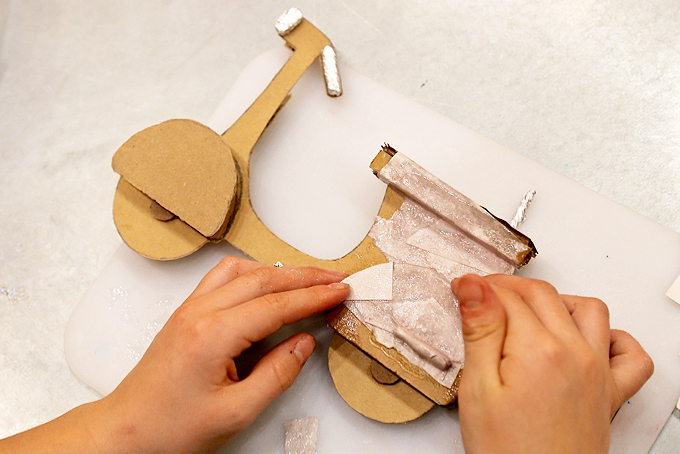
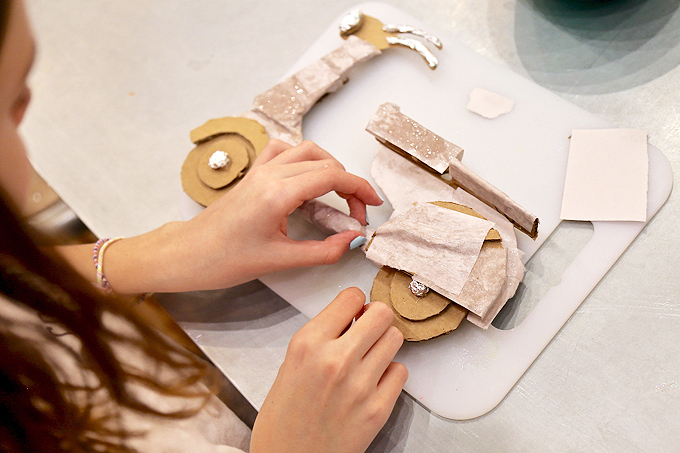
FOUR Paper-mâché is optional. Our older artists had time to add a light layer of paper-mâché. Paper-mâché creates strength and unifies but it’s an optional step if you don’t have enough time, especially since the finished Vespa will be connected to another element for added strength.
Most artists love adding a little paper-mâché to their life! Extra small pieces of newsprint enabled the contours to still show the dimension and detail. If you do mâché your Vespa, fully dry before moving onto paint.
FIVE Paint your Vespa one solid color. Dry. Then move into smaller detail painting until your heart’s content.
SIX Embellish using specialty papers, sticky foams, foil, pom poms, and more. Secure in place with glue.
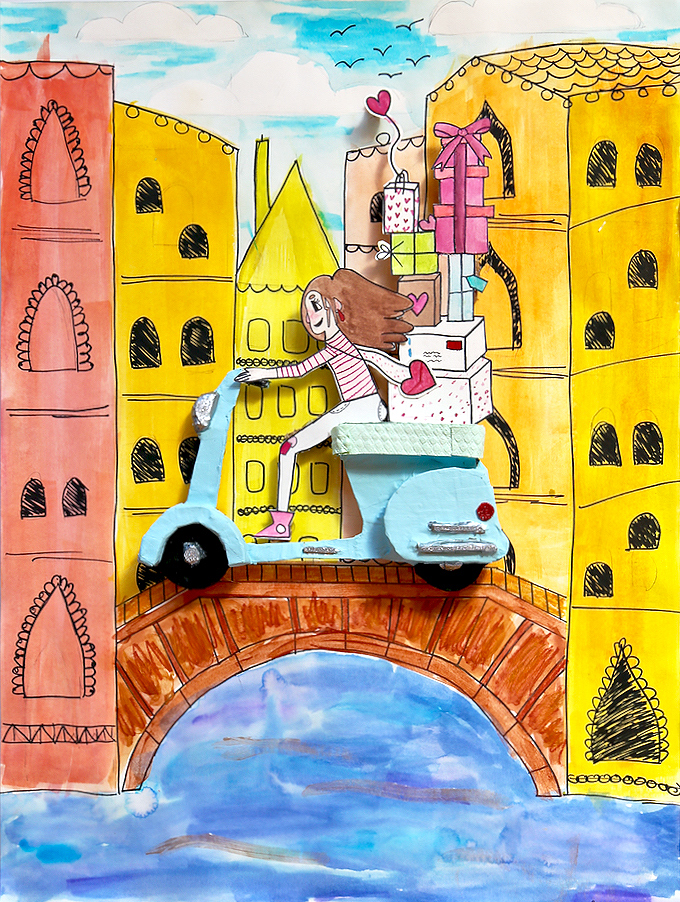
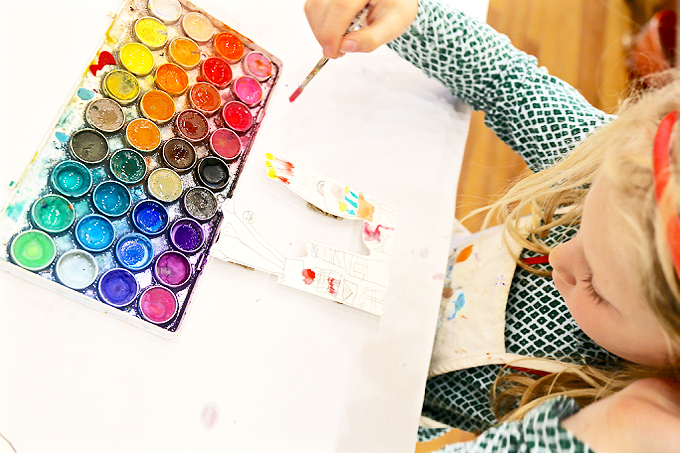
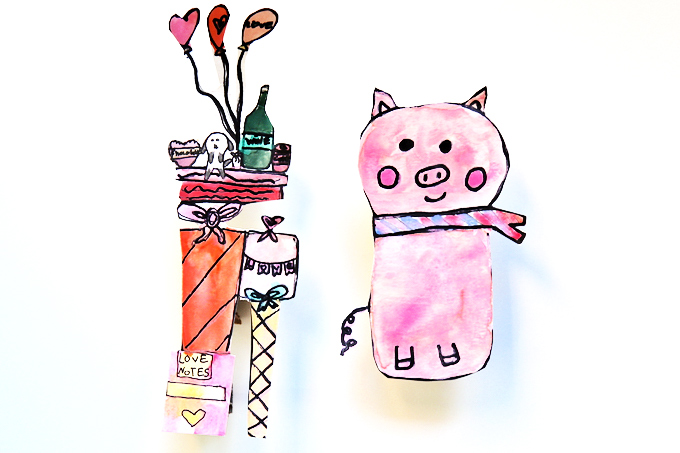
SEVEN Working on heavy-weight watercolor paper, sketch out a humanized creature with a whole lot of character to drive your Vespa (possibly a vole, pig, hedgehog, or maybe even a panda) and sketch out a stack of packages for your Vespa to transport! Define with permenent marker. Paint using watercolors or additional supplies at hand. Artists love adding watercolor pencils and watercolor crayons for artful accents. Dry pieces and cutout. Add thick cardboard pieces to the backs to pop out pieces before adding to the background element coming up next!
DRAWING + PAINTING A VENETIAN CITYSCAPE
Take a splash into creating a Venetian cityscape for your Vespa!
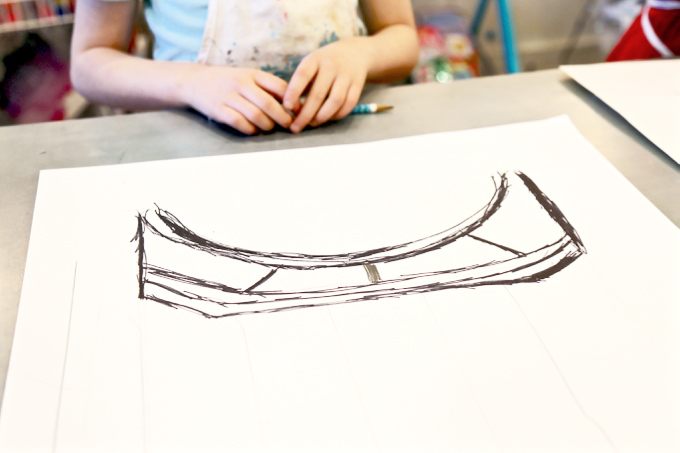
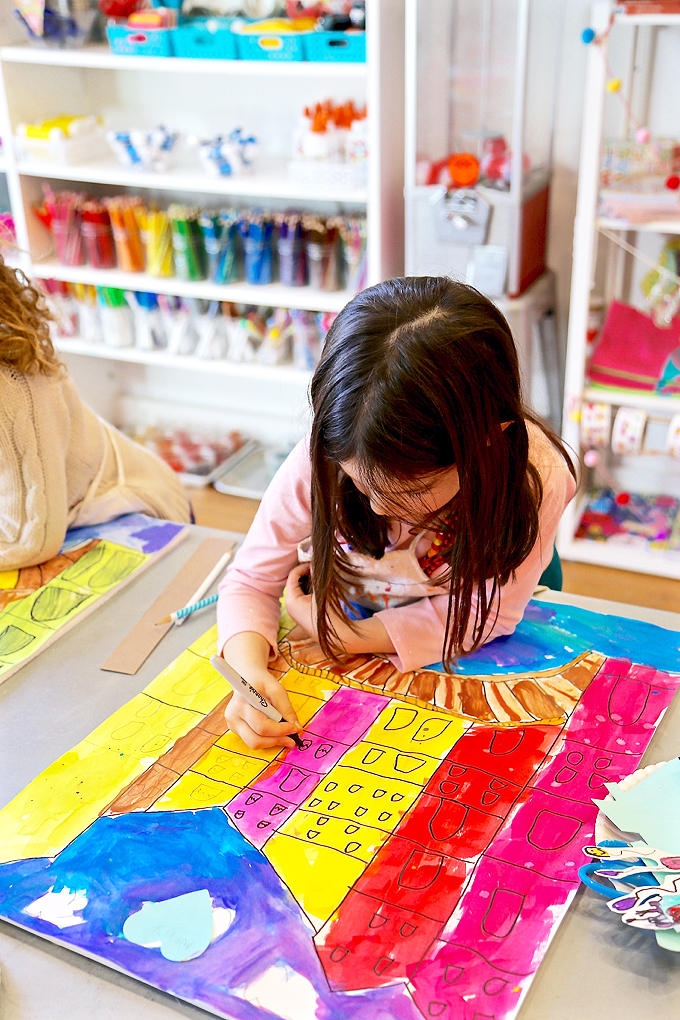
ONE Working on 18 x 24″ heavy-weight watercolor paper, we created a simple stencil for the center bridge placement to give young artists a starting point which had the curve line bottom, top line, and both side-lines, similar to the image above but less detailed. From this point, artists individualized their bridges by incorporating additional curves, lines, and details. The bridge, above the canal waterway, was then painted using a warm “golden pallet” of warm liquid watercolors.
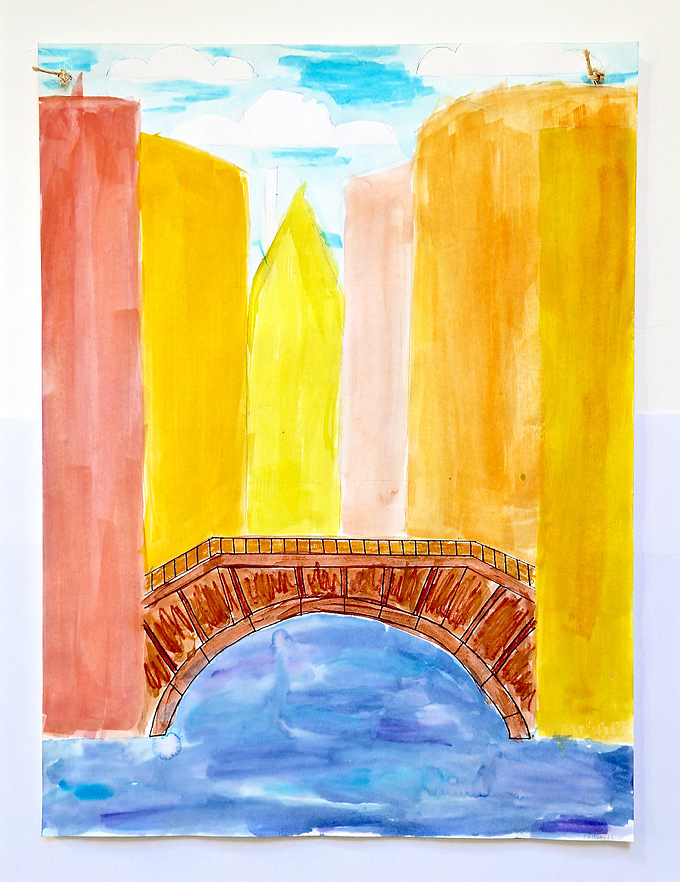
TWO Create buildings using vertical lines with a ruler or yardstick. It seemed best to have 6 – 7 buildings. We discussed how building further away will appear smaller. We also discussed how the buildings were in the distance and how they could appear more “washed or sketch-like or loose” as this wasn’t the most important detail to this piece. Buildings were painted using a wash of warm watercolors.
THREE Move into painting the waterway, aka the canal, using cool watercolors for a colorful contast. We used a combination of traditional pallet watercolors and liquid watercolors. Travel up to painting your sky using cool colors which may entail clouds. Explore a variety of wet on wet techniques and washes. Dry.
FOUR Use a pencil to create the horizontal “3 – 4 levels or stories” on each building and add windows. Look at windows on old Venetian buildings and how they’re different than windows on skyscrapers of today. Compare architecture of today to historic architecture in Venice.
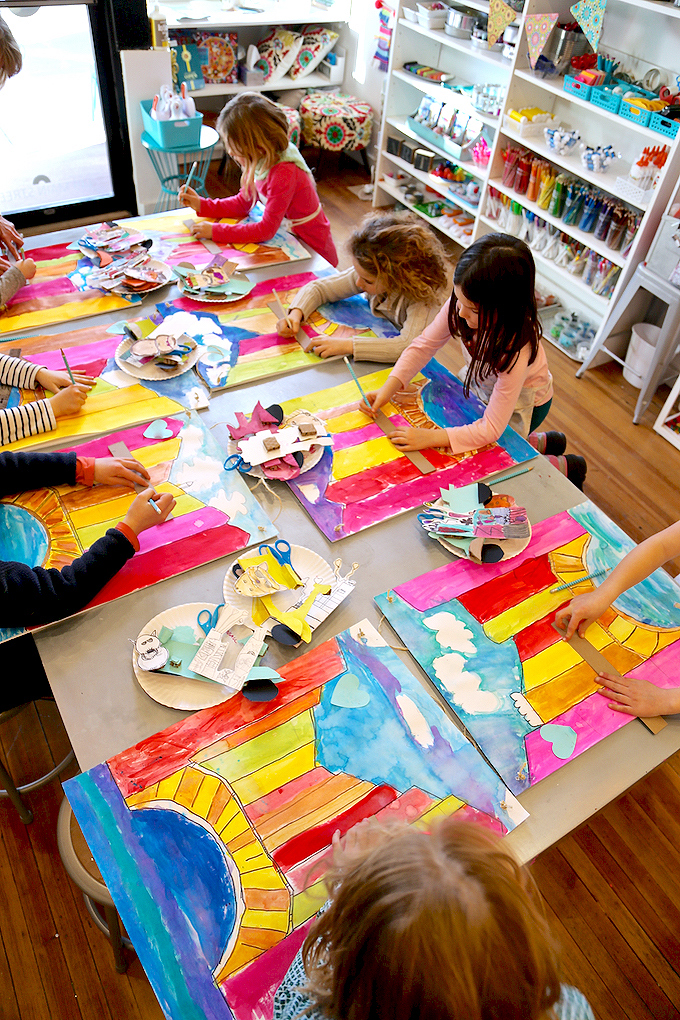
A bird’s eye view of painted pieces just before windows were added.
FIVE Use a black permanent marker to finalize windows and additional details. Most artists colored their windows in black to create a pop of color and contrast.
Love the additional waterlines-n-waves + bridge detail this artist added to her piece to personalize using a permanent marker!
SIX Assemble your entire piece and glue down all the clever + creative + crafty components which include a Vespa, creature aka driver, and packages all on top of your bridge above the lovely canal in Venice. Learn about the love lock tradition and add a mini metal lock to the bridge and toss keys into the canal to celebrate the completion of your colorful creation!
Take an upclose peek at all the clever additions on this piece.
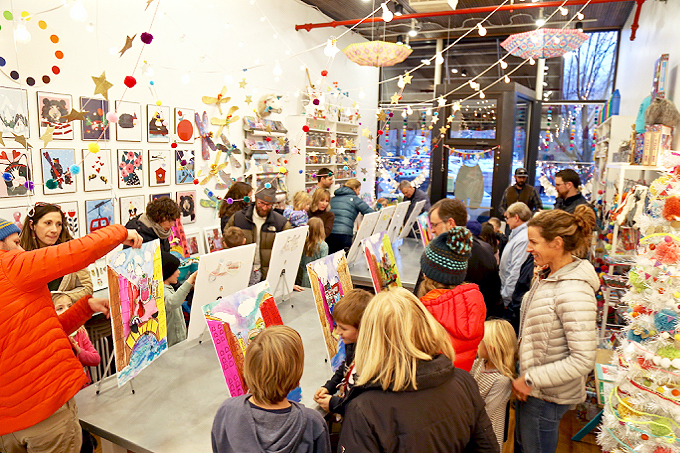
Celebrate childhood + creativity + coming together as a community before taking a trip to Venice inspired by your very own clever creation!
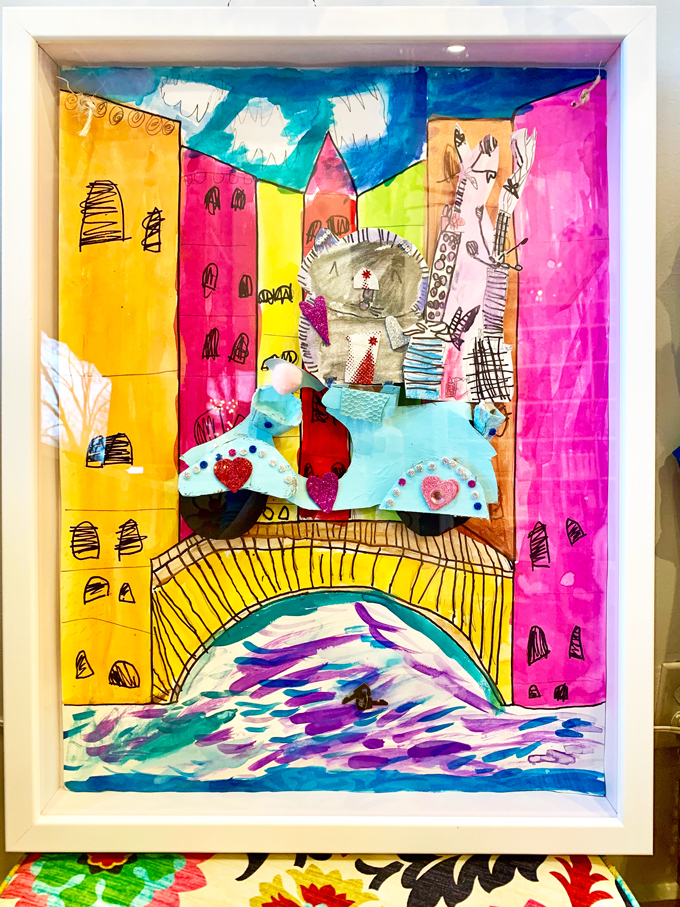
Absolutely love this precious piece that was created by one of our youngest artists and immediately framed by her lovely mama in a sweet shadowbox for showcase, sweetness, and safekeeping!
This is my current scooter of travel, but you’ll be the first to know if I take the leap to get my very own Vespa for vrooming & venturing the downtown streets of our little mountain town of Carbondale, Colorado!
Tag us on Instagram with your creations. We’d absolutely LOVE to see them! As always, thank you for following our artful adventure on Main Street in the heART of the Carbondale Creative District! Send us a note anytime! We’d love to hear what you’re thinking, dreaming, envisioning, and of course, our favorite ~ CREATING!
Much love and happiness creating in this creative + colorful world filled with collaboration + connection + community + arts & crafting! Happy Springtime from our studio!
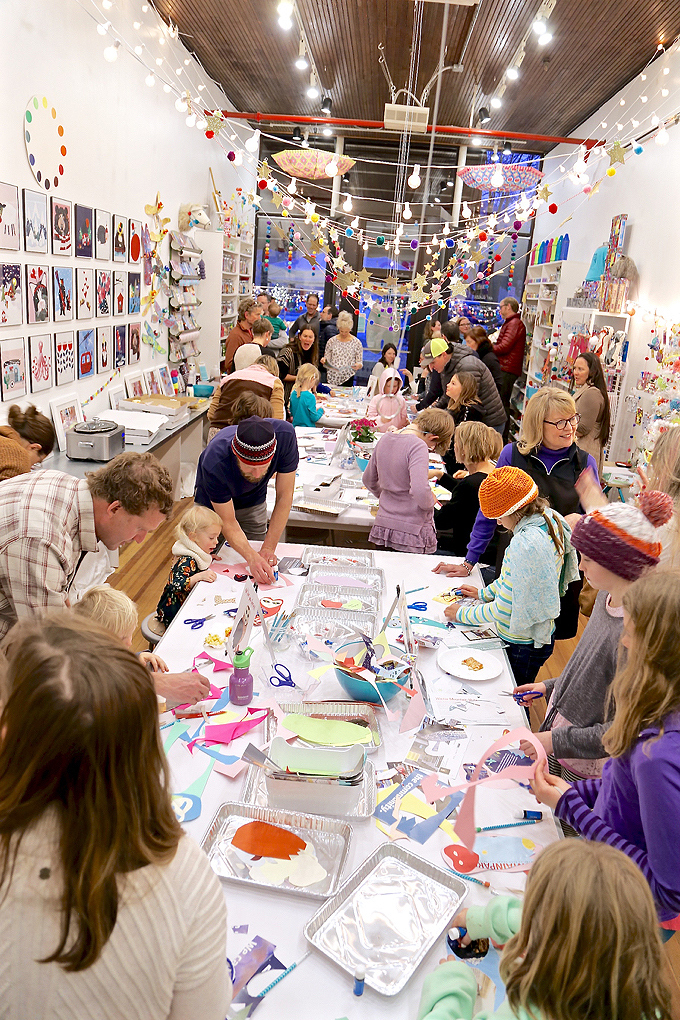
See PHOTOS of this full + festive + fun + feathery + flavorful + flock of friends at FIRST FRIDAY ~ February in the heart of the Carbondale Creative District for a MOUNTAIN PARENT MAGAZINE Reader Appreciation Party in our traditional MAKE & CREATE + 30 Drawings with guest artist ~ LILYBART!
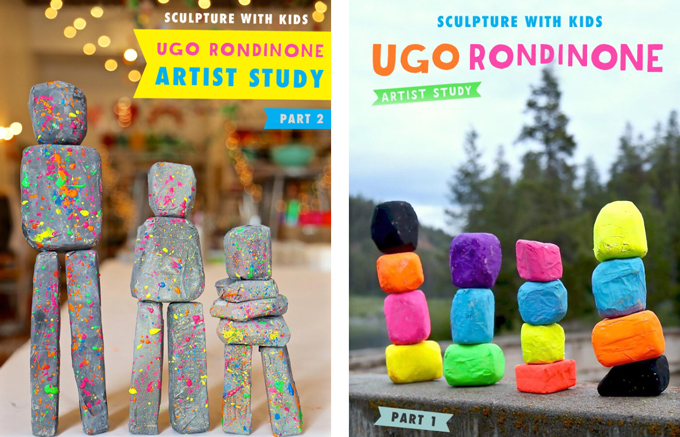
Sculpture with Kids ~ Ugo Rondinone Artist Study (Part One and Part 2) on Art Bar Blog! Discover how we used magnets for these mini monuments with kids!
BOOK A CUSTOM + CREATIVE CELEBRATION:
No date is too early to BOOK a custom + creative + childhood celebration on our Events Calendar!
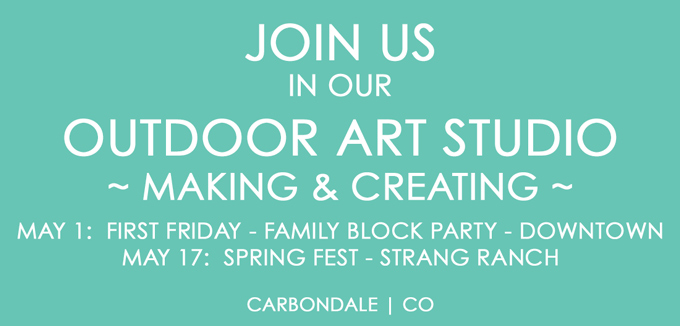
SAVE THE DATE ~ FIRST FRIDAY MAY:
Be sure to pencil in the annual FAMILY BLOCK PARTY in downtown Carbondale | Colorado as we’ll be there creating in our outdoor art studio!
Follow our blog for more inspiring process-based art projects! As always, thank you for following our artful adventure on Main Street in the heART of the Carbondale Creative District! Send us a note anytime! We’d love to hear what you’re thinking, dreaming, envisioning, crafting, creating, and celebrating! Much love and happiness in this creative + colorful world, filled with collaboration + connection + community + arts & crafting!
Tag us and say hello @handmakery Instagram with your colorful creations, celebrations, and shares!
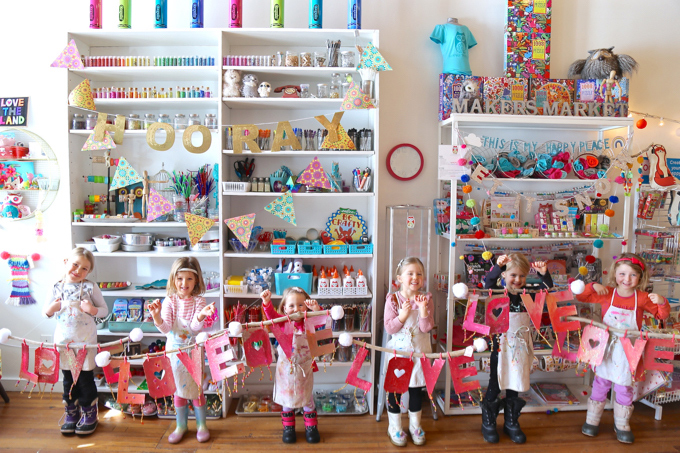
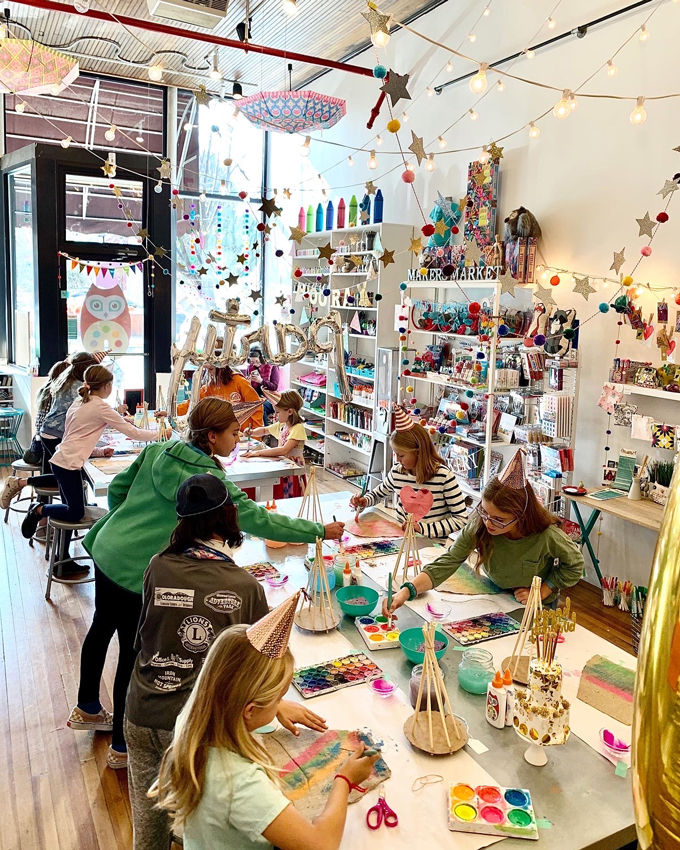
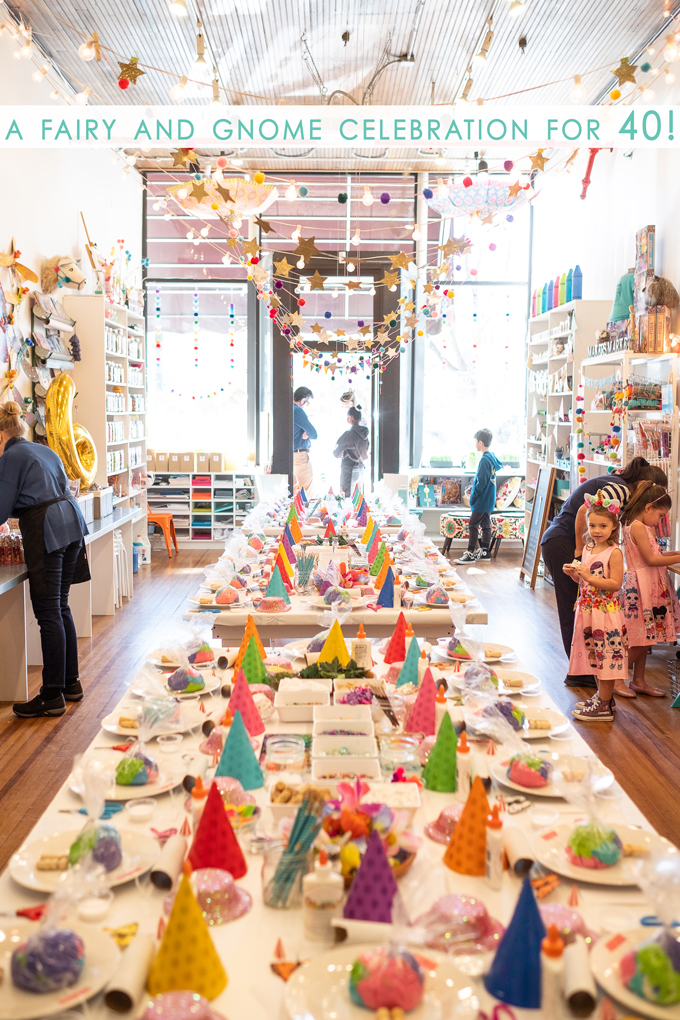
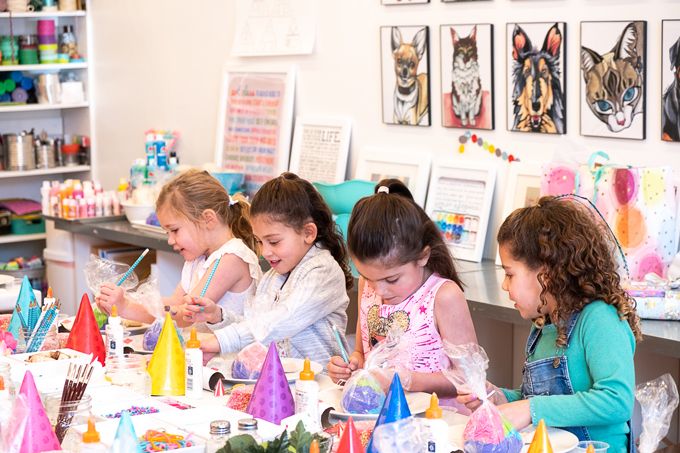
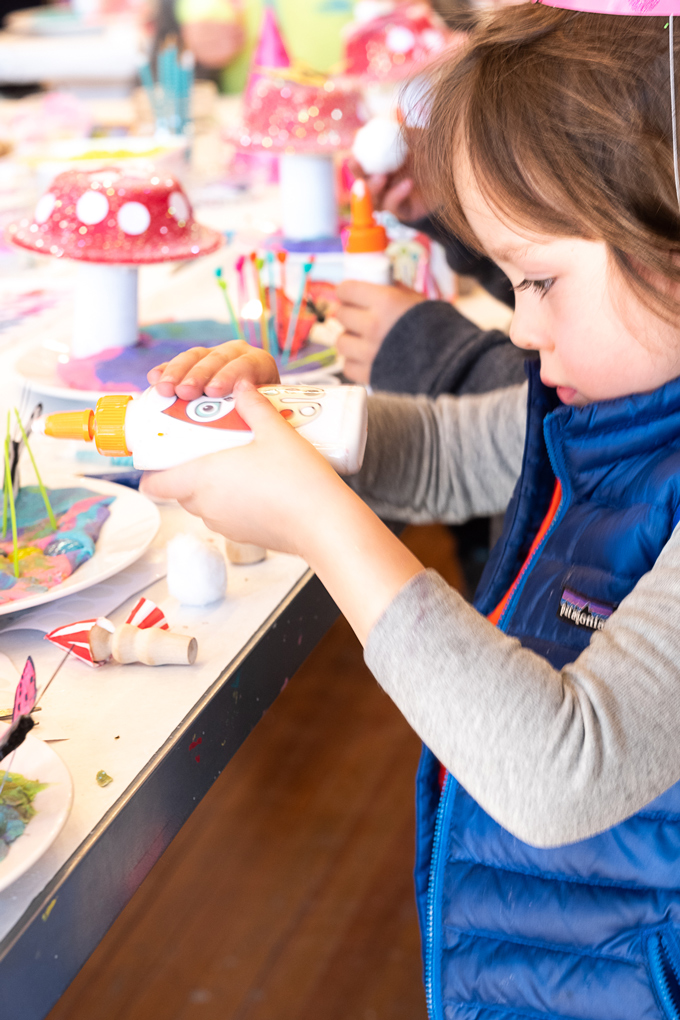
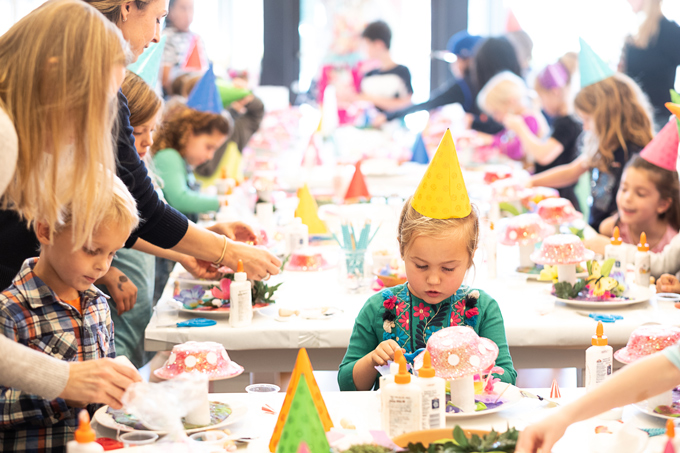
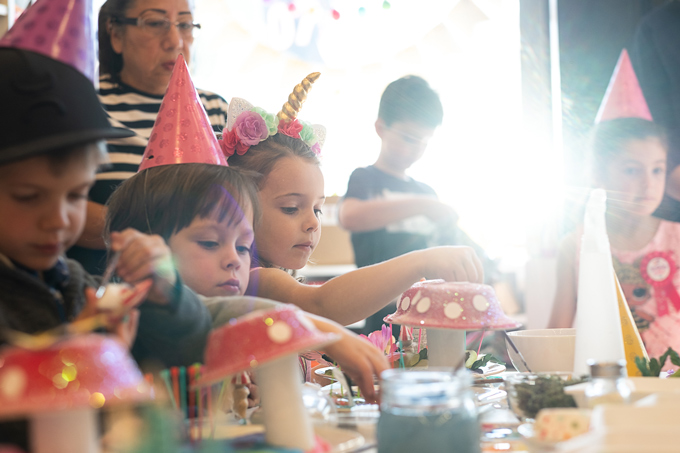
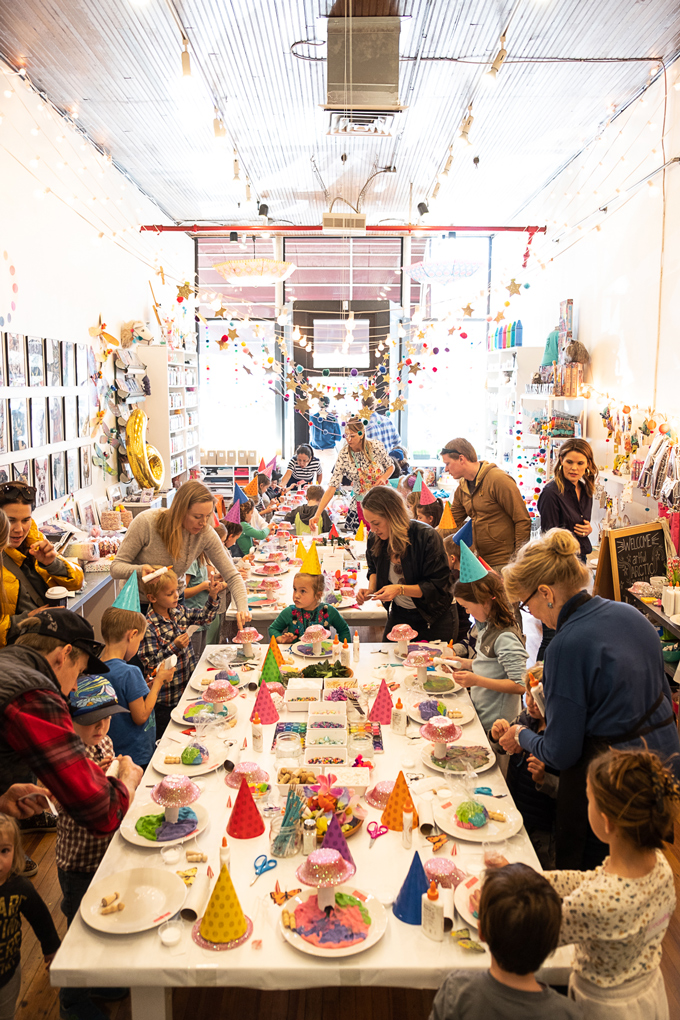
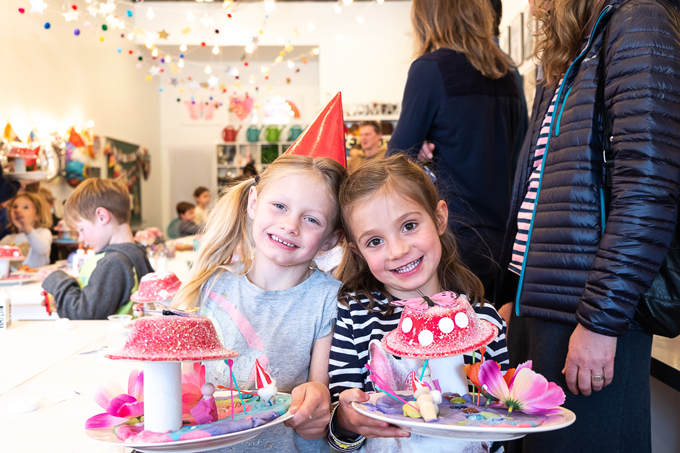
We recently hosted a magical + maker birthday celebration with 40 little artists in our children’s art studio! A Fairy & Gnome Enchanted Land Celebration for a sweet lil‘ one turning SIX! Definitely the largest celebration to walk though our Main Street door in the heart of the Carbondale Creative District. Take a peek inside this precious party with a plethora of lil‘ people! Indeed our studio felt cozy but also so crafty and creative as it completely captured childhood!
Knowing our hands would be festively full, we reached out to our good friend and photographer ~ Hilary Brock to capture this colorful celebration and oh my how she captured all the delightful details of this dreamy day on camera! Hilary, thank you for working your photography magic, you’re so talented!
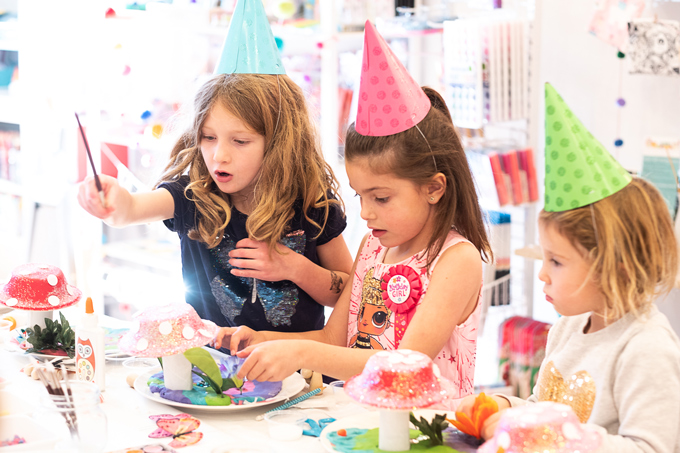
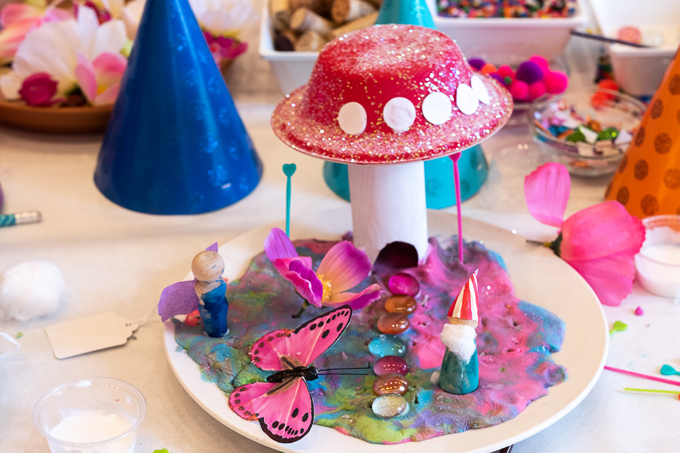
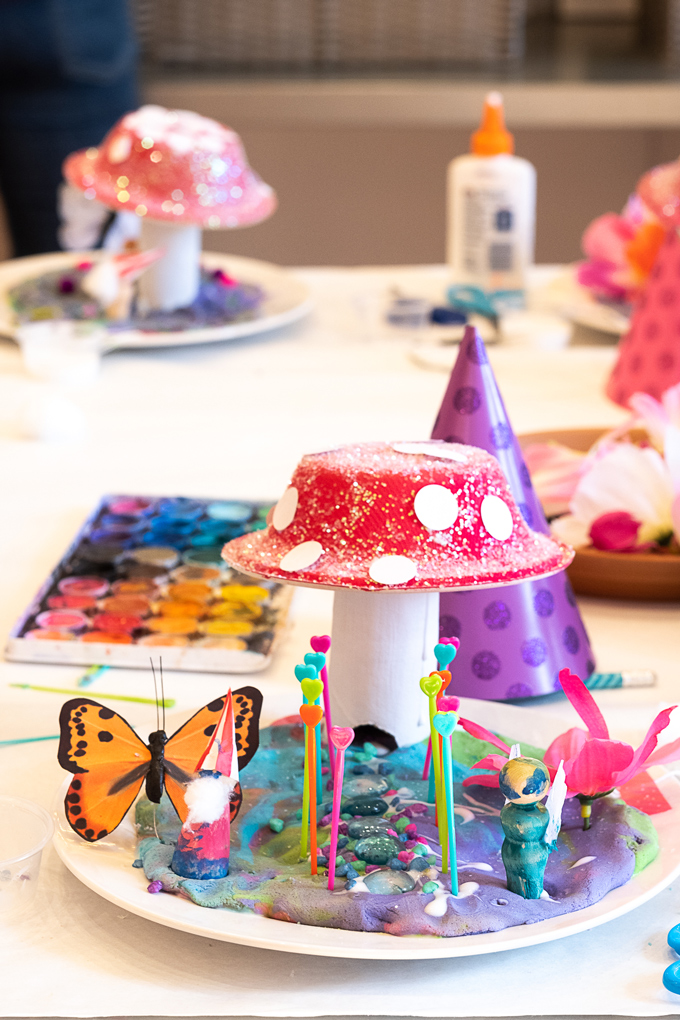
For this creative childhood celebration, we took insightful inspiration from our awesome artist friend and LA studio owner, Meri Cherry and her ~ Fairy Gardens for Kids. Meri always makes miracles happen with mini makers. Meri gave us complete creative confidence for this celebration, connecting and chatting through Instagram. With a few artful additions, a mushroom masterpiece and wondrous whimsical treasures, this process made all makers feel creatively confident and gave them time to connect and cheerfully chat as they celebrated!
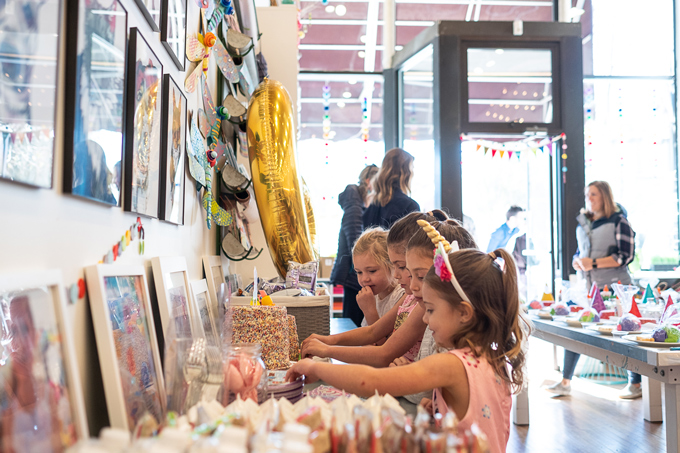
Giggling guests arriving and picking out their creative spaces.
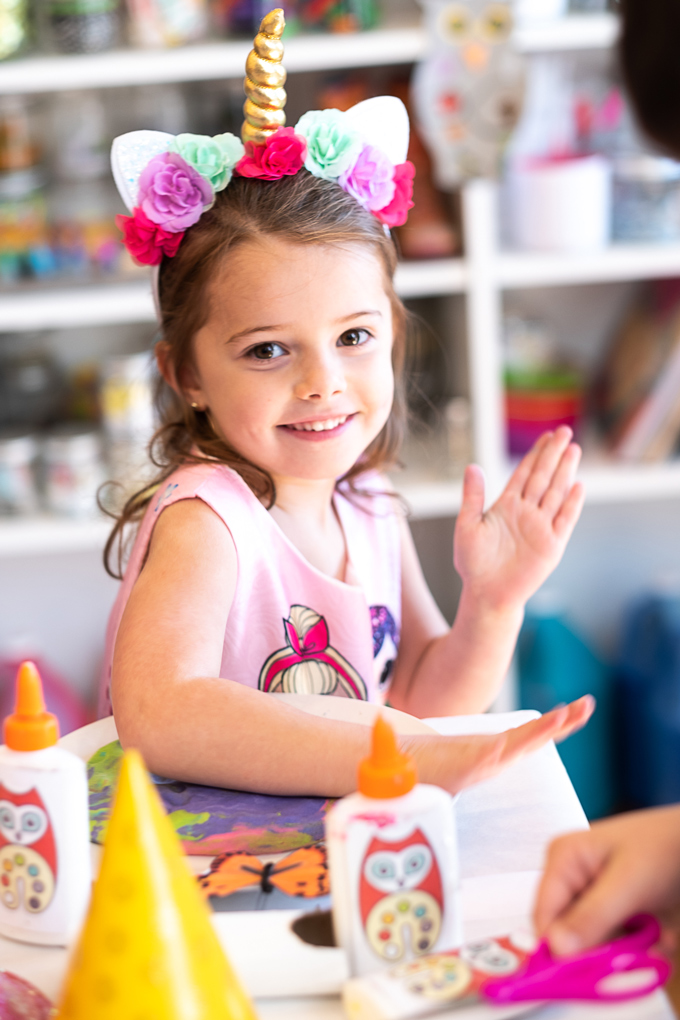
A little one caught in the magic of mixing in the morning light.
The studio starting to fill as guests began artfully arriving.
The birthday girl getting the process started with a smile in Sunday’s sunshine.
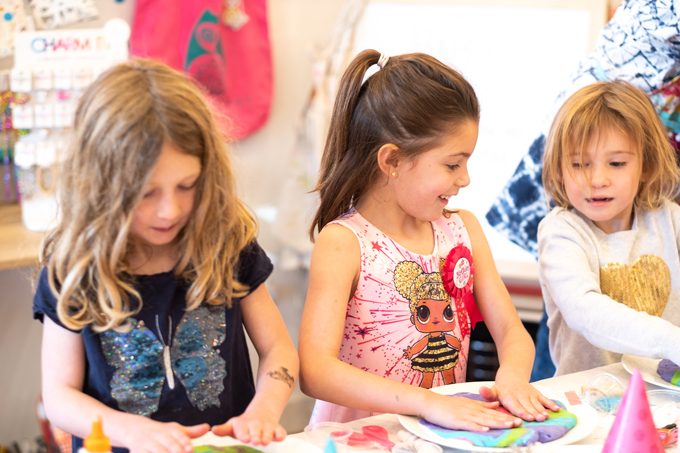
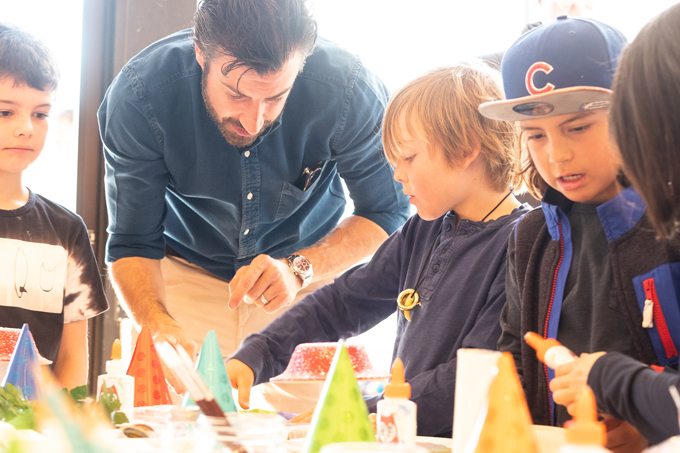
All hands were on deck, both big and small.
Birthday wishes were sparkling and seen inside the soul to later be shared in a birthday song.
The mix of ages made this creative event completely captivating.
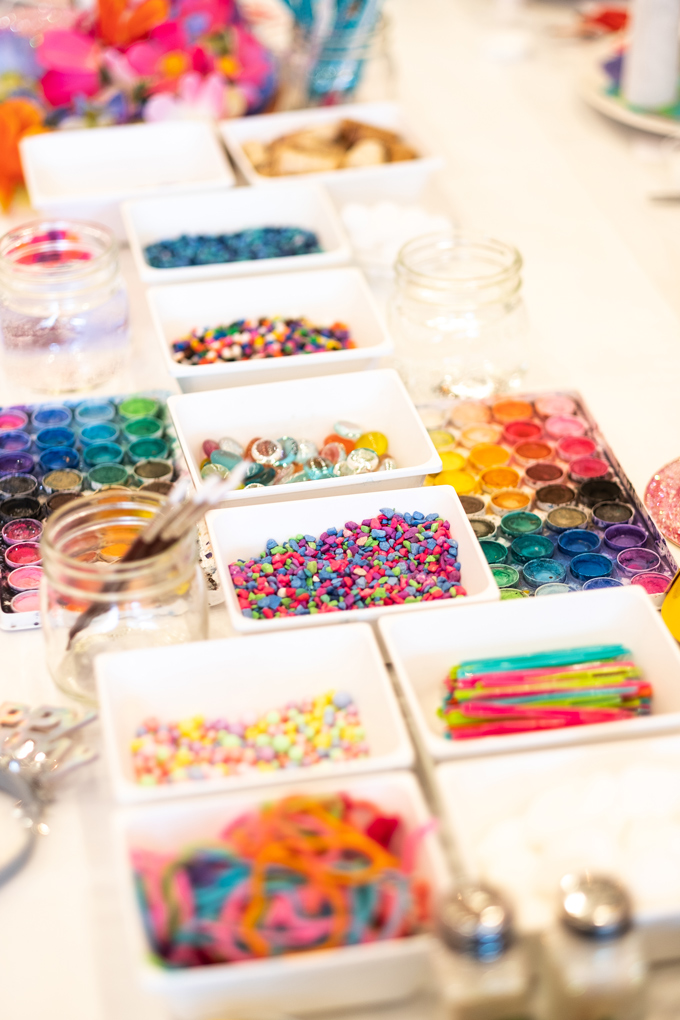
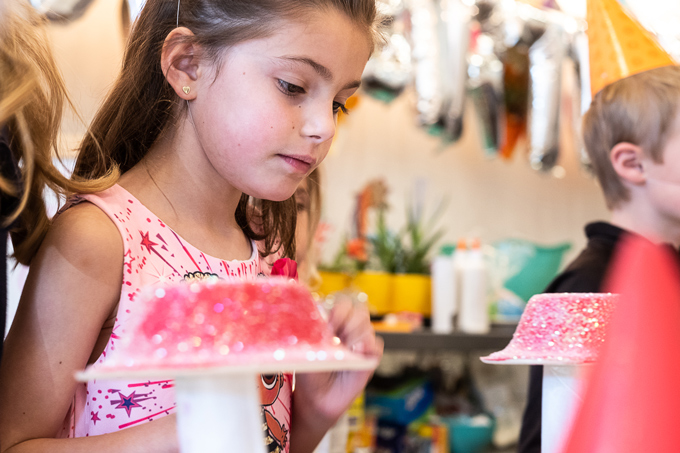
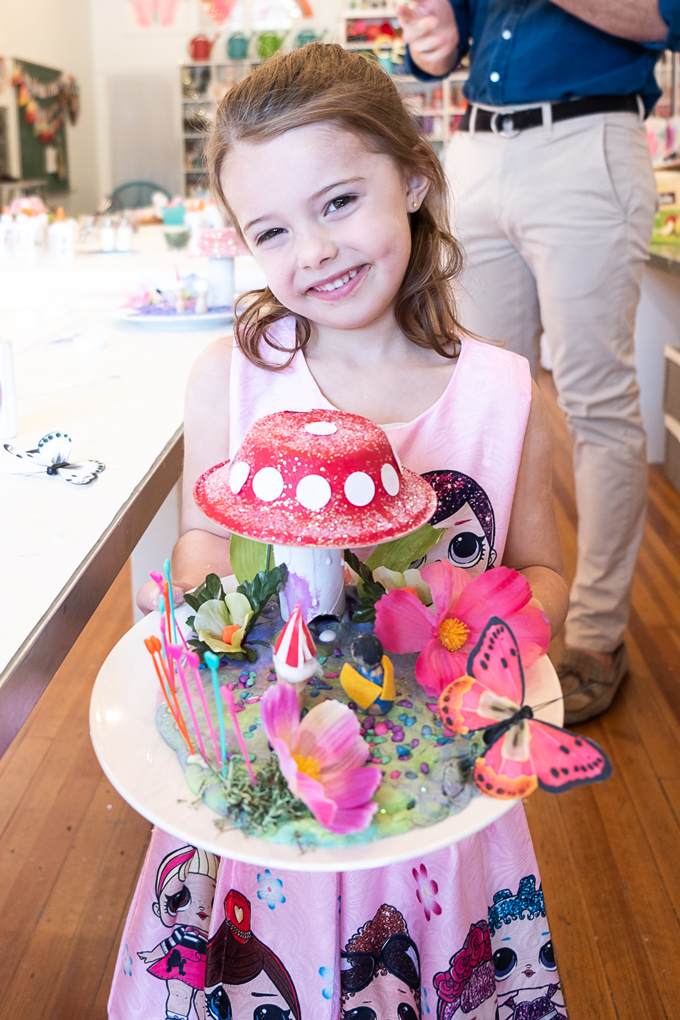
Selecting artful treasures was a happy highlight as each proud artist personalized their piece.
The morning light seemed to sparkle, shine, and create its own song & dance surrounding the marvelous mini makers.
Fairies and gnomes seemed to become artfully alive, appearing around the tables.
A maker and her sweet mama caught in a magical moment.
The whole family jumped into the artful action of this creative + crafting + community celebration in downtown Carbondale|CO!
A photo precisely about the pieces on point to protect the enchanted land.
Fairies lit up with sparkle-n-shine as they flew above the tables, taking in all the magic of the makers caught in the moment.
Creative, cozy, childhood, celebration, crafting, community, chaos, captures, collaboration, connection, Carbondale Creative District, children, and coming together in colorful Colorado with cheer!
It’s all about the process, the details, the experience, and the memories that will forever stay in the mind and heart of the makers.
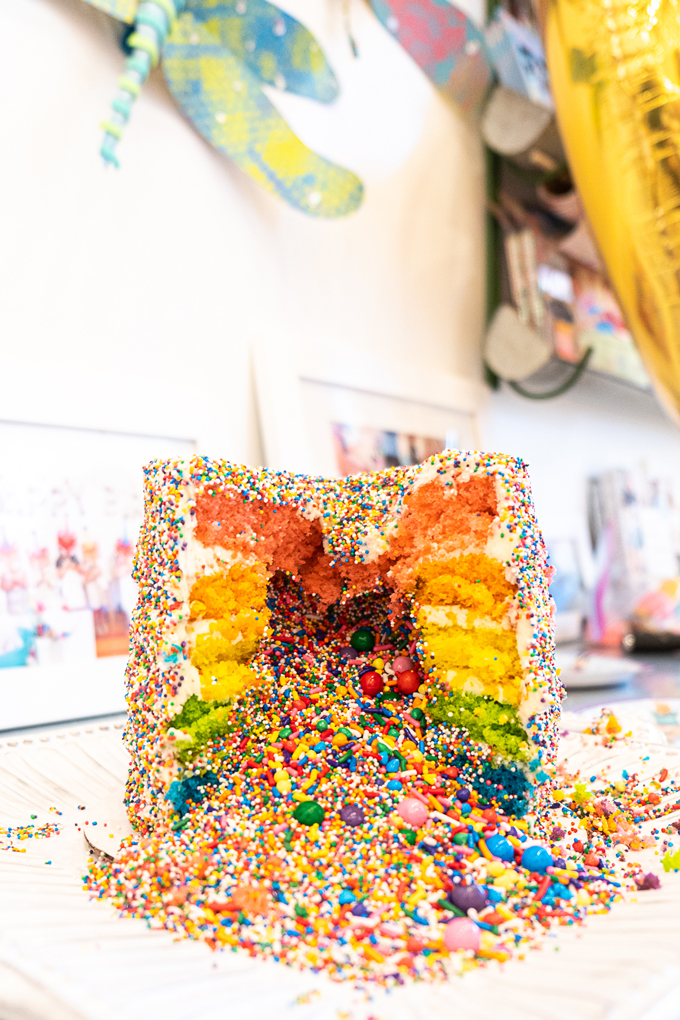
A delightful-n-dreamy rainbow cake baked by the birthday family, both bright and brilliant.
Sweetness + smiles + stargazing + sunlight on a super Sunday in the studio.
A closeup capture of a mushroom masterpiece including both fairy & gnome, a beautiful butterfly taking flight, a pathway on point, and an enchanted land all handcrafted by a clever child.
Tag us @handmakery with your colorful creations and celebrations on Instagram!
Follow our blog for more inspiring process-based art projects! As always, thank you for following our artful adventure on Main Street in the heART of the Carbondale Creative District! Send us a note anytime! We’d love to hear what you’re thinking, dreaming, envisioning, crafting, creating, and celebrating! Much love and happiness in this creative + colorful world, filled with collaboration + connection + community + arts & crafting!
Happy forever fall! October days in Colorado have been most beautiful, filled with sweet sunshine and warm weather! Our studio just wrapped up our first six weeks of a fresh + new school year and we’re excited to announce SESSION II STARTS THIS WEEK! We have just a few spaces in our art workshops offered on Tuesdays, Wednesdays, or Thursdays! Jump in and join us if you’re in the Roaring Fork Valley!
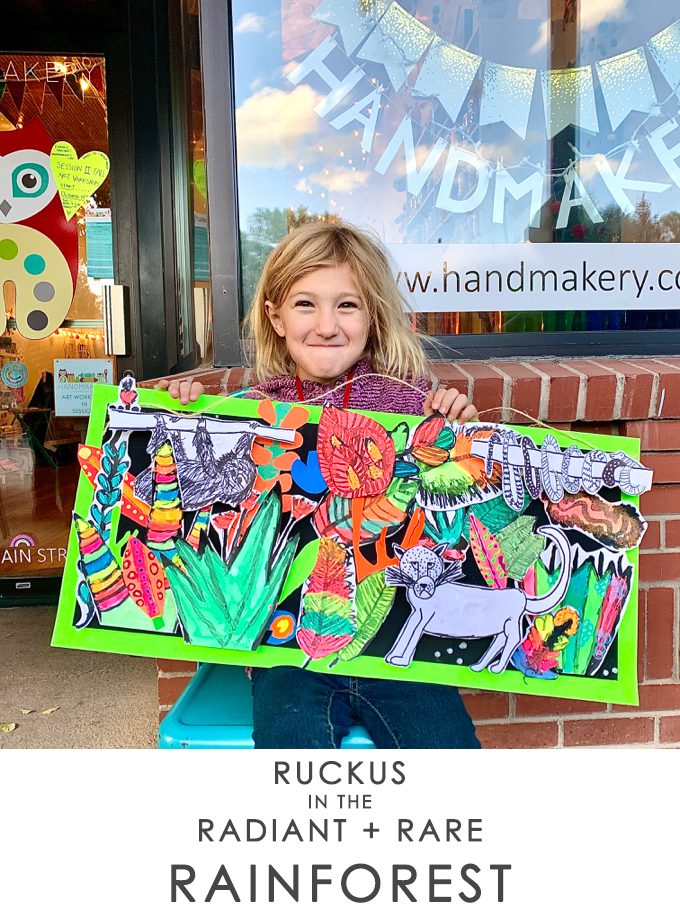
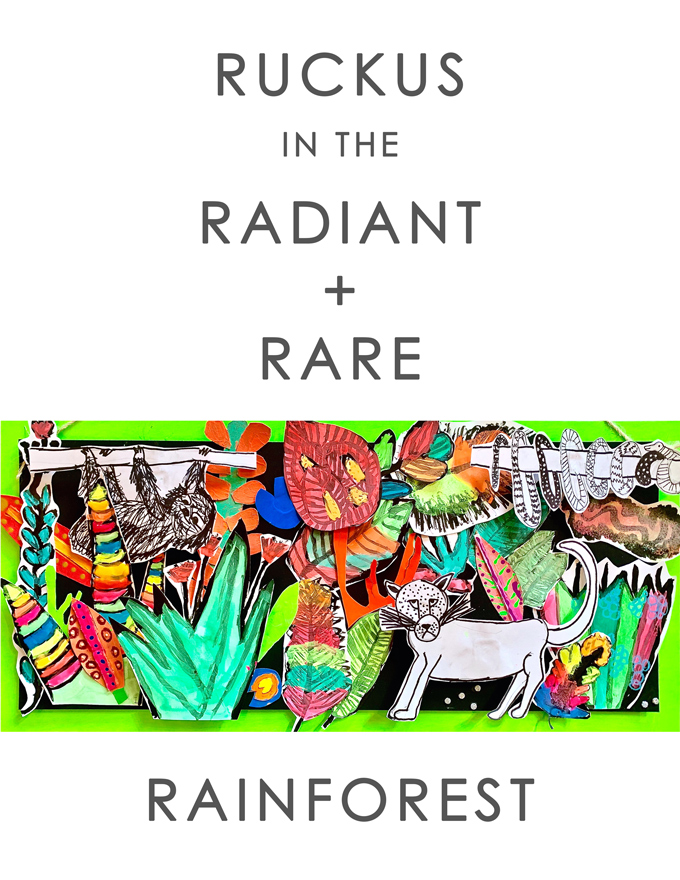
We’d love for you to peek at the most recent project dreamed up + designed + created by creative children in our workshop ~ Ruckus in the Radiant + Rare Rainforest! You might just be inspired to make your own! Tag your creations @handmakery on Instagram!
SUPPLIES FOR ~ RUCKS IN THE RADIANT + RARE RAINFOREST:
A SIMPLE PROCESS FOR ~ RUCKS IN THE RADIANT + RARE RAINFOREST:
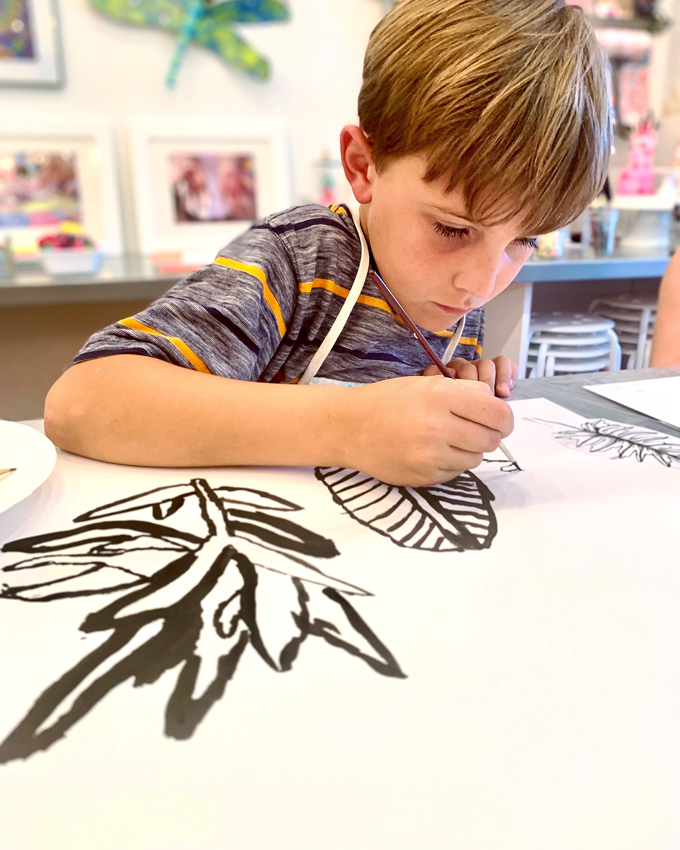
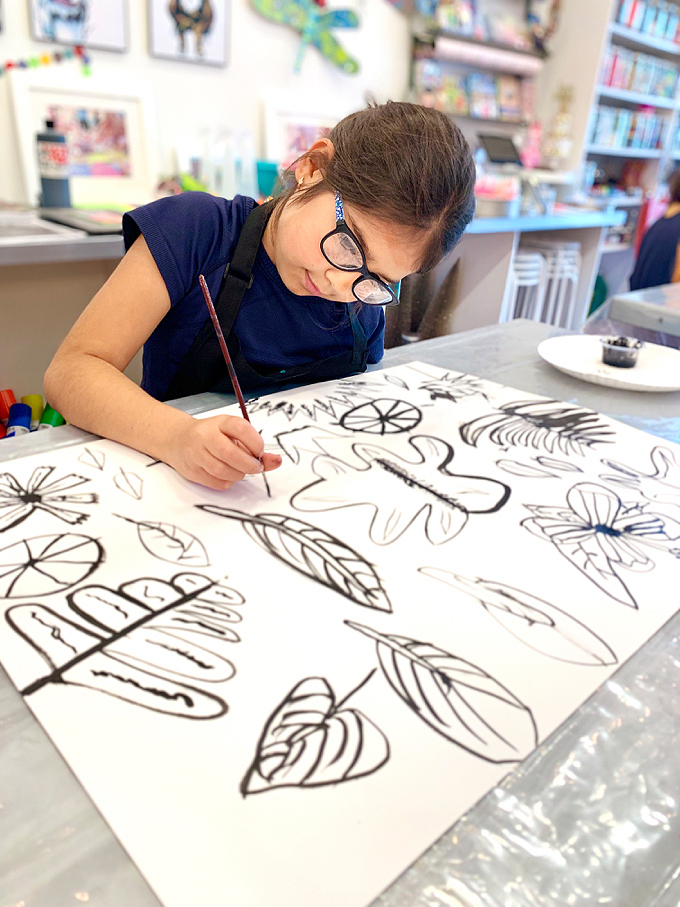
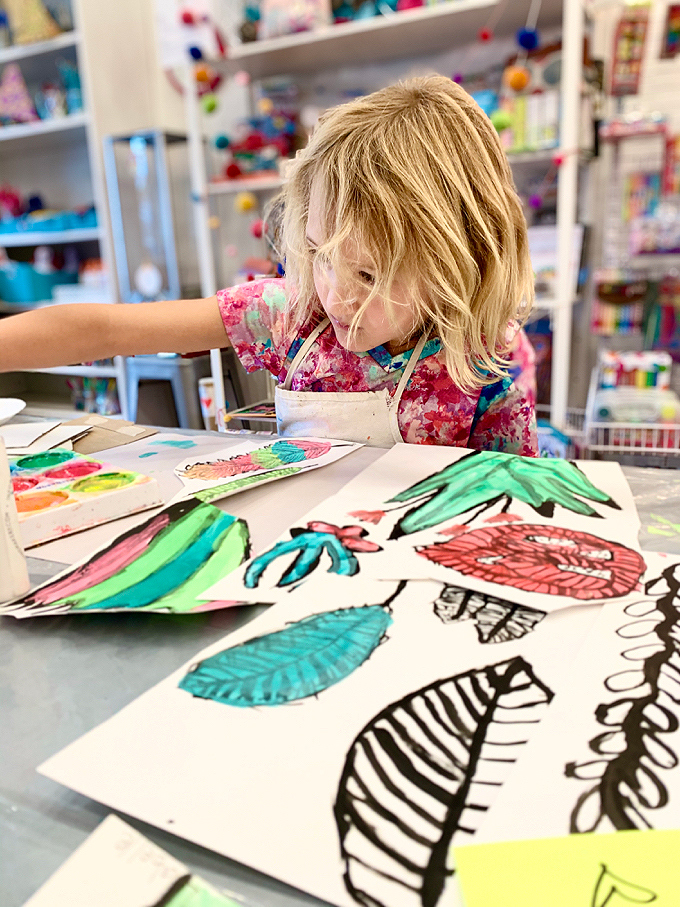
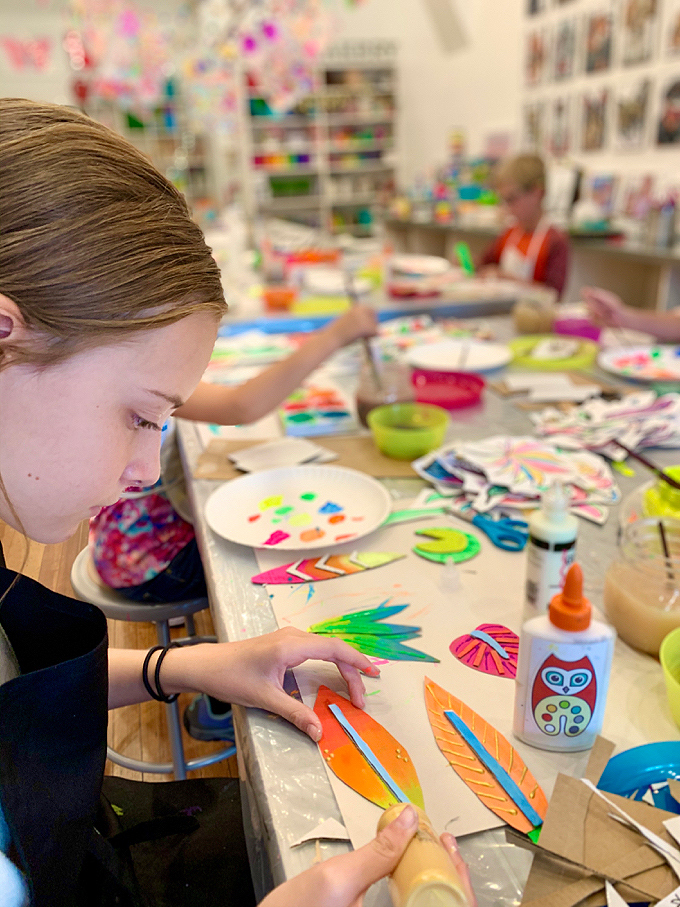
ONE Read The Great Kapok Tree: A Tale of the Amazon Rain Forest as a fantastic introduction to rainforests. Get inspired using simple black & white imagery for discovery, inspiration, and reference. Imagery may include rainforest plants, flowers, leaves, and trees. Use a thin brush and black India ink to “draw” on a large scale, filling a large paper with a variety of observed + organic habitat. Illustrations should remain separate so they can eventually be cut apart. Dry.
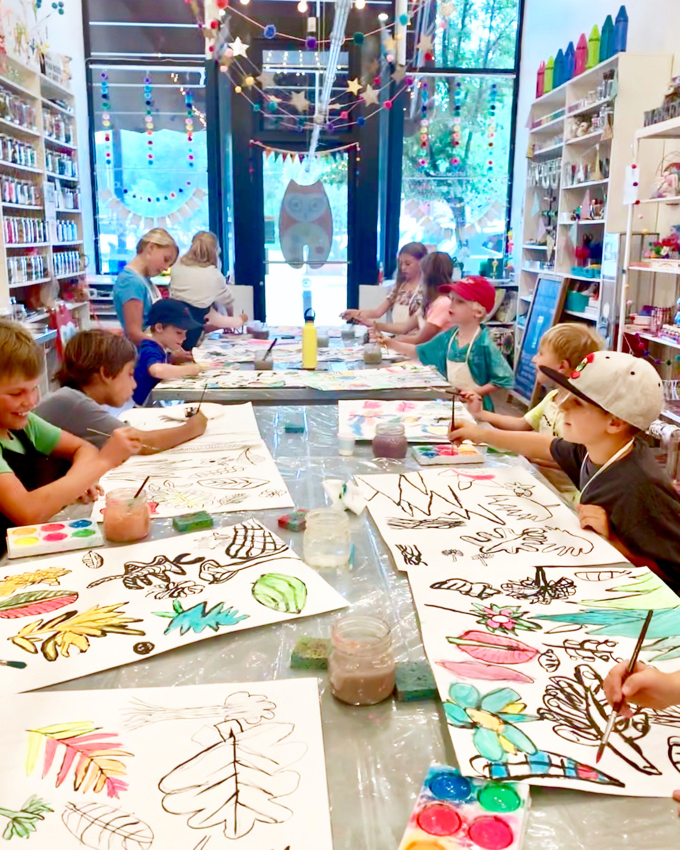
TWO Using tempera cake paints in neons and fluorescents to bring color into the rainforest habitat. This semi-transparent paint will allow the black lines to still shine through. Dry. Cut plantlife apart, leaving the exterior black line.
Early online enrollment at HANDMAKERY is highly encouraged as seating is limited! Start making + creating + connecting in a colorful community focused on a creative + collaborative childhood!
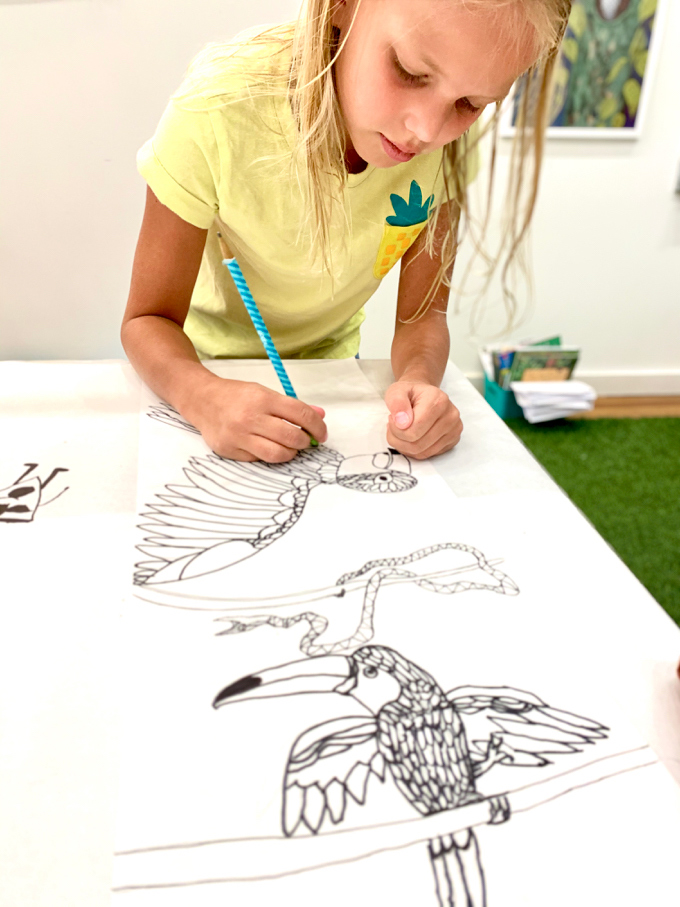
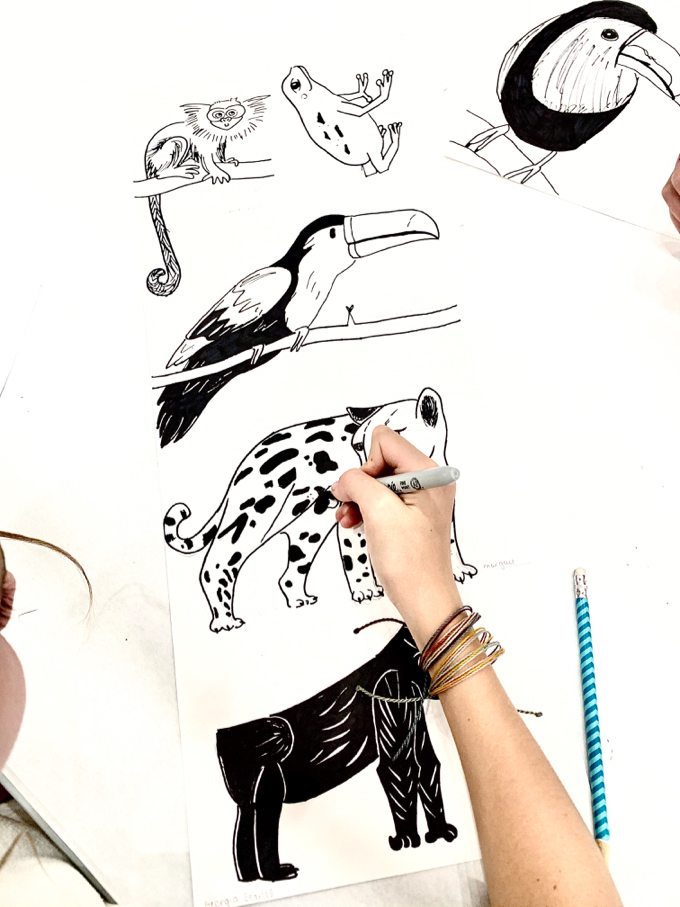
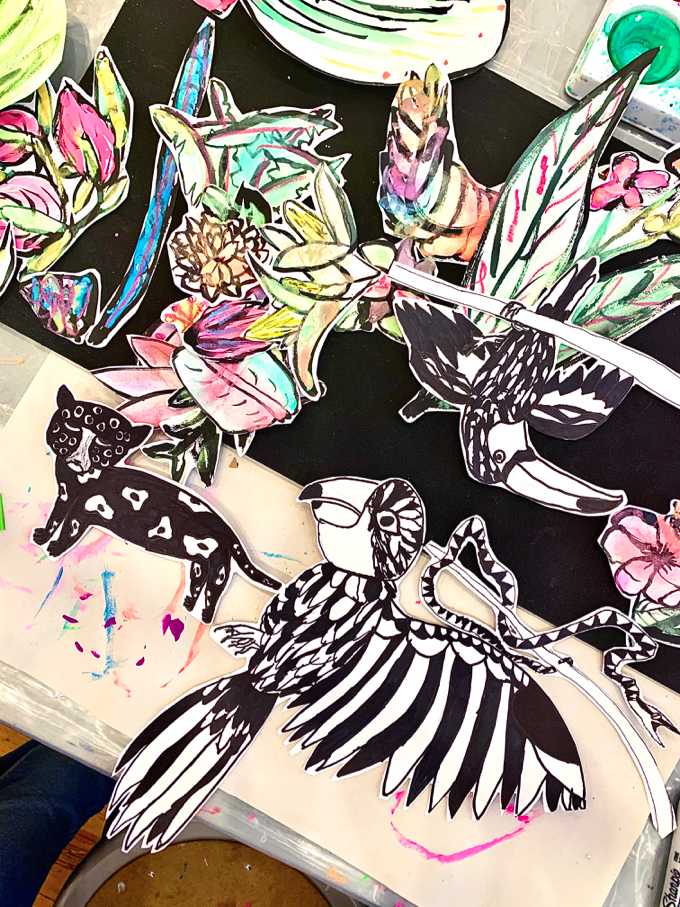
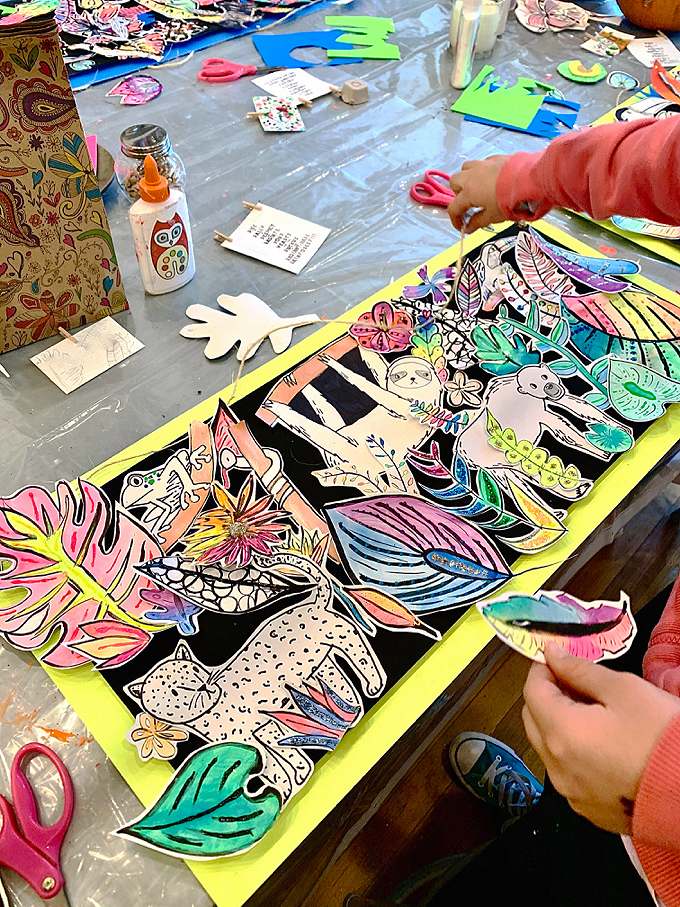
THREE Use pencil to lightly sketch rainforest creatures. Start with simple shapes like circles and ovals, eventually moving to smaller shapes and detail. Use simple black & white imagery for animal inspiration. Move to a permanent black marker to outline, detail, texture, and to bold each creature. Cut out each animal with scissors keeping the exterior black line. We did most of the cutting so young artists would have more time drawing and painting.
Each artist selected their own creature combinations to incorporate into their rainforest. Creatures included poison dart frogs, snakes, exotic birds, sloths, leopards, monkeys, and more! It was exciting to see the different combinations of animals each artist selected to personalize their piece.
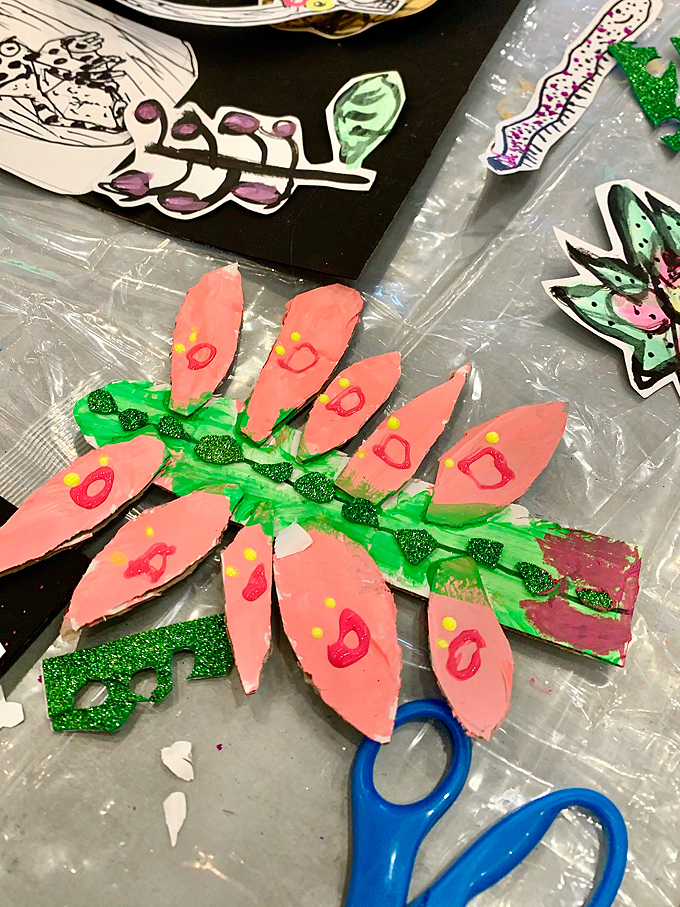
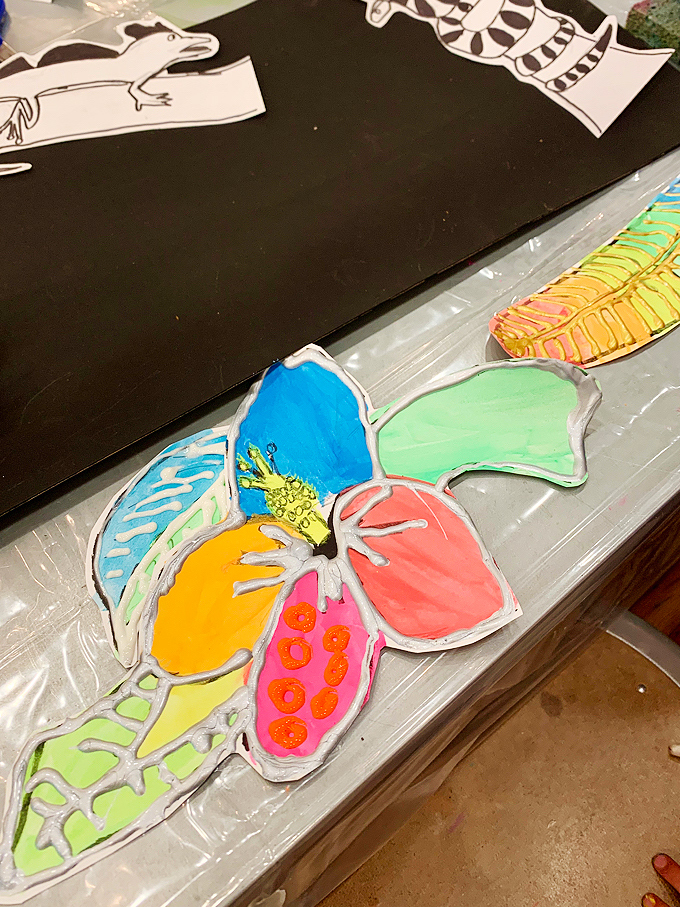
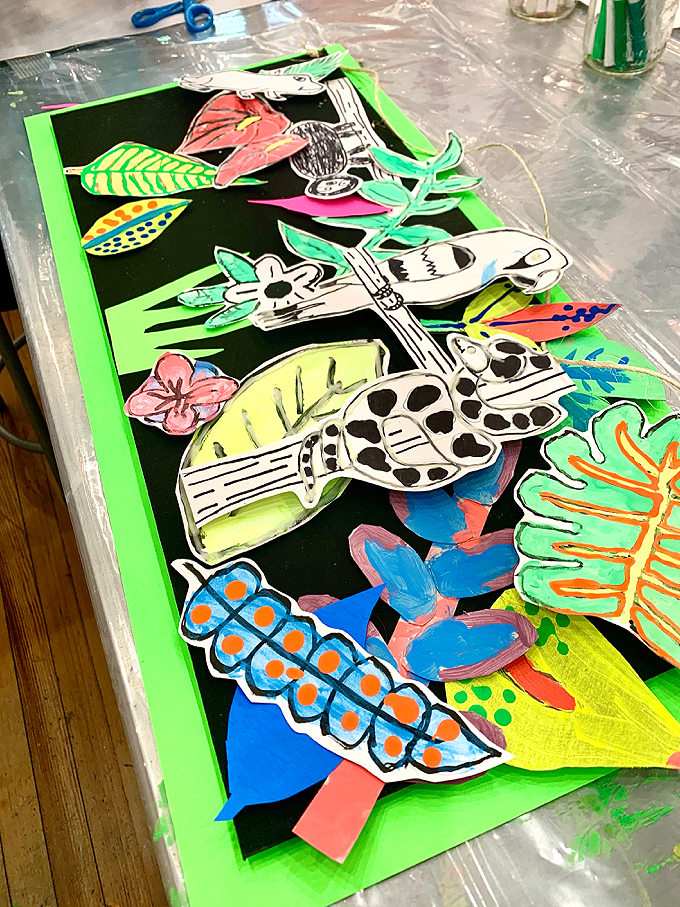
FOUR Explore lightweight cardboard and white glue construction for additional plantlife popouts and to add additional dimension. Paint cardboard pieces using solid body tempera paints in neons and accent with tempera paint pens.
Detail dry painted cardboard pieces with glitter sticky foam or smaller mixed-media components such as pom poms, circle stickers, buttons, oil pastels, washi tapes, patterned papers, and more.
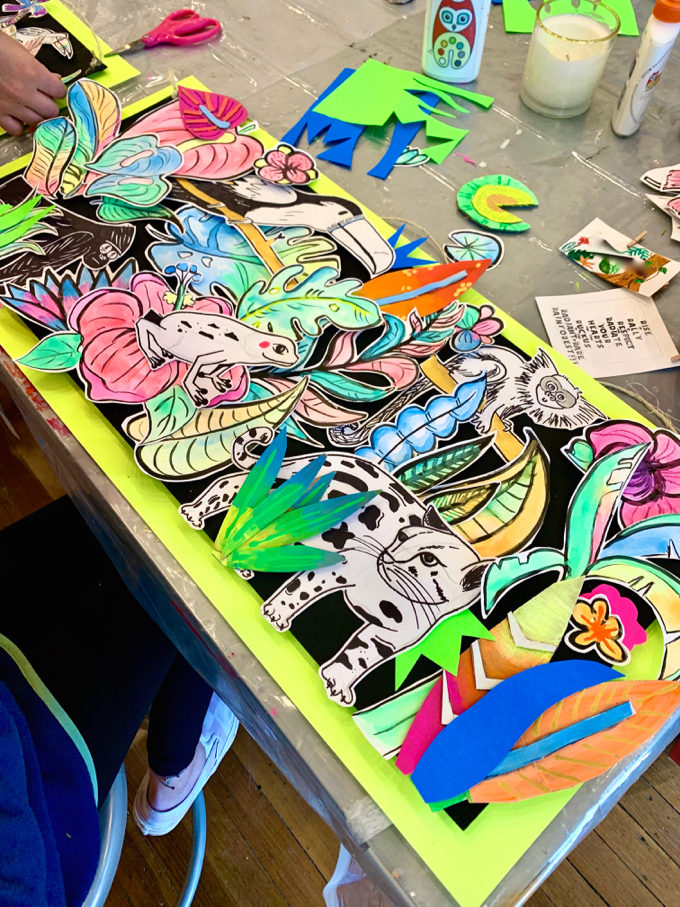
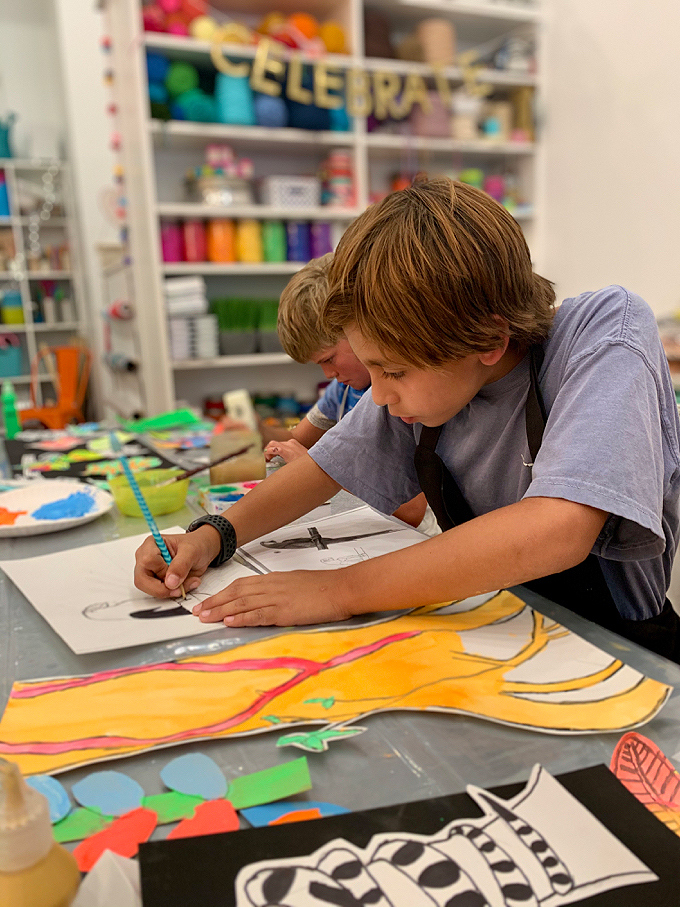
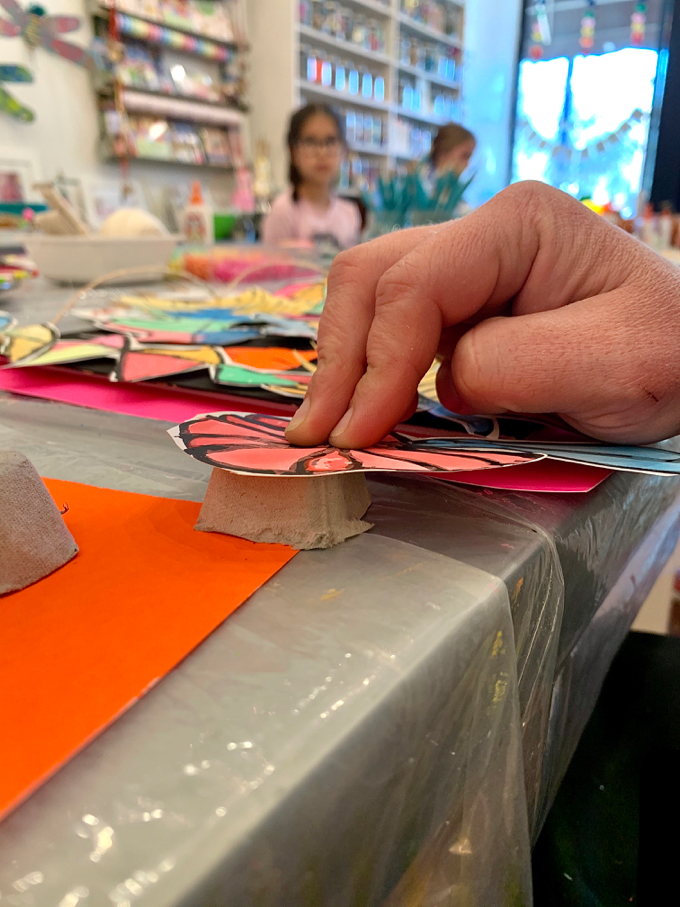
FIVE Layout the cutout “creative collection” of rainforest plants, black & white creatures, and dimensional habitat on a horizontal, pre-painted, black cardboard, backed with a smaller piece of foam core for strength and stiffness. Arrange pieces considering foreground, middle-ground, and background. Pieces can flow off the black cardboard to allow more space and to add dimension.
A beautiful rainforest flower painted in paint pen to popout.
A birds-eye-view of rainforest animals accented with eye catching patterns. Creatures remained in a black + white color scheme for a brilliant + bold + contrasting statement.
SIX Use three to five, precut egg carton pieces to pop out selected pieces. Use white glue to attach a low profile egg carton piece to add height and a bit of pop.
SEVEN Arrange finished pieces on the pre-painted black cardboard, again, that has been backed with foam core for added durability, flatness, and strength. Use a light amount of white school glue to tack down pieces so they’re not fully glued down, so pieces still have a flex & flow. Use a neon poster board to create a vibrant frame to finish off and showcase. Drill holes in the top two corners and add a piece of twine to display.
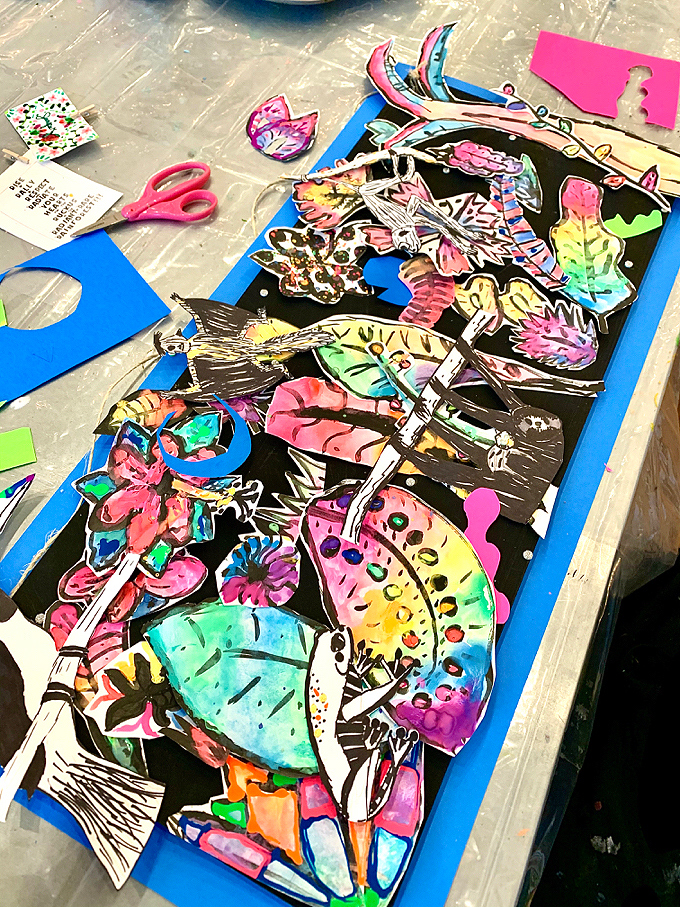
A peek at a few pretty pieces in progress as artists were planning and popping with a unique perspective, point of view, and of course a powerful punch, all part of the process and on point. Now say this three times!!!
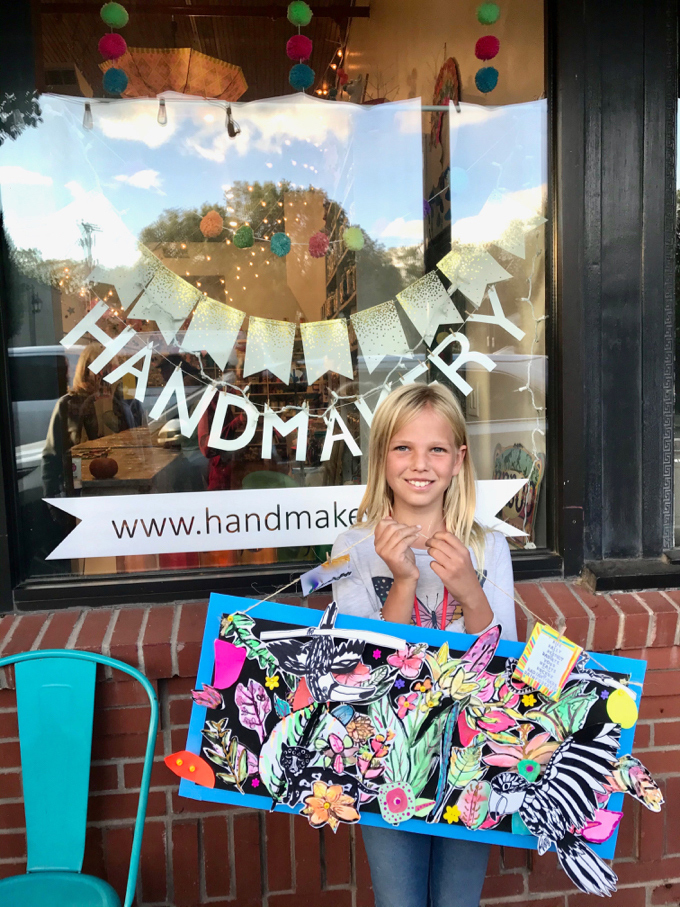
Having a project with “several separate pieces” allowed artists to move around pieces to the puzzle, to build, and to layer their one-of-a-kind ~ Ruckus in the Radiant + Rare Rainforest so it was unique to each artist. Keeping all animals black & white created a wonderful contrast to the colorful habitat.
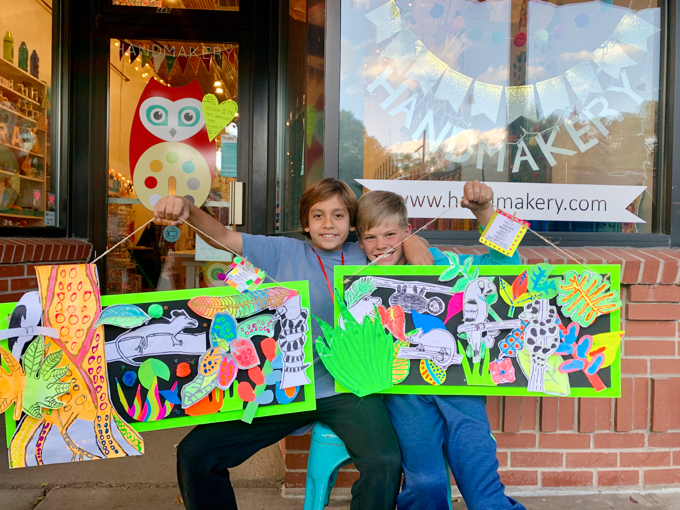
Every artist walked away with a one-of-a-kind creation with a collection of creatures they were proud of creating!
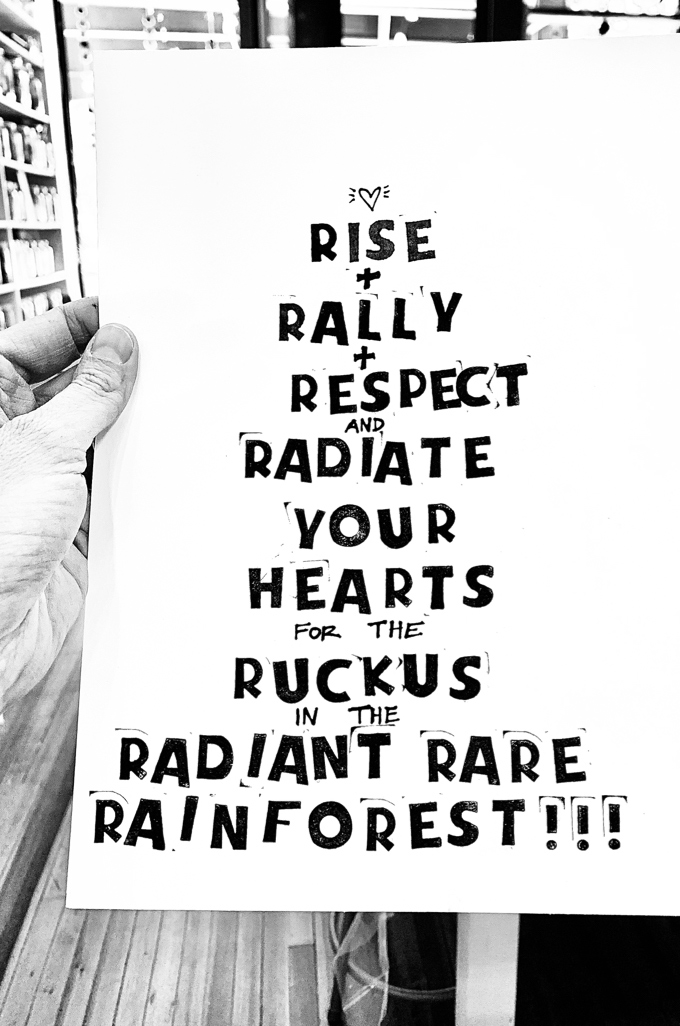
A little hand-stamped + black & white saying we printed for each artist to frame using materials of their choice. Little wooden clothespins were used to clip onto the twine of their projects. We discussed how this piece was truly an artist statement to ~ RISE + RALLY + RESECT + RADIATE YOUR HEARTS for the RUCKUS in the RADIANT + RARE RAINFOREST to remind humans to protect and preserve this special land!
The week wrapped up with our traditional recognition ceremony + mini art show as makers took home ~ a most marvelous mini-masterpiece on Main Street in the majestic mountains!
Tag us @handmakery with your creations on Instagram! Follow our blog for more inspiring process-based art projects! As always, thank you for following our artful adventure on Main Street in the heART of the Carbondale Creative District! Send us a note anytime! We’d love to hear what you’re thinking, dreaming, and envisioning! Much love and happiness creating in this creative + colorful world filled with collaboration + connection + community + arts & crafting! Ami
Happy Back to School! Hope you’ve had a wonderful time slowing down, celebrating, and soaking up summertime under the sun and stars!
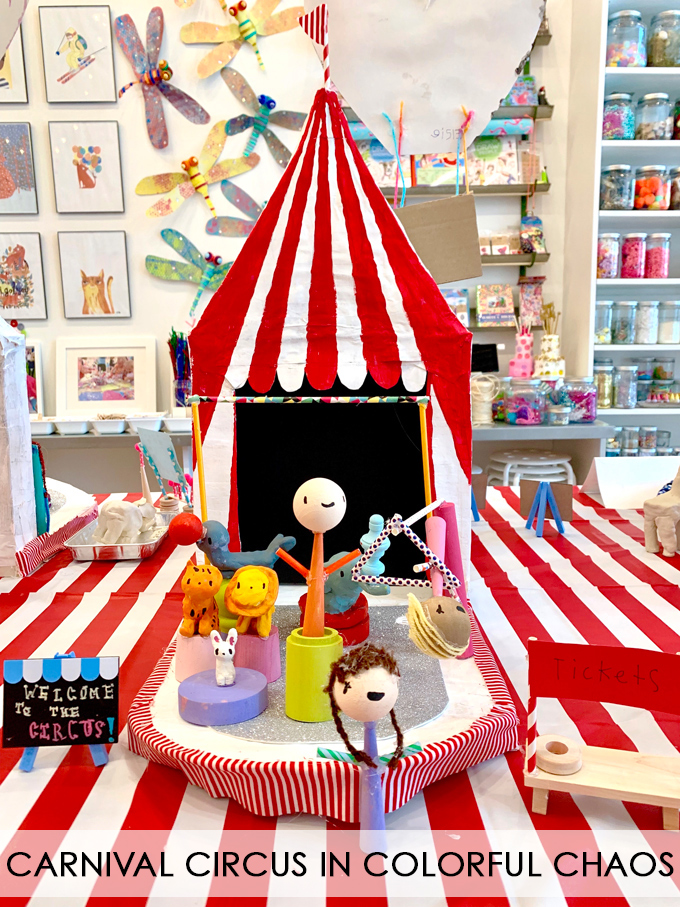
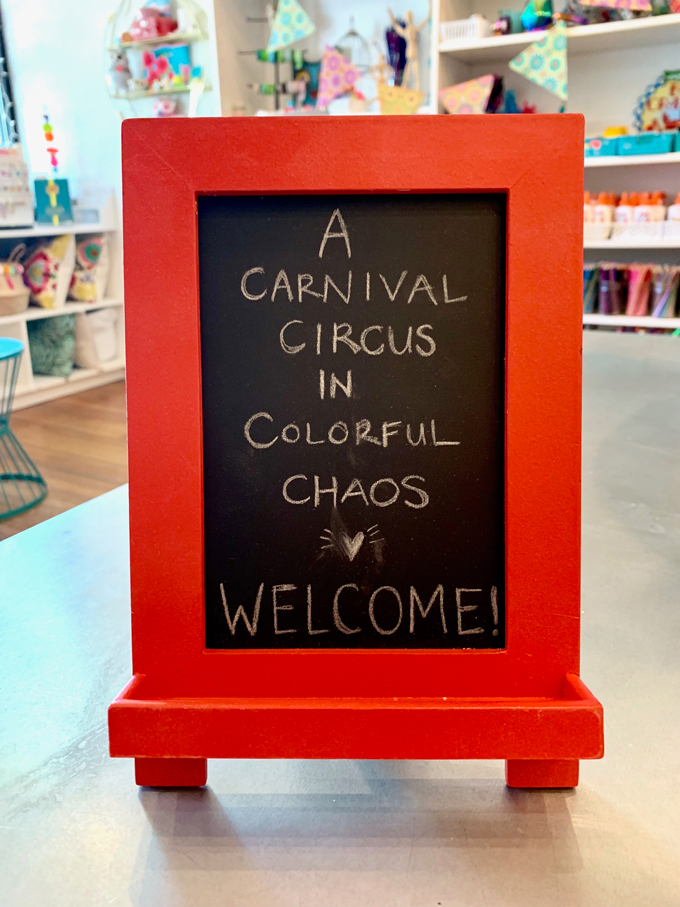
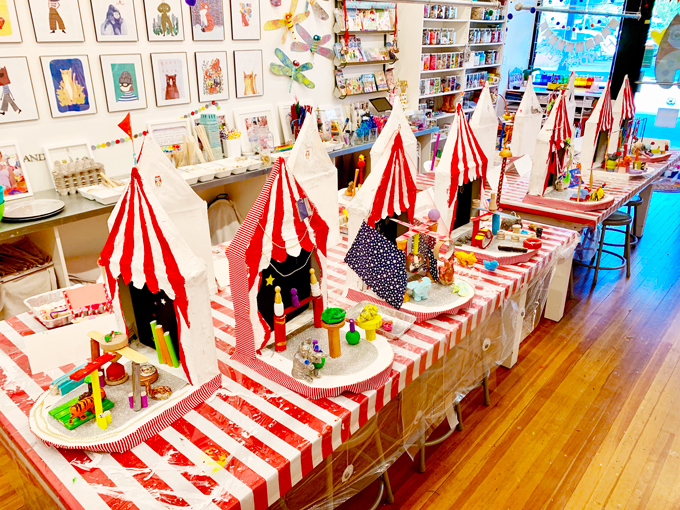
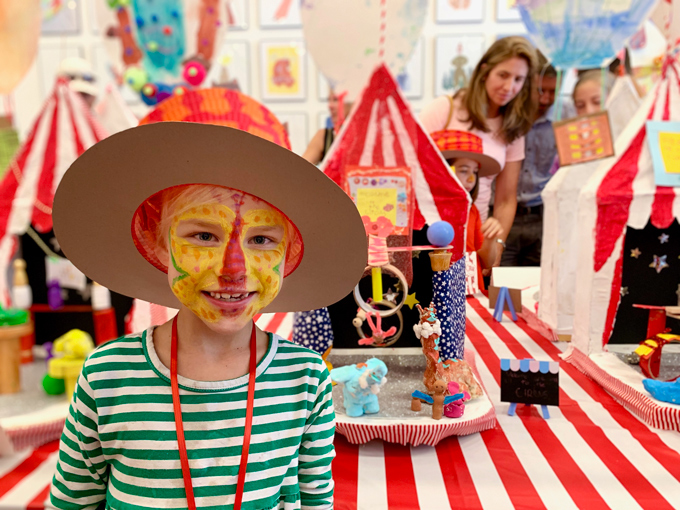
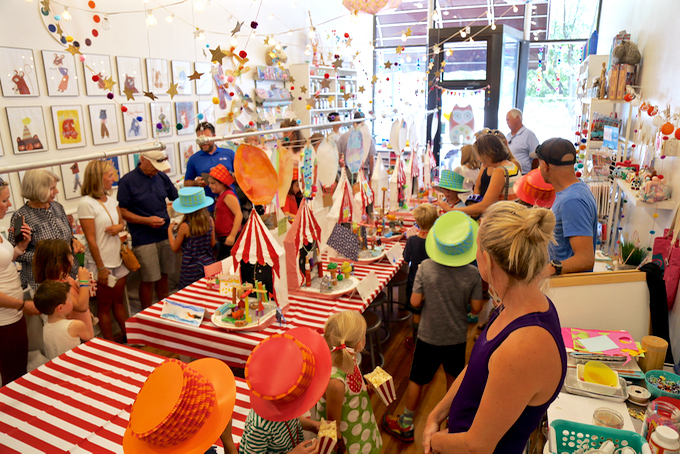
Our studio artists recently showcased ~ A CARNIVAL CIRCUS IN COLORFUL CHAOS! This was our final + full-week workshop of the splendid summer! It was F-U-N and completely filled with construction, creativity, children, color, creatures, cheer, childhood and of course, a teeny-tiny bit of chaos! Take a peek at this delightful process combining circus + carnival + celebration + childhood + construction + collaboration + community + color! We were inspired by Up Warsaw’s beautiful + handmade furniture and wooden circus tents @upwarsaw on Instagram! Be sure to tag @handmakery on Instagram if you give this process-art project a GO! Take a peek below!
Early online enrollment is highly encouraged as seating is limited! Start a new school year making + creating + connecting in a colorful community focused on a creative + collaborative childhood!
Glues – white glue, cool temp glue gun + glue and hot glue gun + glue {adult use}
Paper straws
Pipe cleaners
String + yarn + wire
Wood parts and pieces {assortment}
Wooden peg dolls
Poster board
Sparkle foam
Fabric
Paper and markers for signs + flags + garland
Embellishments- sticker stars, pom poms, and more!
A SIMPLE PROCESS FOR ~ CARNIVAL CIRCUS IN COLORFUL CHAOS:
BUILD + CONSTRUCT
ONE Construct in pairs using 4 – 12″ dowels, masking tape, duct tape, and a 12 x 12″ heavy-weight box with a separate lid, to create an initial structure for the circus tent. All four tent poles should angle towards the center, to connect together at the center point of the tent.
TWO Use light-weight cardboard, ex. cereal boxes, to draw, cut, and create the curtain elements on the upper front and front sides of the tent. The top curtain can be sketched scalloped and cut. Tape all three cardboard pieces onto the box so they’re secure and frame the stage.
THREE Coat the above structure with newspaper and paper-mâché mixture. Dry overnight.
FOUR Use the box lid as the circus stage. Place the dry circus tent onto the stage. Line up the back of stage and box lid so they’re flush. Tape in place using duct tape strips. Add a round cardboard cutout on top and center on the stage. Mark where the circle overlaps the box sides with a pencil. Cut this overlap so the stage sides are squared off and the front only rounds.
FIVE Paper-mâché connection points so the tent and stage become strong and one unit. Paper-mâché all four sides of the upper tent so the dowels are enclosed. Dry overnight.
PAINT + EMBELLISH
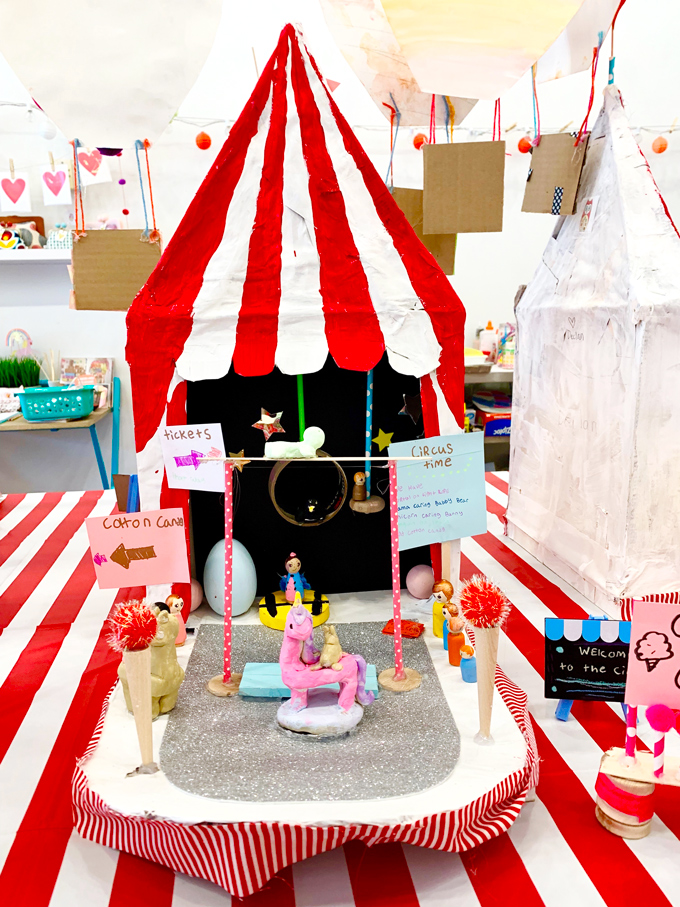
SIX Paint the entire dry tent and stage unit white using acrylic paint to get a solid covering on top of the newspaper. Dry overnight. Use a ruler to draw pencil lines from the center tip of the tent down to each curtain scallop. This will create the red and white divisions for the tent stripes. Mark the red stripes with a light “x” so children know which sections to paint red and which sections to keep white. Use red acrylic paint with a small brush for tent stripes. Encourage young artists to take their time and travel slow to get crisp + clean lines.
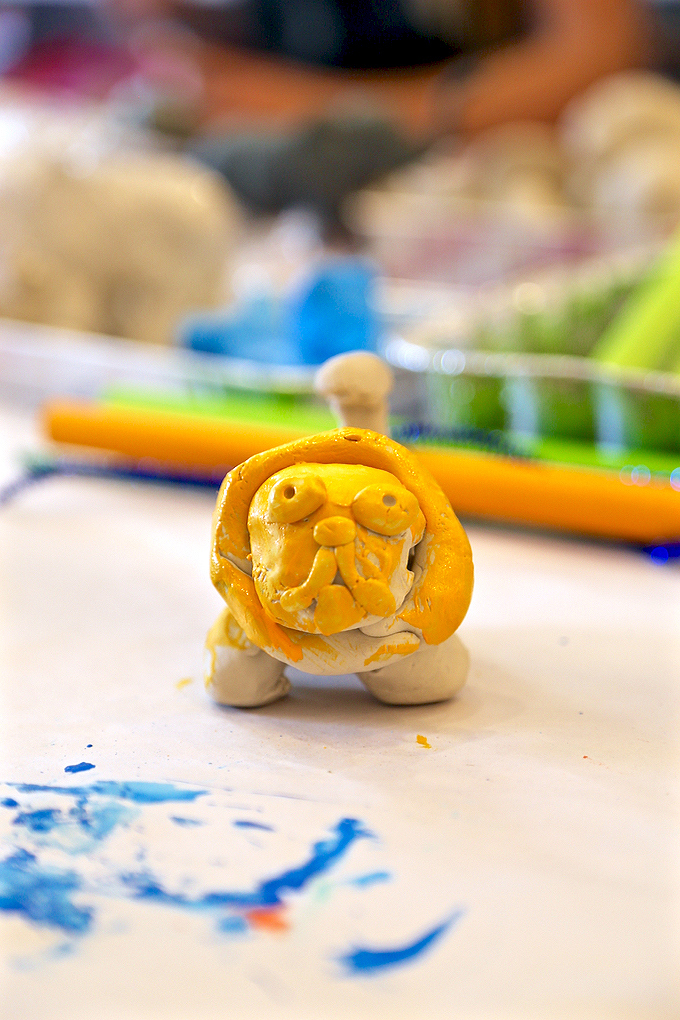
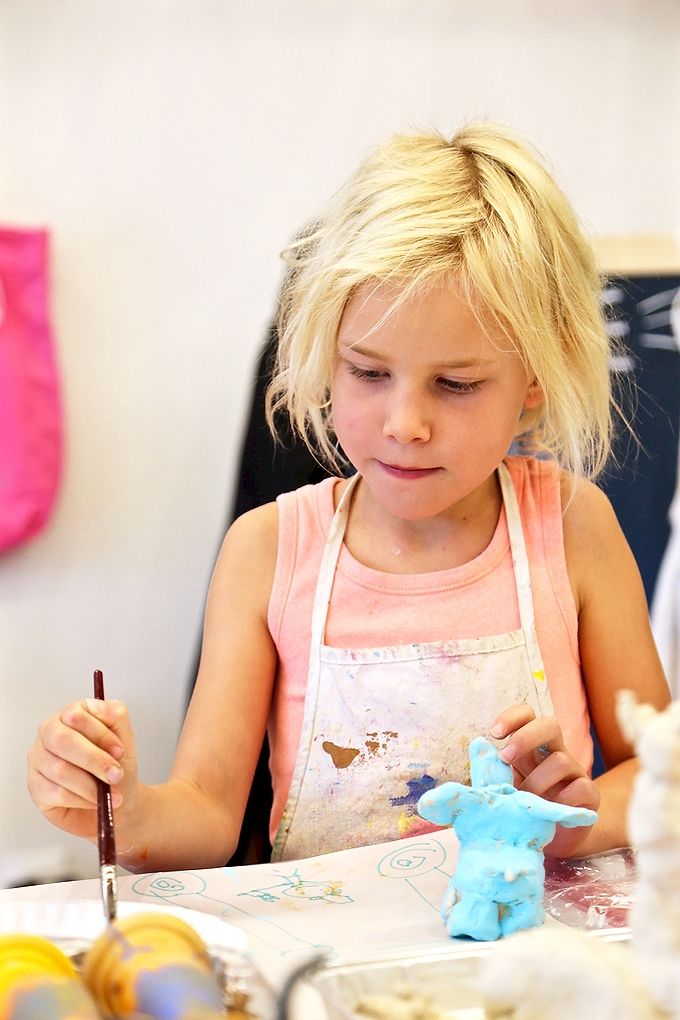
SEVEN Move into dreaming up, sketching, and constructing both carnival and circus creatures using clay. We used an airdry clay to create 3D figures. Dry figures before painting using acrylic paint. Children painted their animals solid before moving into smaller details.
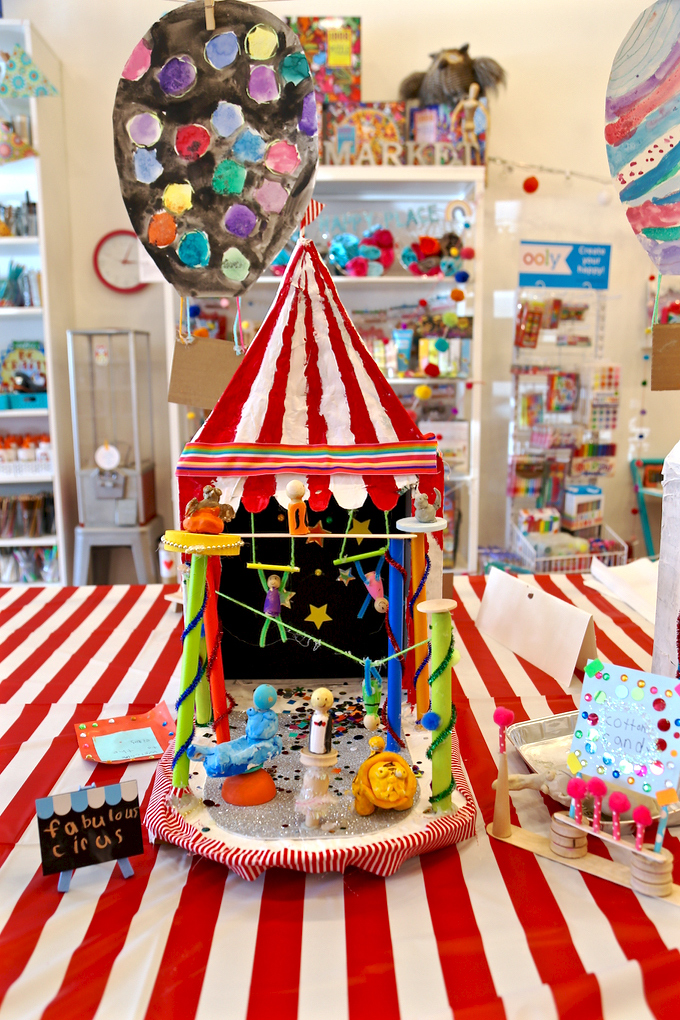
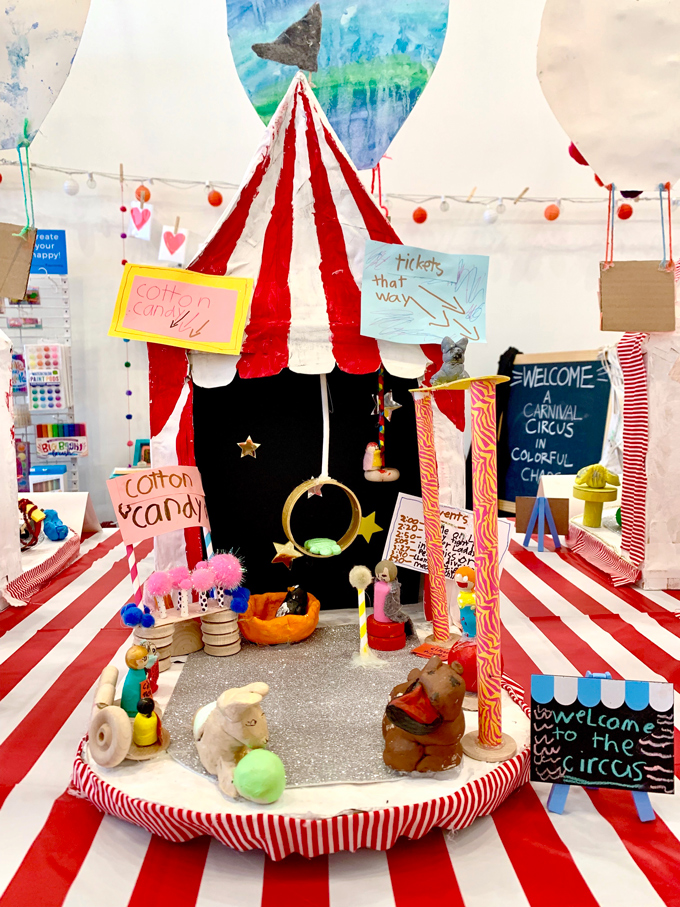
EIGHT Once your circus tent is fully painted and dry, move into stage construction. We precut silver sparkle foam for the stage base and hot glued this piece on top of the spark-tacular stage. Cut a piece of black poster board to bend and set into the stage background. Tape in place. Sticker stars can be added to the black poster board for sparkle + shine + a little stage magic! Children used cool temp glue guns to create their stage structures using patterned paper straws, painted wood pieces, yarn, string, fabric, and more! Precut strips of striped fabric were attached by artists using cool glue around the stage for added color, texture, and stage-like appeal!
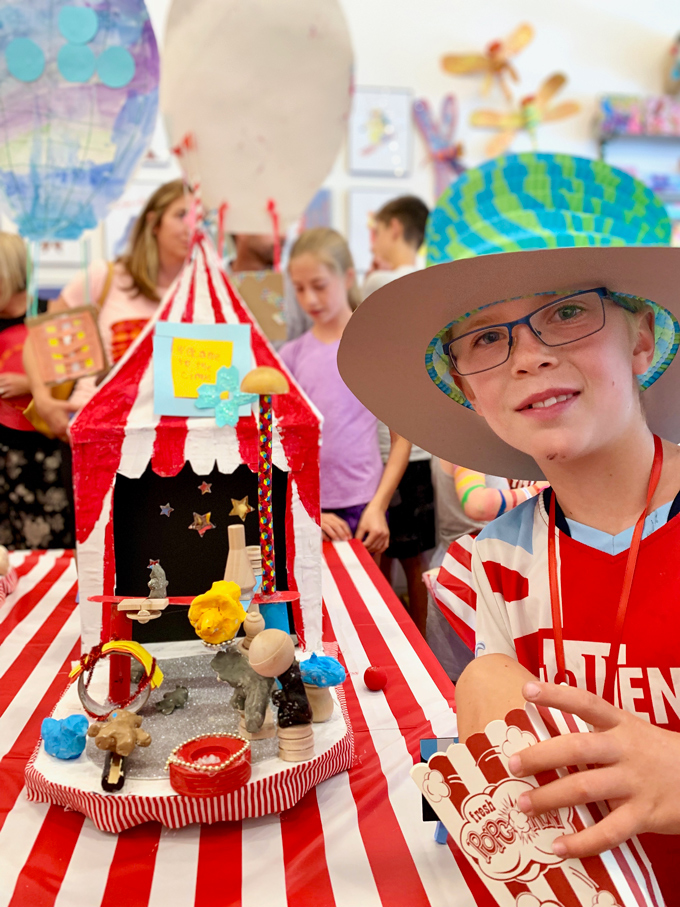
NINE Painted people (aka wooden peg dolls) and creatures were added to the stage to complete the ~ CARNIVAL CIRCUS IN COLORFUL CHAOS! Artist amazed and awed as they created tightropes, trapezes, lyras, acrobats, magicians, imaginary animals, and more! These ringmasters also made the most detailed signs to sell tickets, announce the event schedules, direct guests to tasty cotton candy, popcorn, and candy stands! The imagination and creativity of these artists… truly over-the-top bright + beaming + brilliant!
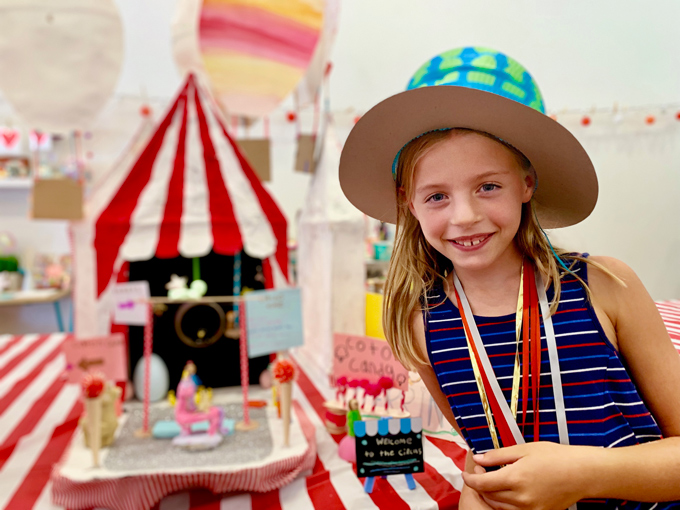
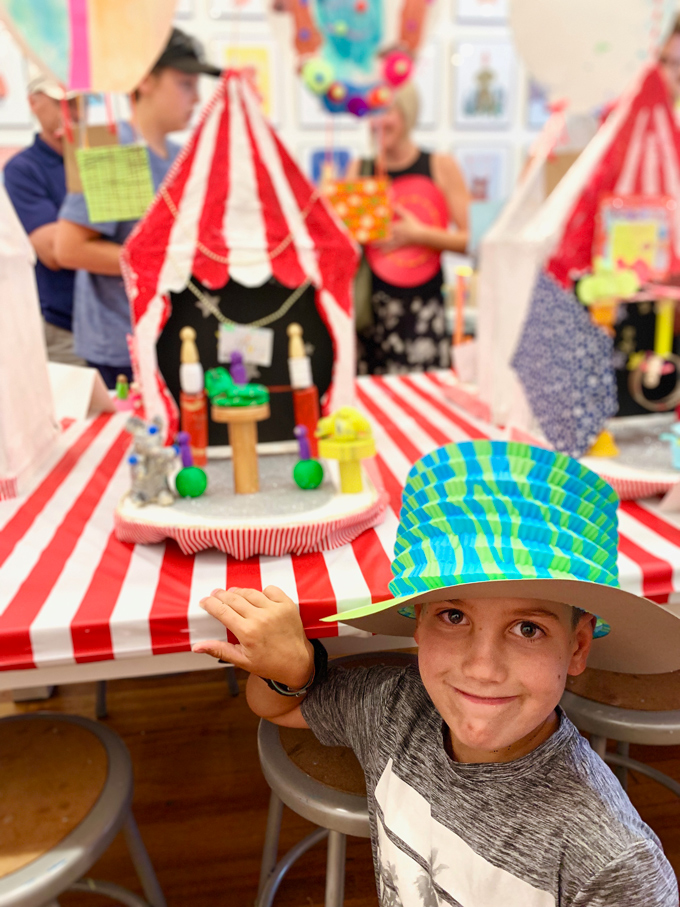
TEN We added face paint, carnival hats, and popcorn to enhance the full-circus experience for our community art show celebration!
Celebrate childhood + creativity + color + community by creating and collaborating!
My artful friend, Bar Rucci, created an incredible DIY ~ Circus Tents Made By Kids (photo above) on her lovely ~ Art Bar Blog and over on Handmade Charlotte for another fantastic way to bring a circus experience into any creative environment! You’ll definitely want to take a peek at this project and ALL her gorgeous goodness by following her @artbarblog on Instagram or visiting her on Art Bar Blog!
Tag us @handmakery with your creations on Instagram! Follow our blog for more inspiring process-based art projects! As always, thank you for following our artful adventure on Main Street in the heART of the Carbondale Creative District! Send us a note anytime! We’d love to hear what you’re thinking, dreaming, and envisioning! Much love and happiness creating in this creative + colorful world, filled with collaboration + connection + community + arts & crafting! Happy School Year! Ami
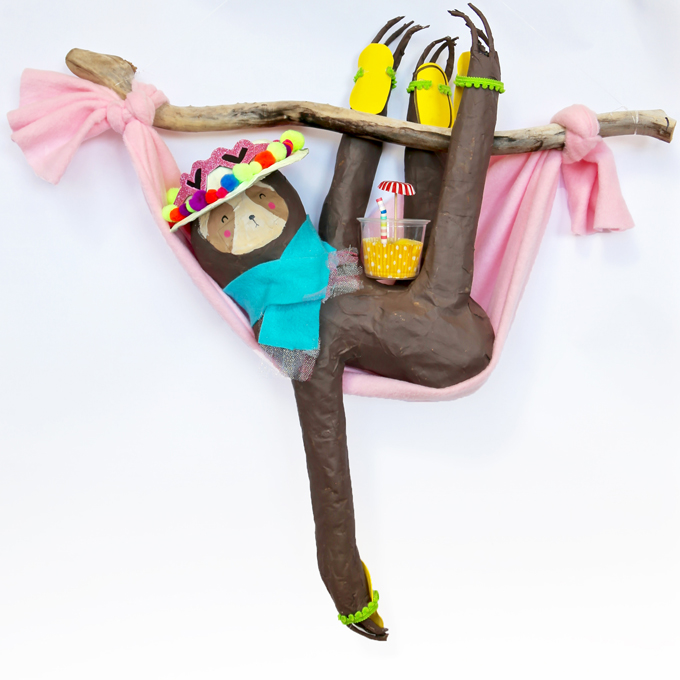
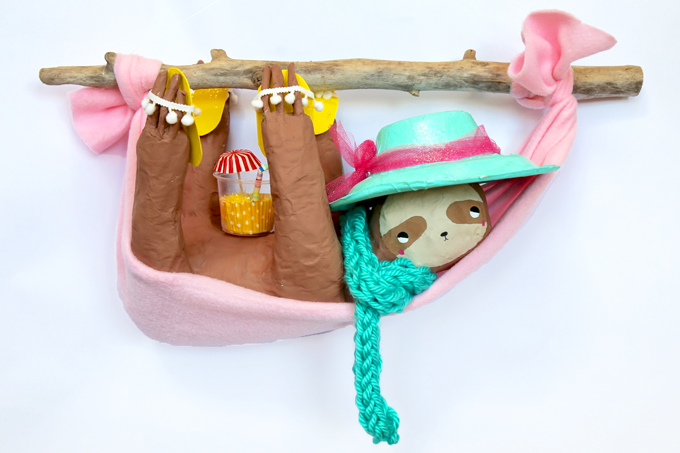
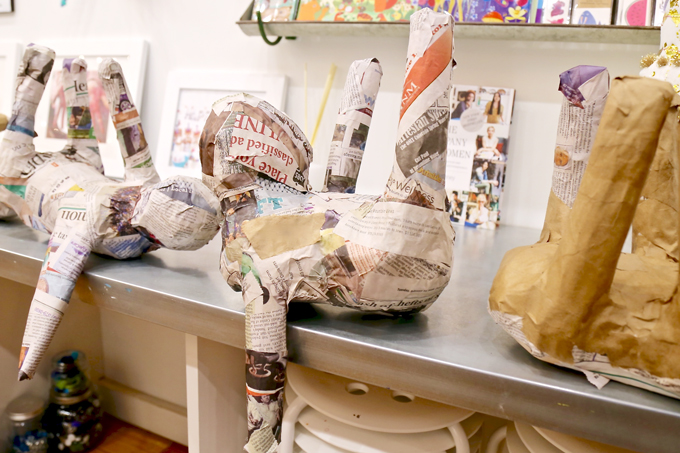
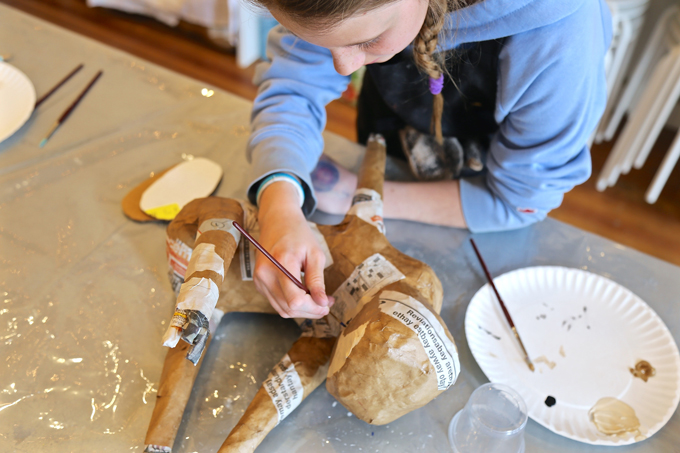
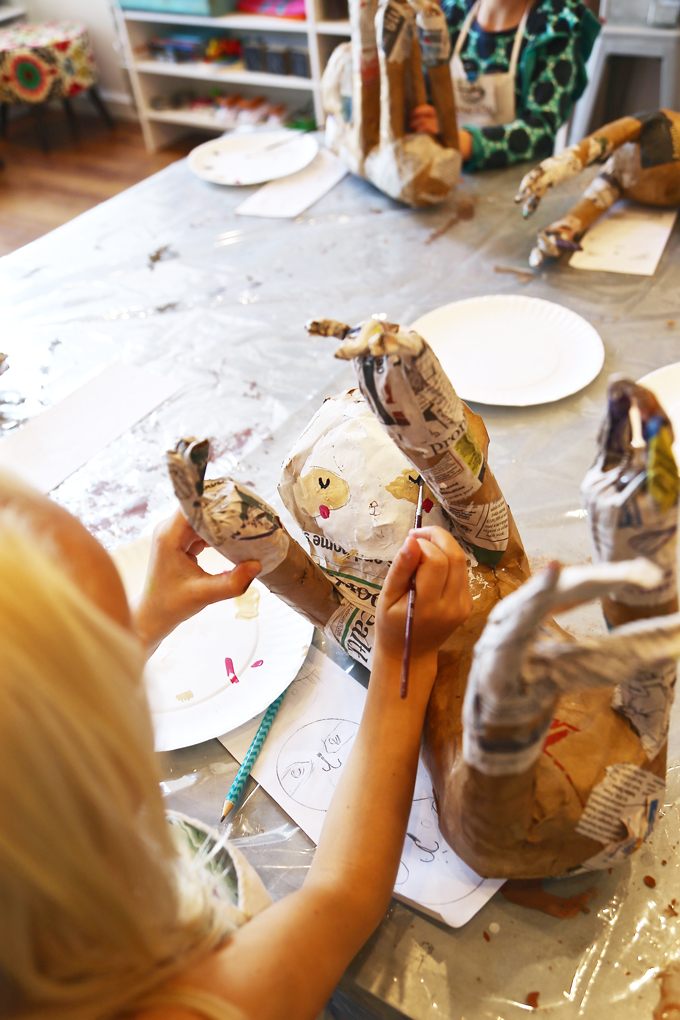
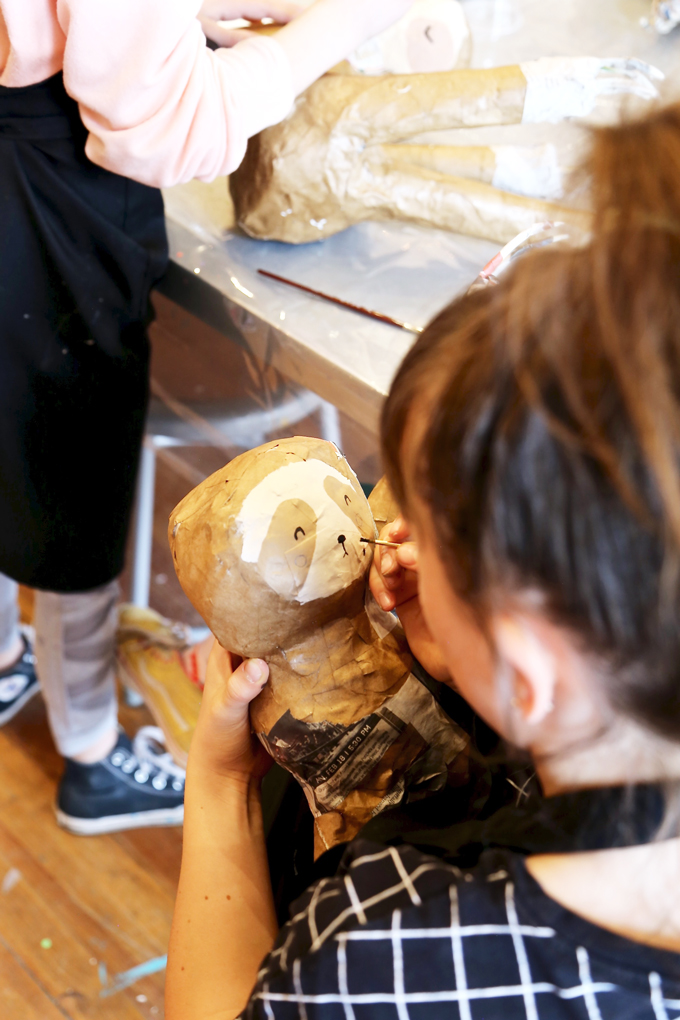
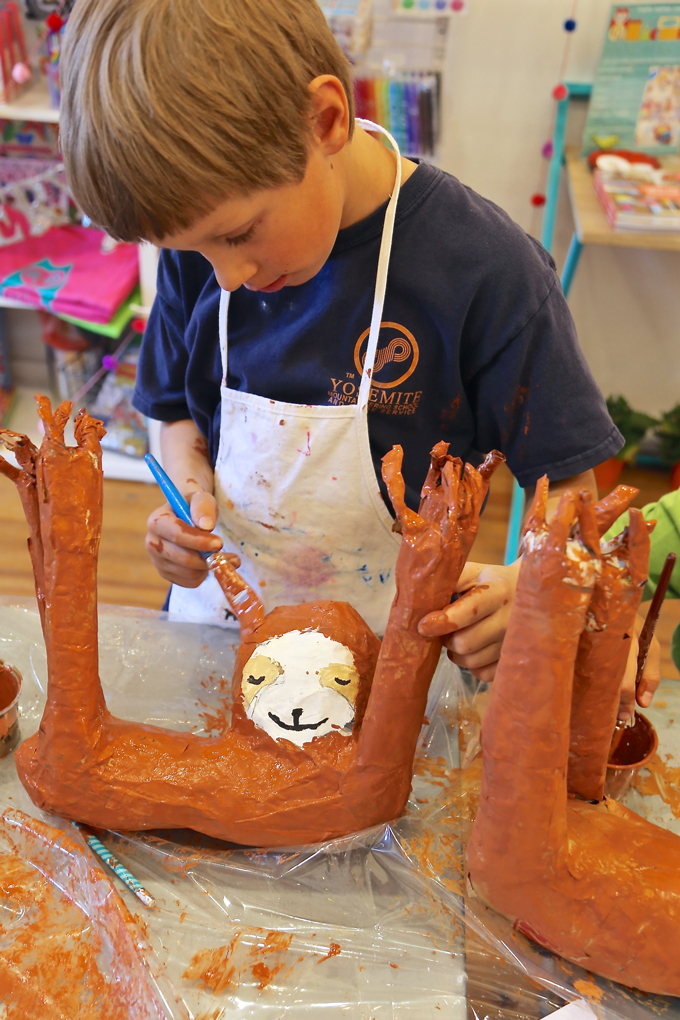
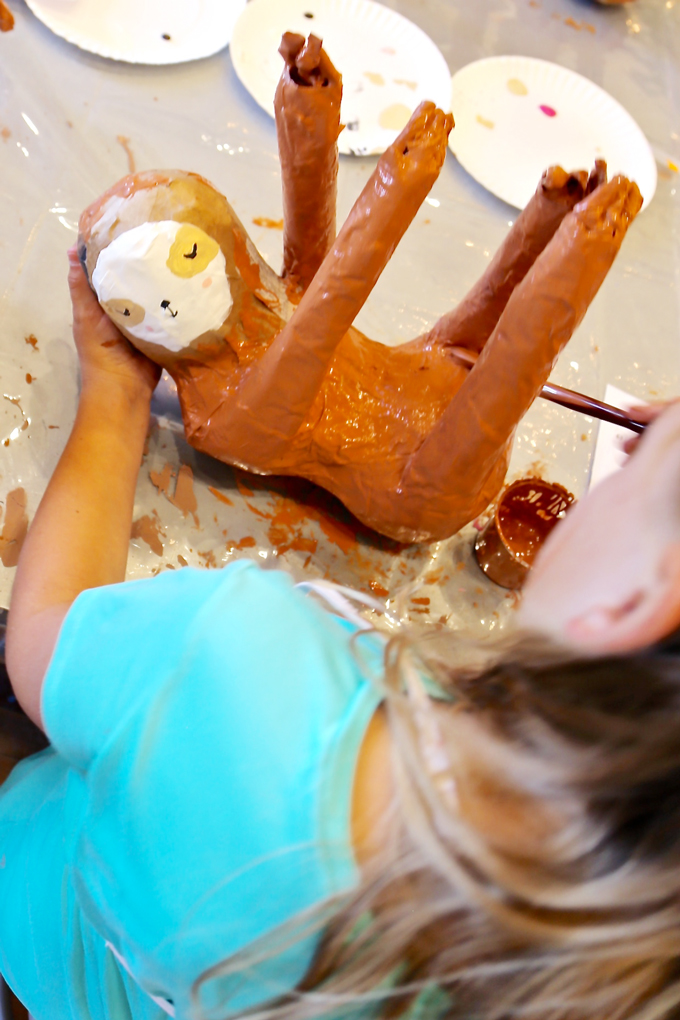
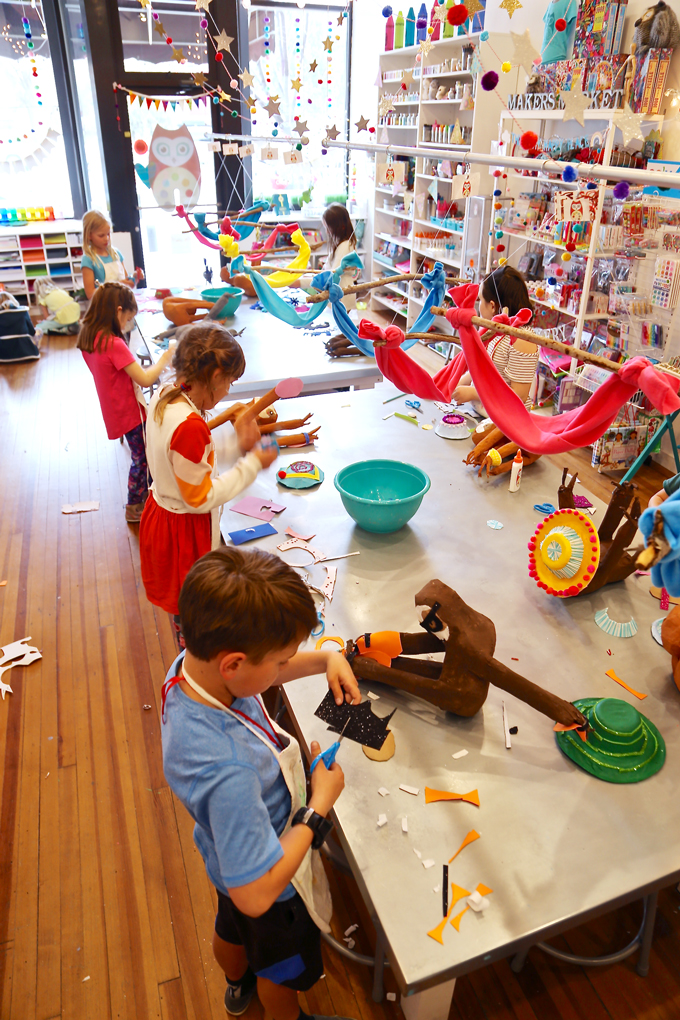
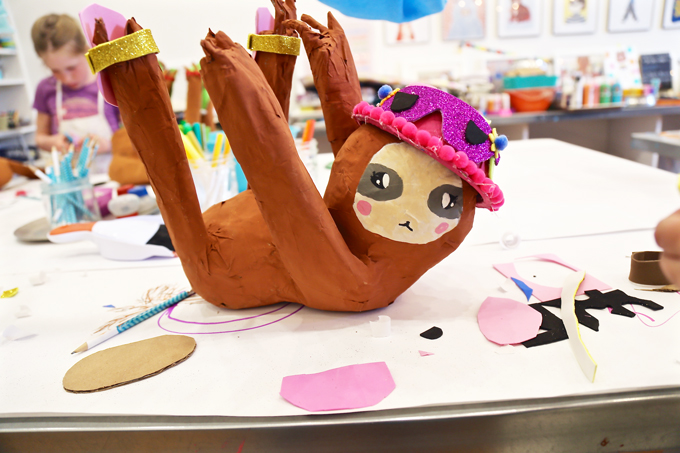
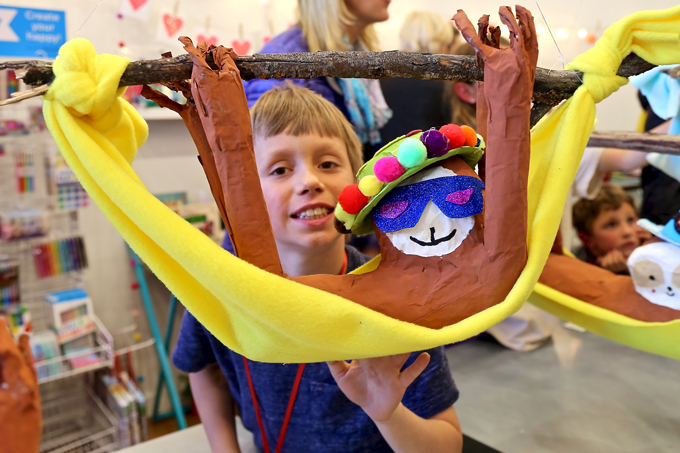
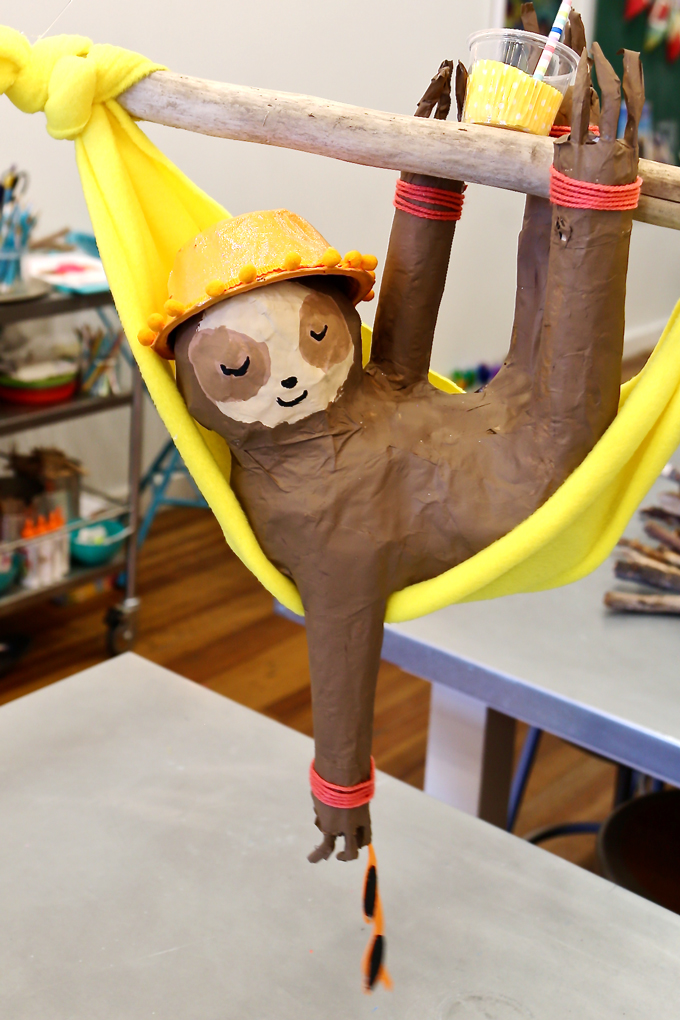
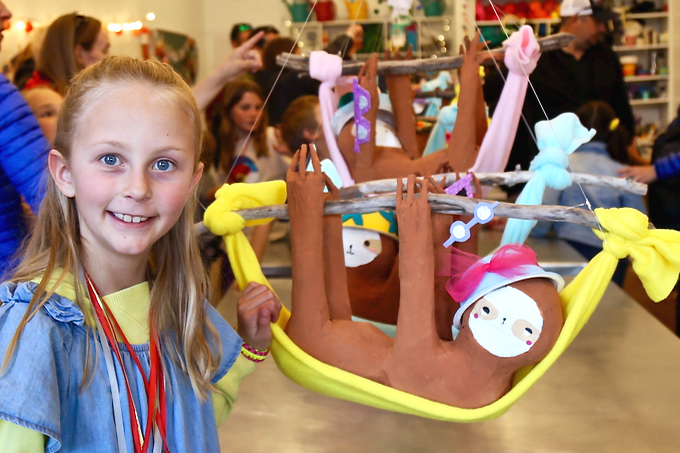
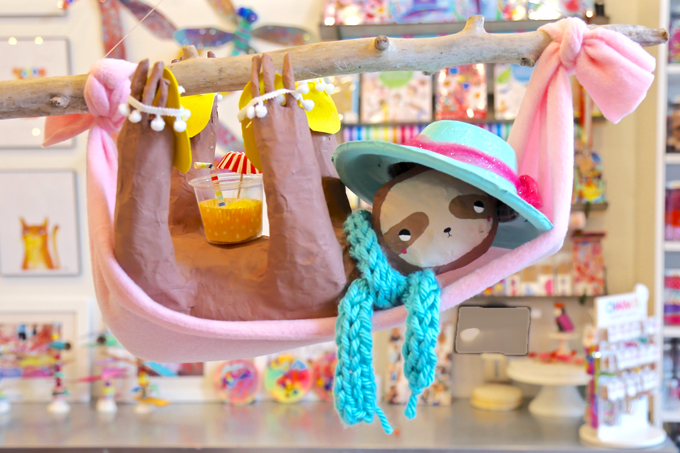
Hello there! Excited to give you a little springtime inspiration in your day! Our artists recently showcased their ~ SCULPTURAL SPRINGTIME SLOTHS in a sling, sporting stylish sandals + sunhats + sunglasses + scarves, while sipping & sun-basking in the sunshine in our early spring + six-week + school-year art workshops for ages 5 & up! We have a feeling these creatures will “slowly” steal your heart! Sharing a list of sweet-n-simple, go-to-supplies, to get your very own sloth started using several upcycled material you might already have on hand! Be sure to tag @handmakery on Instagram if you give this project a GO! Take a peek below!
SUPPLIES FOR ~ SCULPTURAL SPRINGTIME SLOTHS:
Newspaper {upcycled}
Paper bags {upcycled}
Tape- masking + duct tape
Scissors
Paper-mâché mixture + bowl
Paint + pallet + brush
Driftwood
Fabric- fleece
Fishing line
Embellishments for sandals, hats & sunglasses
A SIMPLE PROCESS FOR ~ SCULPTURAL SPRINGTIME SLOTHS:
Did you know sloths are the most trending animal of the year? Would you believe the sloth has replaced the unicorn!?! Indeed, it’s true! Read about their debut as “the most trending creature” of this year. Would you also believe a baby sloth was just born, right here in Colorado!?! If you’re looking for some amazing + simple sloth facts for kids, to go along with this DIY, take a look. Artists loved learning all about these cozy and trending creatures! We even hosted a sloth birthday party right in our very own sweet studio!
A sweet + sisterly + sloth-selfie sent in by one of our amazing HANDMAKERY families! Thank you for tagging #handmakery on Instagram with your creations!
SUN BASK, SIP, SIT BACK & RELAX INTO SUMMER:
TAKE A SPLASH & JOIN US THIS SUMMER:
1. JUMP IN AS SUMMER ART CAMPS ARE QUICKLY FILLING!
Early online enrollment is highly encouraged as seating is limited! Jump into summer making + creating + connecting in a colorful community focused on a creative + collaborative childhood, in the heART of the Carbondale Creative District on magnificent Main Street!
2. FAMILY BLOCK PARTY ~ FIRST FRIDAY MAY!
You don’t want to miss this event! If you’re local to the Roaring Fork Valley, be sure to join us for our 7th year hosting a ~ FREE art-making booth for ALL AGES! We’ll be making & creating in our outdoor art studio which will be located in downtown Carbondale |Colorado, at the heART of the Carbondale Creative District! Join us for the much-anticipated + annual + artful ~ FAMILY BLOCK PARTY!
3. LET’S CONNECT ON INSTAGRAM!
Tag us @handmakery with your creations on Instagram! Follow our blog for more inspiring process-based art projects! As always, thank you for following our artful adventure! Send us a note anytime! We’d love to hear what you’re thinking, dreaming, and envisioning! Much love and happiness creating in this creative + colorful world filled with collaboration + connection + community + arts & crafting! Happy Spring! xo Ami