Artful A-Frame with Kids
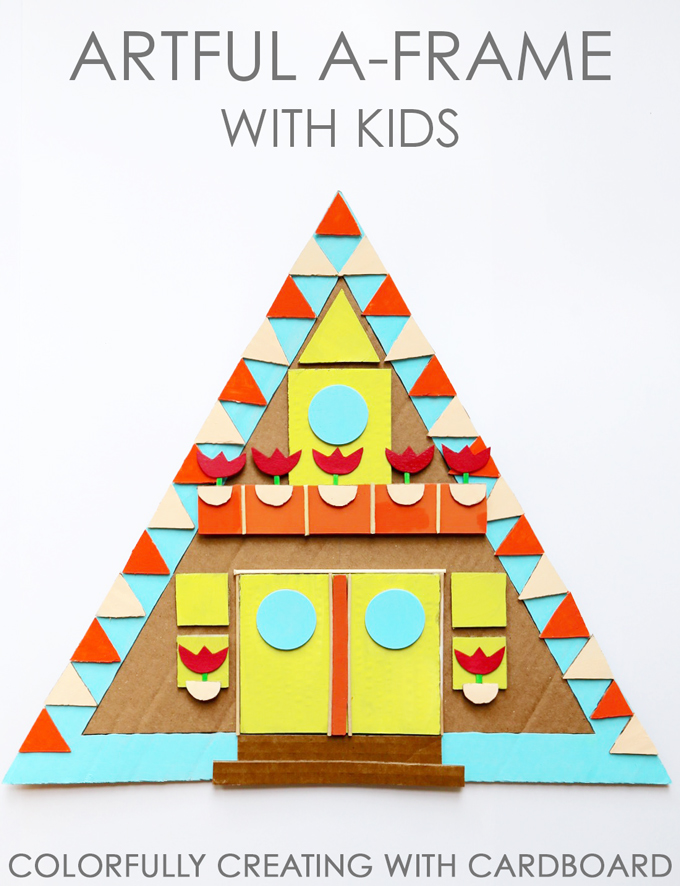
Get cozy, creative, and cardboard constructive from your casita with our architecturally trending DIY ~ ARTFUL A-FRAME WITH KIDS! Take a peek at our {hands on + mixed-media} process creating with crafty kids in Carbondale, Colorado in our downtown art studio at 449 Main Street and be sure to follow our artful adventure on Instagram!

An A-frame is an architectural house style known for its steep-angled roofline that generally begins at the foundation and meets at the top in the shape of the letter A. They became quite popular around the world in the mid-50s through the 1970s, but they’re totally trending today!
SUPPLIES FOR ~ ARTFUL A-FRAME FOR KIDS:
- Paper and pencil
- A-frame online inspiration, included below.
- Utility knife (adult-use)
- Straightedge and geometric shape stencils
- Wooden sticks and a tool for cutting (optional)
- Glue
- Scissors
- Paints, brush, water & container
- Embellishments (optional)
PROCESS FOR ~ ARTFUL A-FRAME FOR KIDS:
ONE Collect cardboard upcycled from a large pizza box top.
TWO Take a peek at trending #aframe inspiration on Instagram. We’ve included a lovely list below!
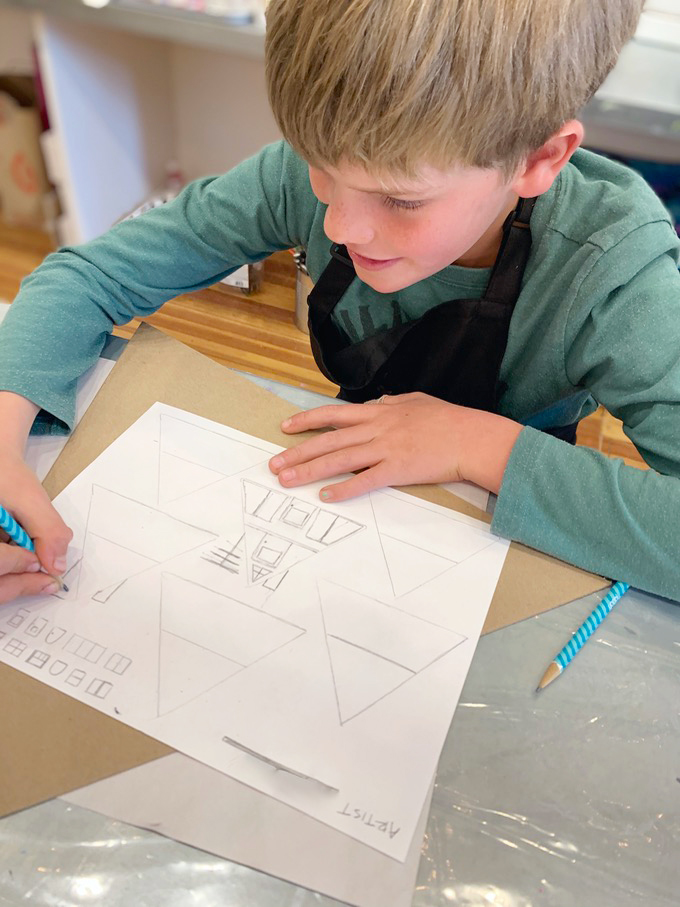
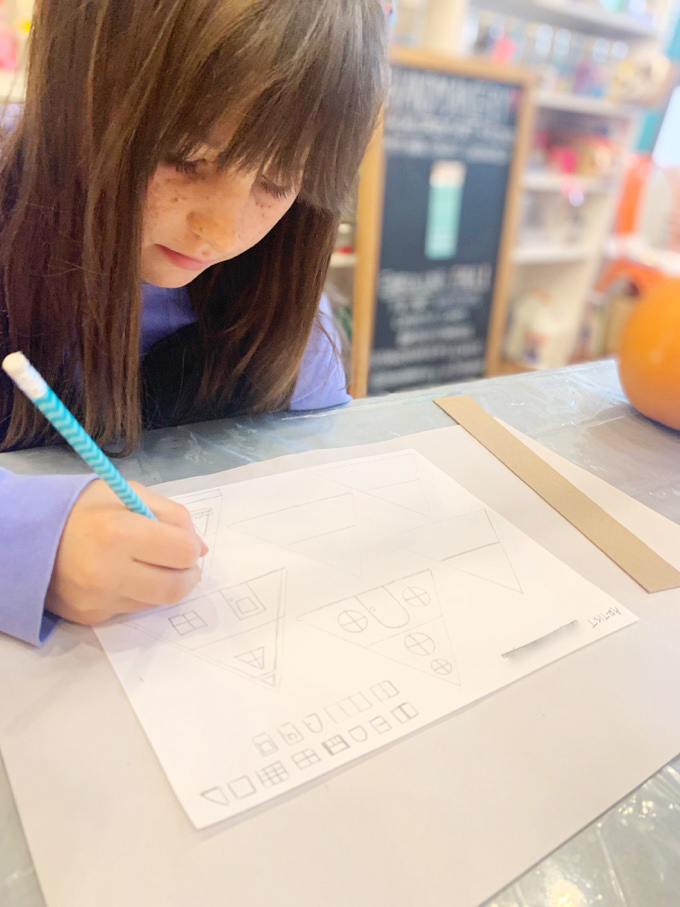
THREE Start with a few simple triangles, pre-drawn onto sketch paper, for mini open-ended sketches. Young artists can work towards their vision, sketching within these triangles, to then create their favorite design to construct. Focus on sketching the main elements which might include doors, windows, sliders, decks, and more. A-frames are most often two-stories and symmetrical, but the sky is the limit! Just be sure to set your sights high and soar!
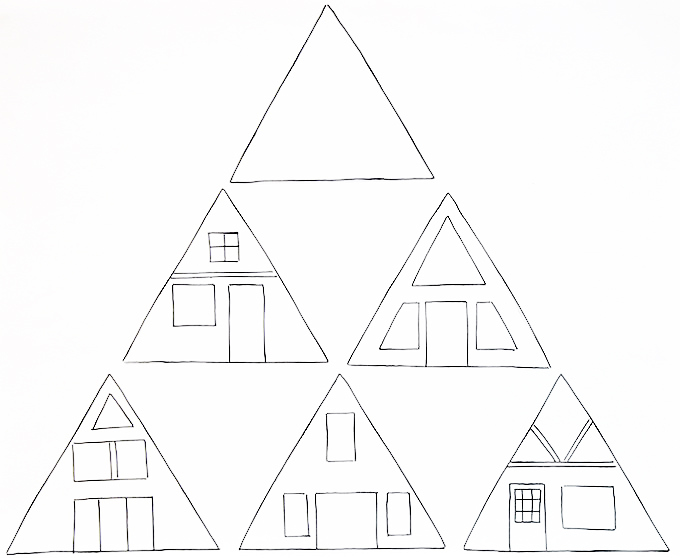
FOUR Use simple sketch ideas to begin construction. Here are some simple sample layouts for visual reference to artfully inspire.
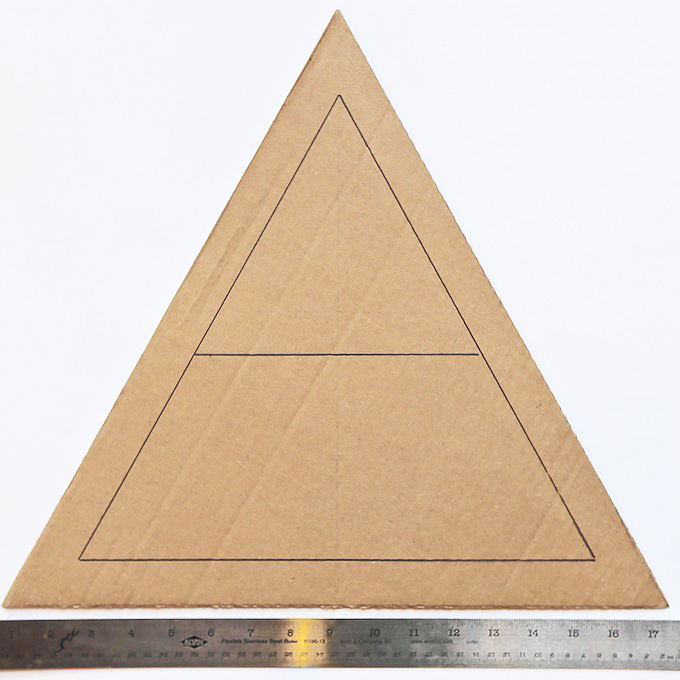
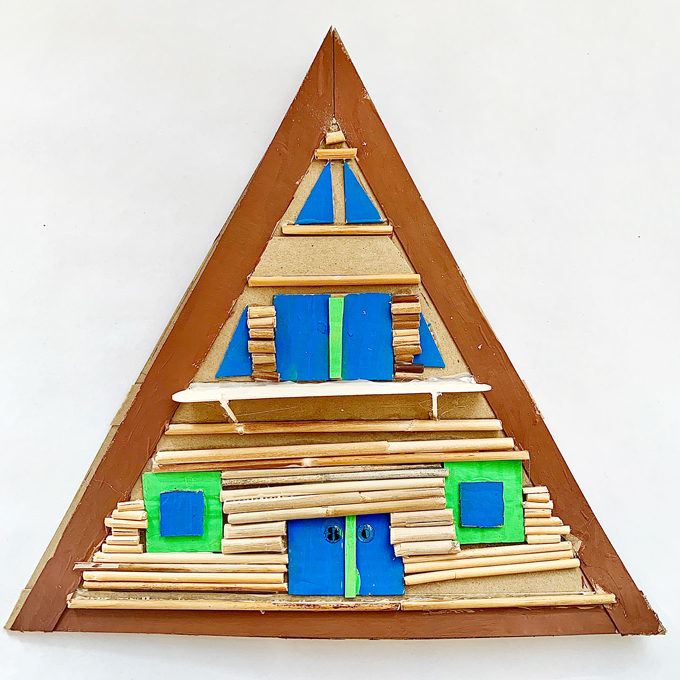
FIVE Precut a large cardboard piece into a triangular base using a utility knife (adult-use) at a 45° angle. Then measure a 1 1/4″ border around all the three sides using a pencil. Midway, mark the second story with a horizontal line or keep it open for a single story with a vaulted interior. The inside of
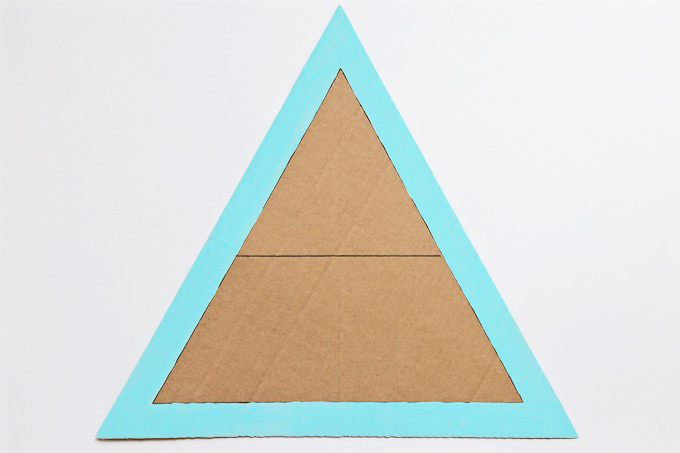
SIX Pick a favorite color. Using acrylic paint, cover all three sides with a solid coat. You can also use painter’s tape to get a crisp edge.
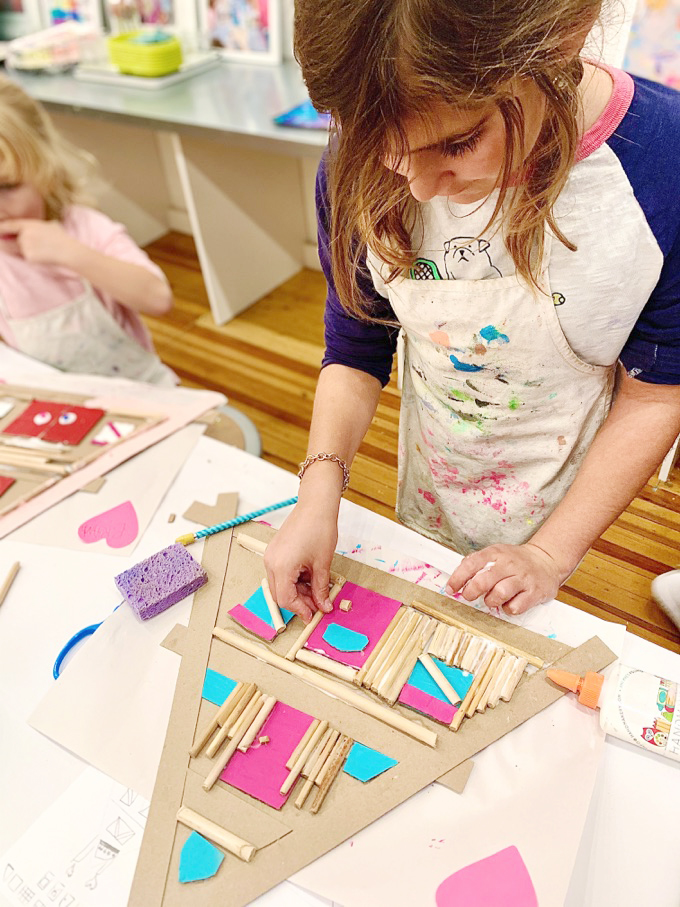
SEVEN Precut cardboard pieces into smaller, more manageable pieces for younger
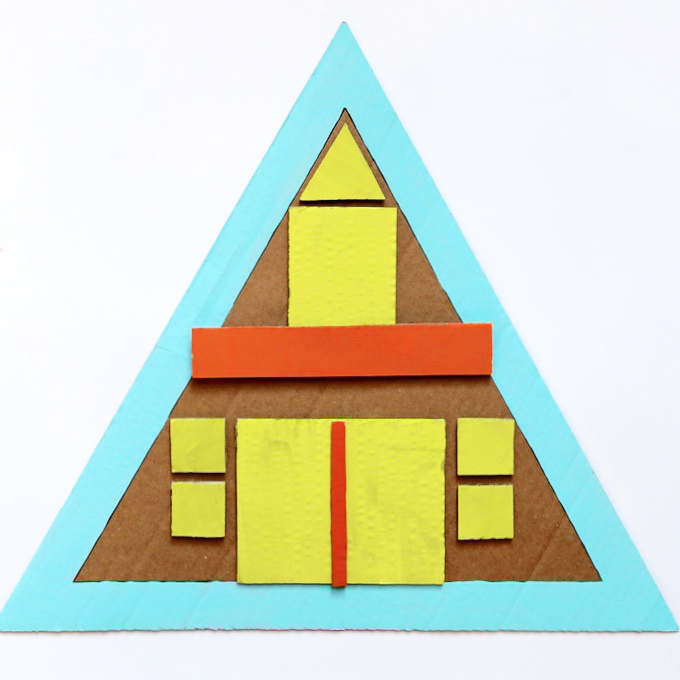
EIGHT Select three main colors to complete your color pallet. On a separate work surface, paint individual elements, such as doors and windows using a medium-sized brush and acrylic paint. Dry all pieces separately. Keep interior pieces moveable so artists can rearrange and make changes to their layouts before finalizing piece placement by gluing down.
NINE Tiny cardboard pieces can be added to personalize. Take a peek at the divided
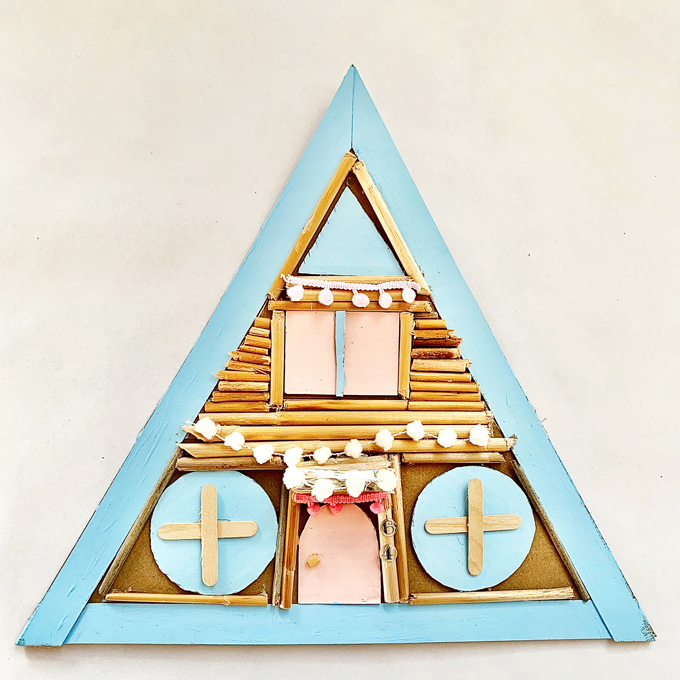
Love the circular and triangular windows on this blue A-frame with
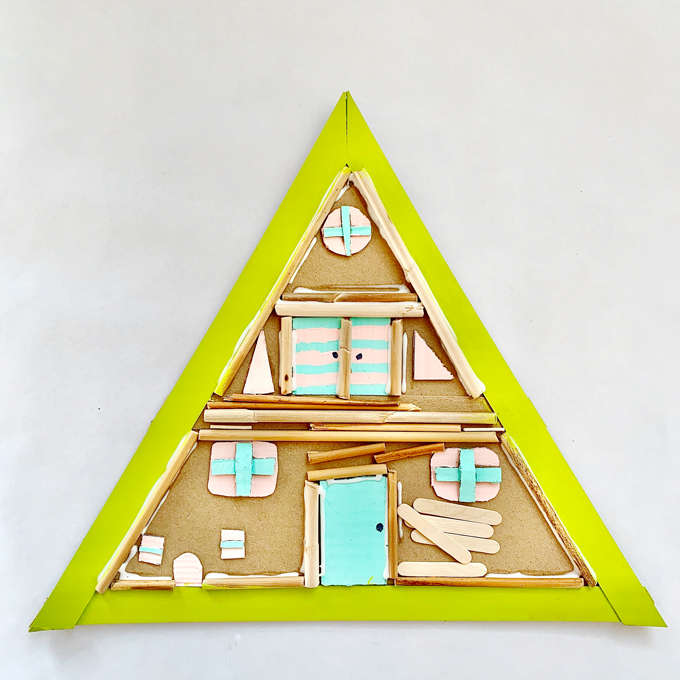
TEN As a favorite “optional element” artists can add wooden pieces to make this project more real-world in construction. Kids LOVE working with wood! We collected cattails in the fall and most importantly pre-dried these sticks in the sun for several weeks so they wouldn’t shrink and pop off the cardboard when glued down. Cattails are an amazing and abundant resource in the great outdoors. They simply grow around wetlands and are easy to cut with heavier weight scissors. My daughter and I cut over 200 for this project. The best part about cattails you’re wondering? Cattails are smooth, straight, and simple to cut. Older children can cut cattails independently using small (6″) diagonal cutters or dikes, of course with adult supervision, to specific lengths. Younger artists can mark the length with a pencil and have an adult assist with the cutting. In the springtime, cattails have been drying out all winter so they’re ready to go without dry time. Collect, remove the
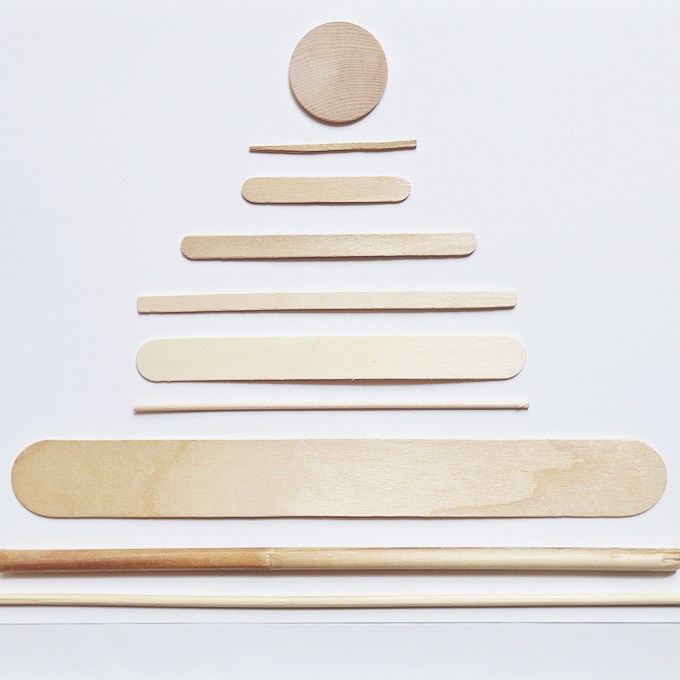
Additional wood pieces to artfully add might include, craft sticks, popsicle sticks, skinny sticks, mini craft sticks, natural mini wooden craft sticks, jumbo craft sticks (great for decks and porches), tiny dowels, wooden skewers, toothpicks, flat rounds, and more!
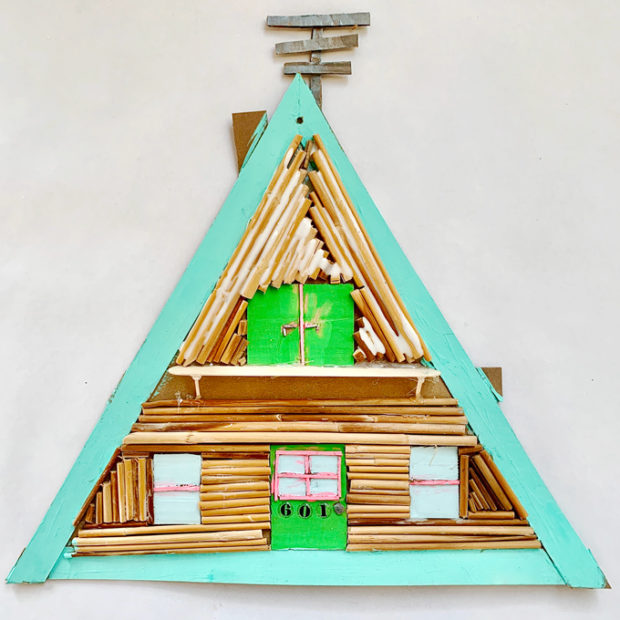
Most wooden pieces can be glued down with a generous application of white glue and dried overnight. A popout deck or balcony might need a little hot glue reinforcement. Doesn’t this A-frame have a wondrous in the woods or lovely log cabin feel?
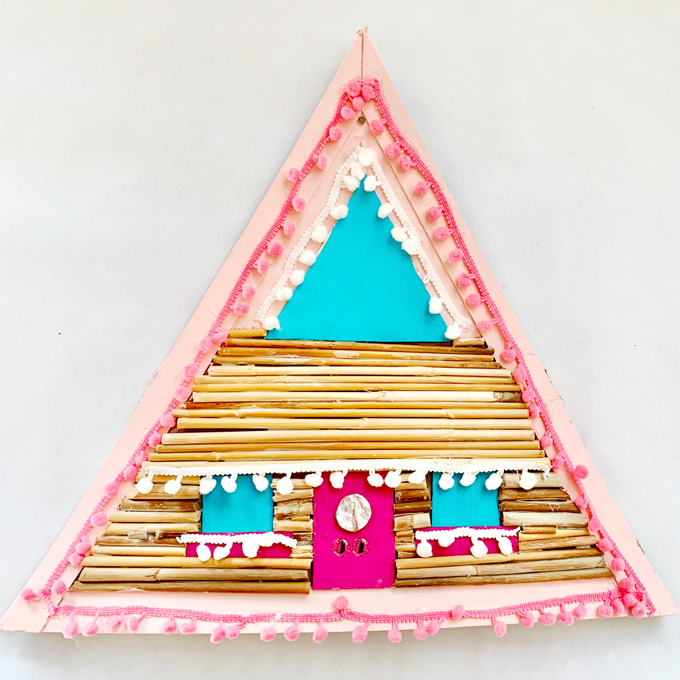
Artists LOVED working with real wood as a “real world” architectural element for diversifying their siding in directions including vertical, horizontal, and artfully angled. The natural cardboard also remained as a natural compliment to spaces not covered in wood. Artists got clever and crafty adding window boxes, circular windows, stairways, railings around balconies and decks, entry archways, tv antennas, and more! Kids are just oh so clever and always so very crafty!
Dreamy + Darling #aframes on Instagram:
- @aframehaus | A-Frame Haus
- @aframedaily | A-Frame Daily
- @aframeaddicts | A-Frame Addicts
- @redaframe | Red
A Frame - @blackaframevt | Black
A Frame - @aframe.on.fletcher | A Frame On Fletcher
Tag us on Instagram with your creations. We’d absolutely LOVE to see what you’re making and creating! As always, thank you for following our artful adventure on Main Street in the heART of the Carbondale Creative District! Send us a note anytime! We’d love to hear what you’re thinking, dreaming, envisioning, and of course, our favorite ~ CREATING!
Much love and happiness creating in this creative + colorful world filled with collaboration + connection + community + arts & crafting! Happy Springtime from our studio to your cozy, crafty, and creative
Ami