DIY Pet Portraits with Personality
My fabulous art students created a project personally dreamed-up and designed called ~ Pet Portraits with Personality. With moving our studio to Main Street last summer, life got a little beyond busy so thank you for your patience with just getting this project out! With fall in the air and back to school really here, thought it would be the perfect time of year to share this fun favorite with you!
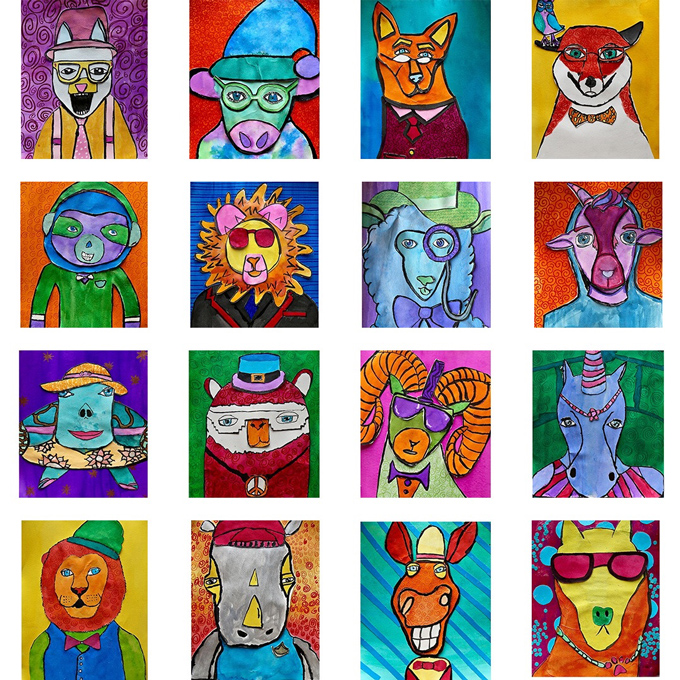
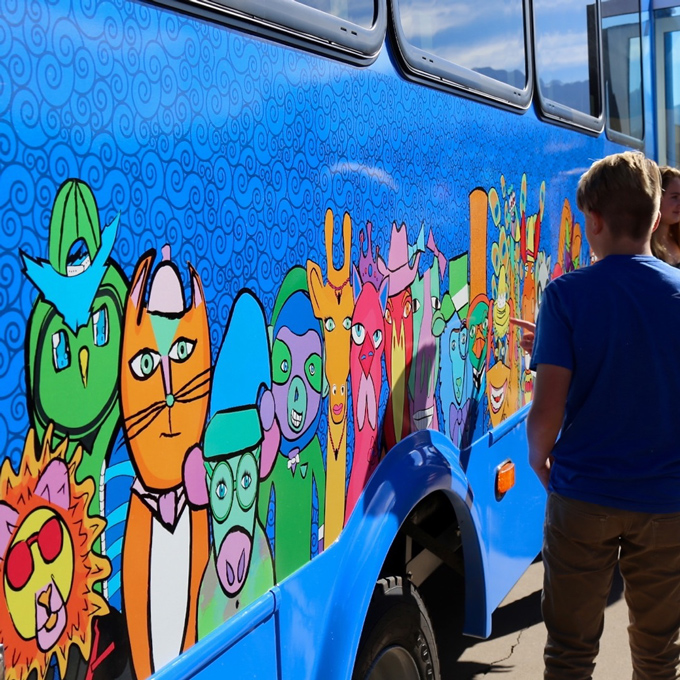
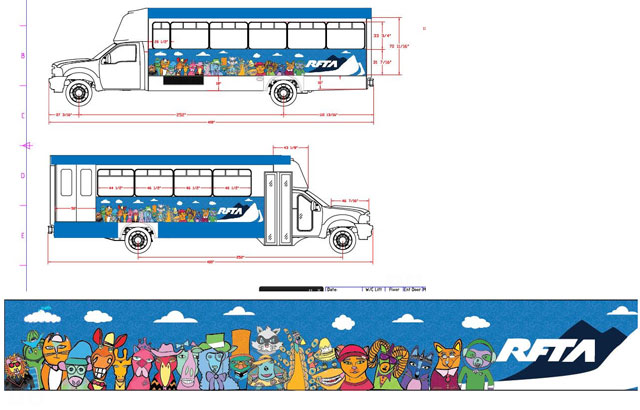
Pet Portraits with Personality was a huge project created with children ages 10 – 14! The artwork, 120 finished pieces, were then used for a local circulator bus (yes, a REAL BUS!!!) and a collection of 35+ community “bear-proof” cans. Both the bus and can projects were designed to bring more art to the heART of our historic downtown! So proud of each artist and their unique creation, contributed to both of these colorful community projects! So happy to see our community come together to support both kid-friendly + child-focused art projects! The artwork has brought a great deal of humor, color, and a whole lot of creativity to our community of Carbondale | Colorado at the heART of the Carbondale Creative District! Don’t you just love how childhood and creativity completely collide, to completely capture community and collaboration!?! Take a peek!
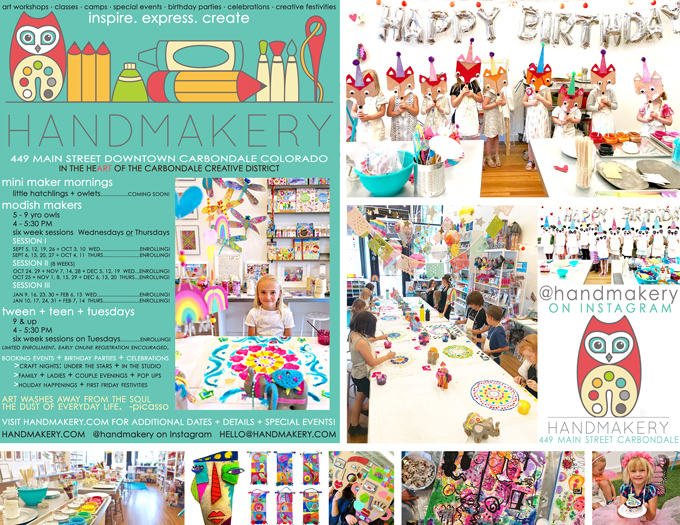
ENROLLING at HANDMAKERY.COM!
FALL ART WORKSHOPS START IN 7 DAYS!!!
WORKSHOPS + CLASSES + CAMPS
COMMUNITY BUS COLLABORATION: Project Details

HIGHLIGHTS: Unveiling Ceremony
COMMUNITY CAN COLLABORATION:
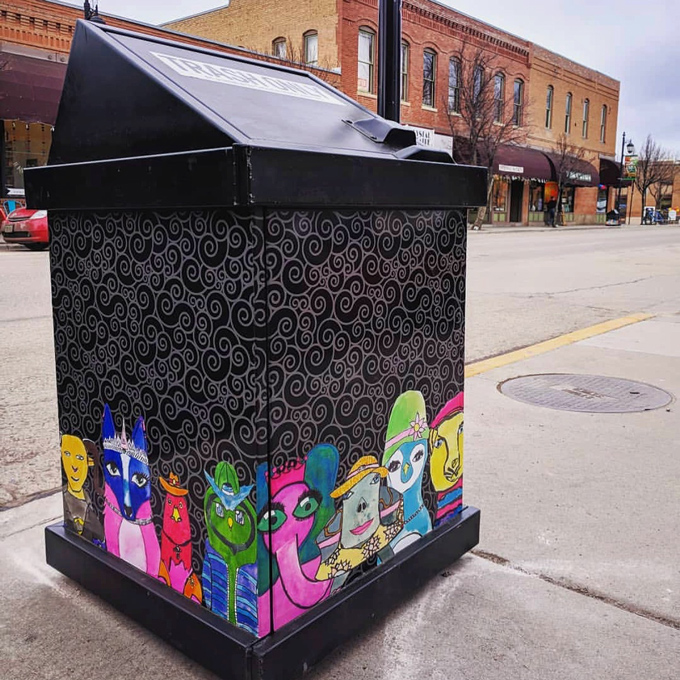
Read a fantastic article highlighting all the details about these upcycled Bear-Proof Cans wrapped with student artwork located throughout downtown! Would you believe there are over 35+ cans throughout our community!?! A huge thank you to the Town of Carbondale for taking on this project. This particular can is located right across from our studio at 449 Main Street! The day the install happened was just beyond exciting to watch out our windows!

SUPPLIES:
- Pencil + eraser
- Scissors
- Gluestick
- Realistic animal face photos for inspiration
- Sketch paper + final paper + tracing paper + watercolor paper cut to size
- India Ink
- Watercolors including both liquid and traditional pallets
- Watercolor brushes + water container
- Lightbox or window
- Colored pencils, permanent markers, acrylic paint, colored paper for additional details!

PROCESS:
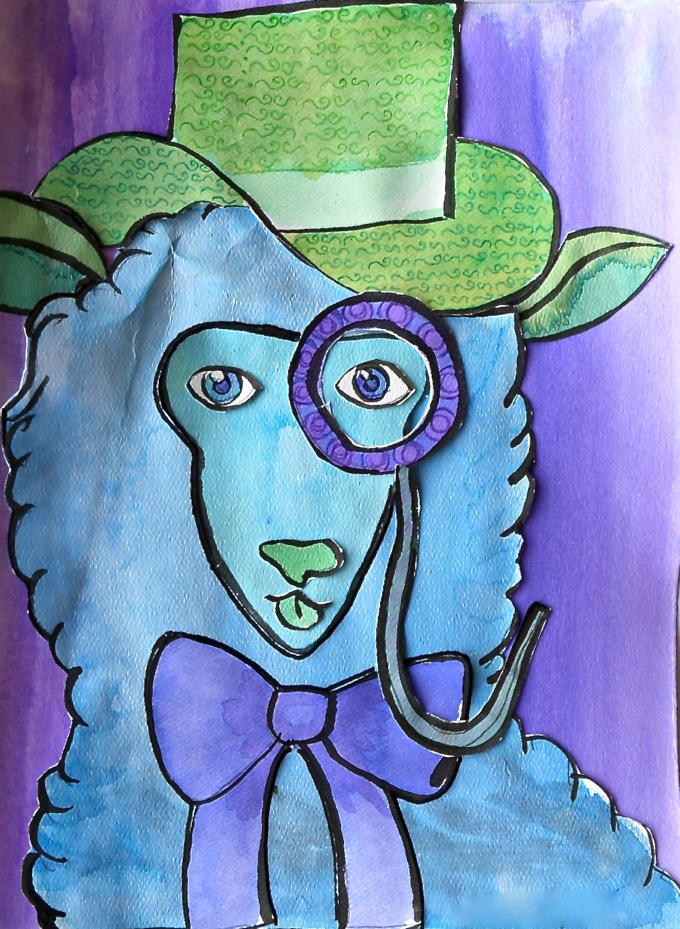
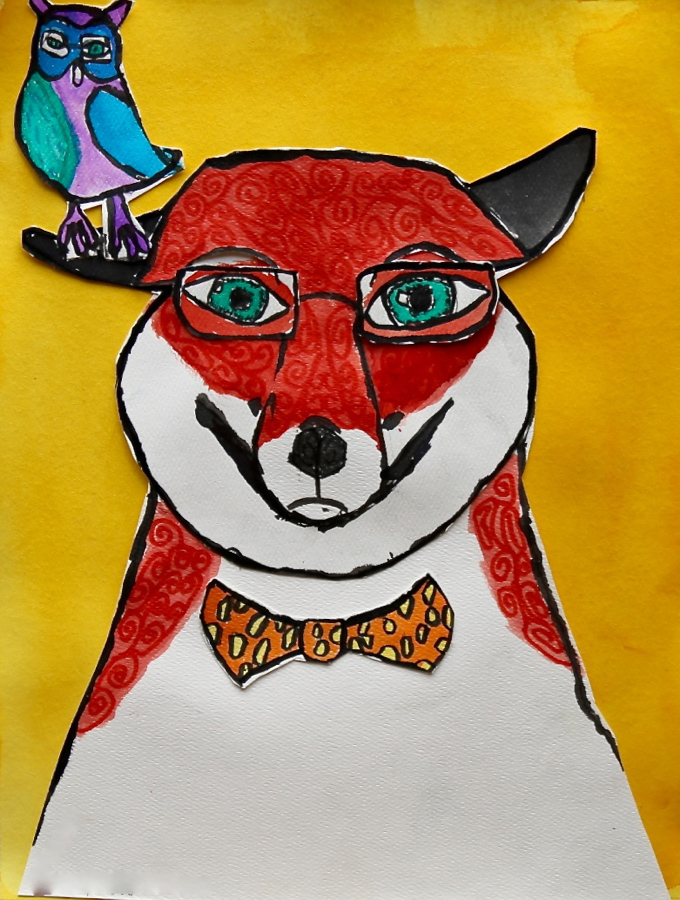
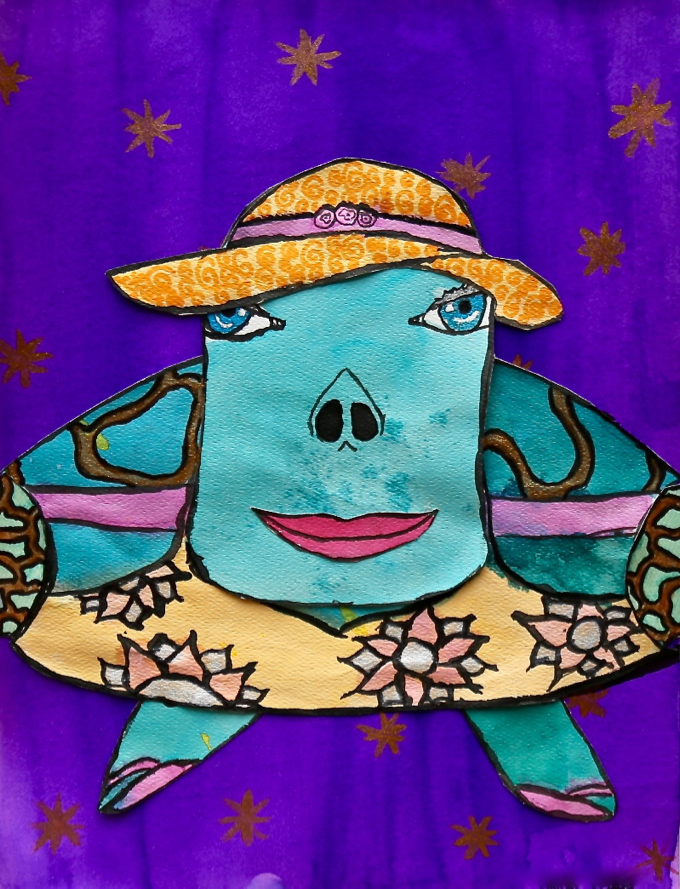
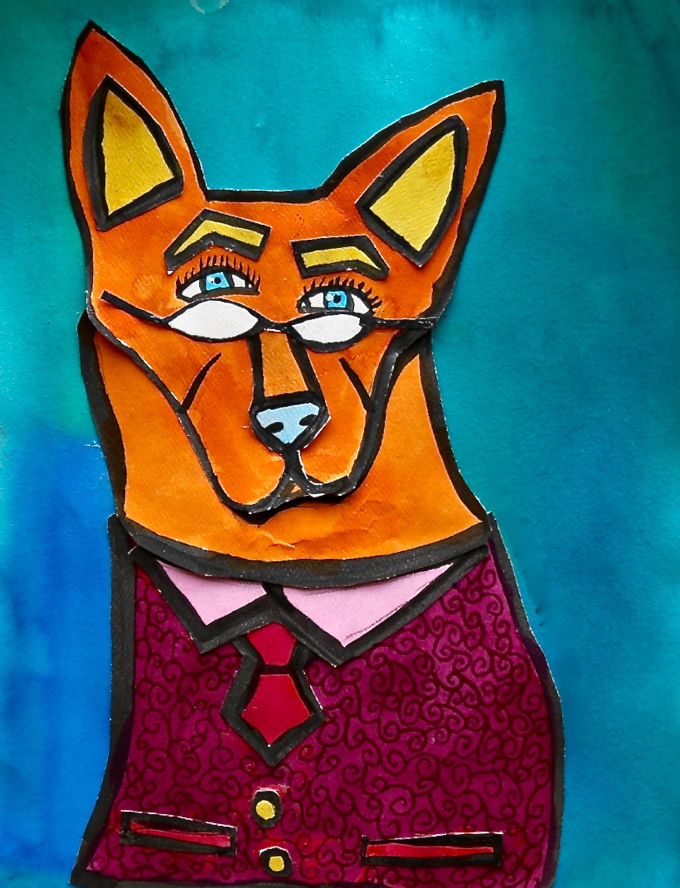
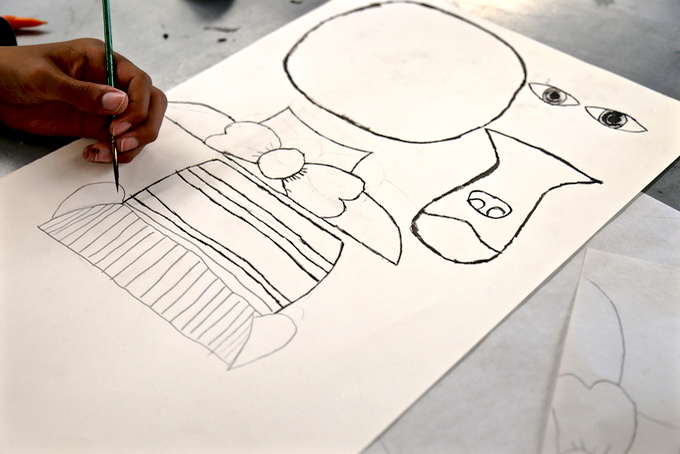
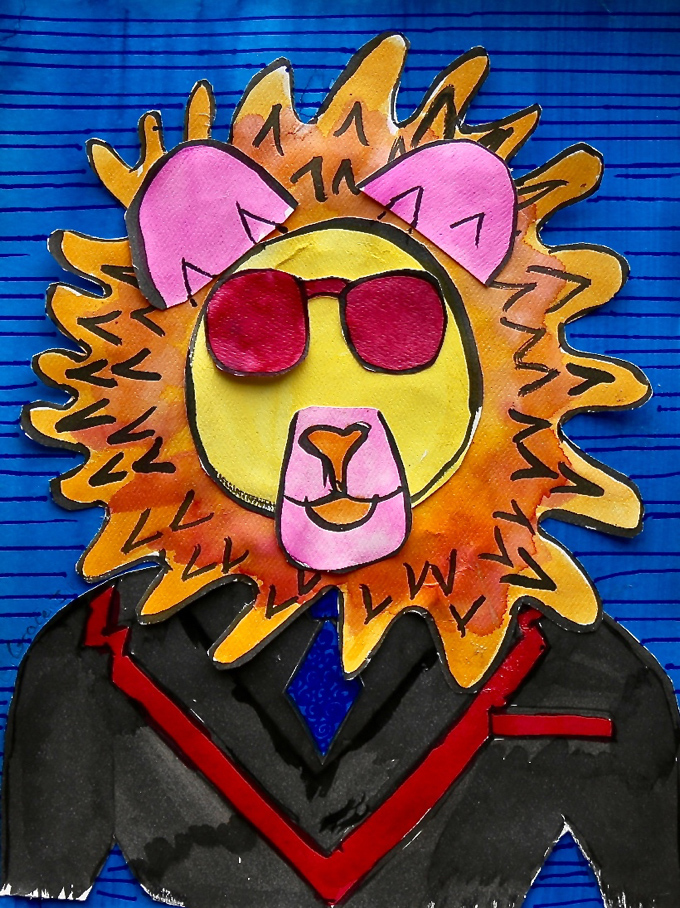
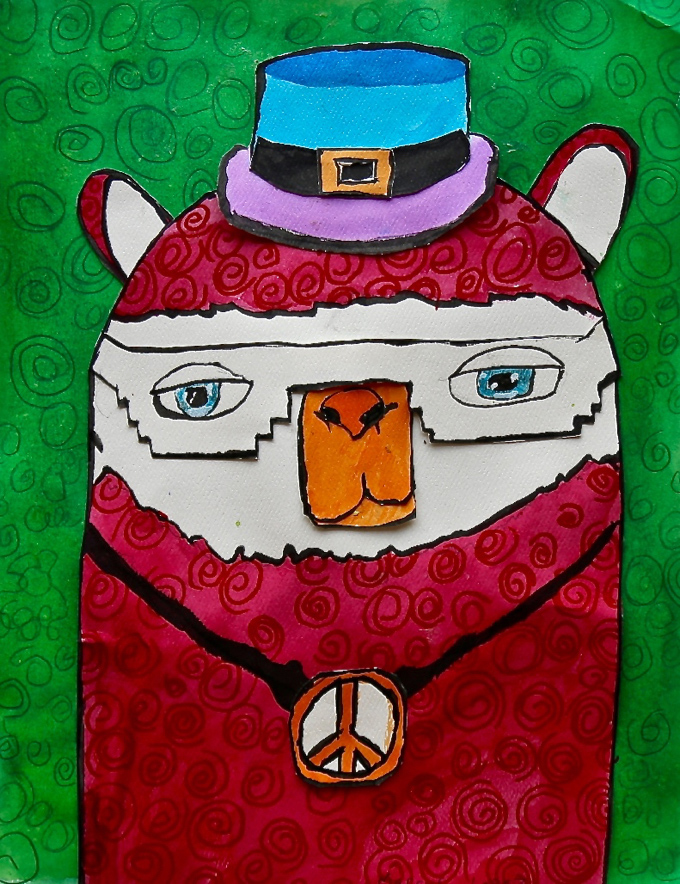
ONE Select a realistic animal and dream up your animal’s expressive personality. Create several mini sketches focusing on the face, head, and shoulders.
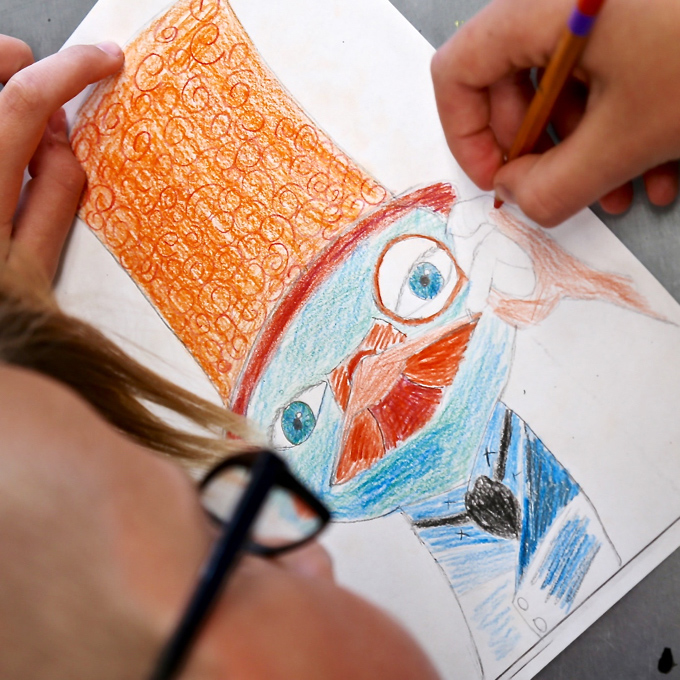
TWO Finalize your favorite sketch selection into a drawing, again with a focus on the face or upper body. Humanize your animal by adding human-like features, ex. eyes, mouths, shoulders, costuming and fun accessories, yet keeping a bit simplified, as individually drawn pieces will need to be drawn and cut out.
THREE Finalized your favorite animal drawing to a specific vertical paper size, fill the space by going big and focused in.
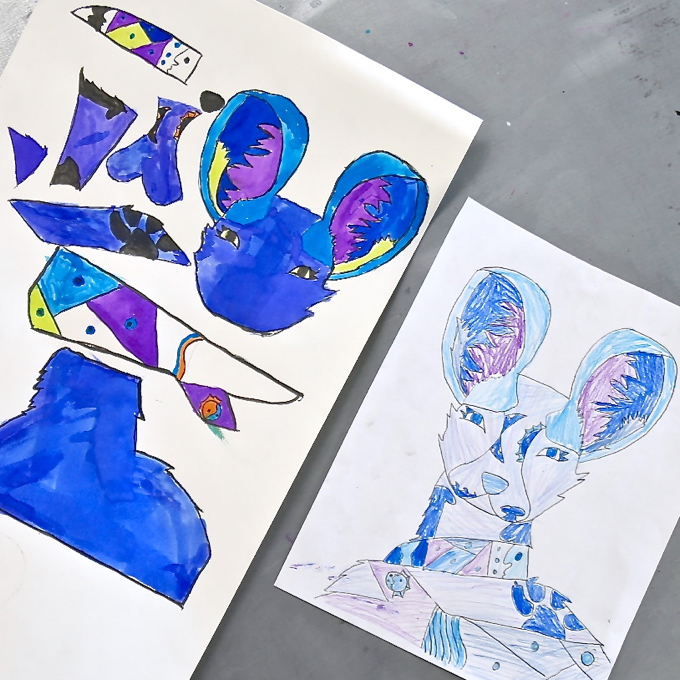
FOUR Trace each section of your drawing onto tracing paper at a window or lightbox. Separate out each layer. For example, the glasses would be a separate “drawn and cutout piece” from the face, to then overlay on top of the face. Start with the largest shapes first, such as the face, neck, and shoulders. It is very helpful to create bigger shapes to smaller shapes, working background to foreground.
FIVE Place the tracing paper shapes behind the final watercolor paper at the window or lightbox. Trace images onto heavy-weight watercolor paper in pencil. Again, all individual pieces that make up the complete animal, will be all drawn as separate pieces. The photos, above and below, should help with the visual understanding.
SIX Before cutting apart, use India Ink and a small brush to outline all the separate pieces. Remember to vary the line quality to keep your pieces more painterly so they capture both thick and thin for a more handcrafted flair. Dry.
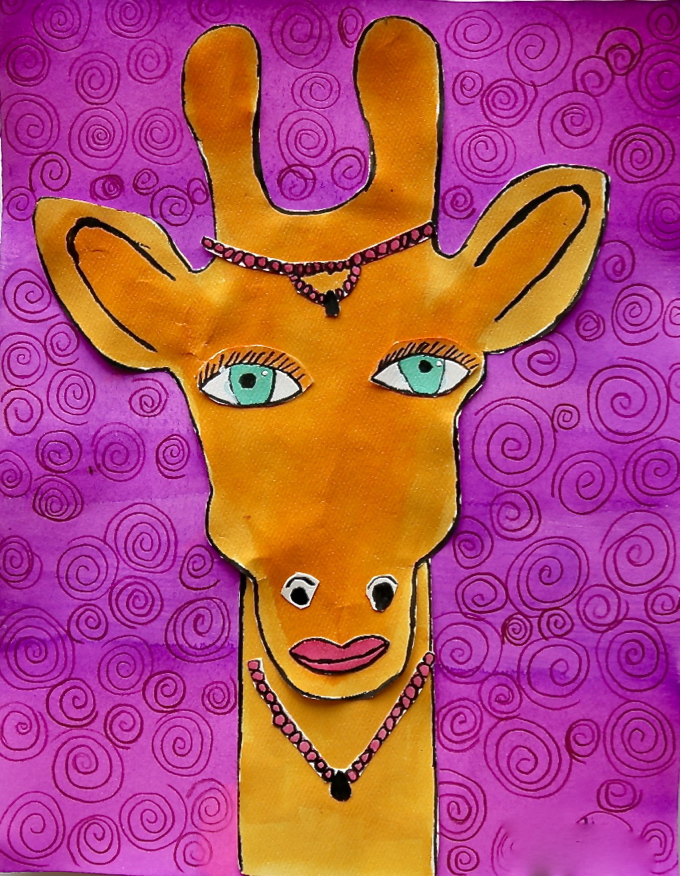
SEVEN Plan out a color scheme- complementary, analogous, warm or cool, intermediate, triad, or monochromatic for the overall piece. The color scheme should include the background.
EIGHT Using watercolors, which could be liquid or traditional pallets style, paint each piece remembering to dry between colors. Dry all pieces. Cut apart all individual pieces following the outer edge ink so the varied edge lines are preserved. Use a heavier weight watercolor paper to create a vibrant wash for the background. Dry.
NINE Assemble all the separate cutout/painted pieces using a heavy duty glue stick.
TEN Onto delightful details! Add highlights in eyes using white acrylic paint. Add swirls using colored pencil or permanent marker by using a similar color. Add texture and additional delightful detail. Use cut paper shapes, ex. stripes or polka dots to create a contrasting background to pop the creature! Most importantly, create a pet with personality and humor that comes to life with color, contrast, and human-like features!
A PEEK: Into the Planning Process of the Bus


A HUGE THANK YOU!!!
CPAC Carbondale Public Arts Commission
RFTA Roaring Fork Transportation Authority
… for making these two community projects, completely focused on kid art, come together for our community!
Tag us @handmakery with your creations on Instagram! Would love to see your ~ Pet Portraits with Personality! Follow our BLOG for more inspiring process-based art projects! As always, thank you for following along on this artful adventure in beautiful Carbondale | CO at 449 Main Street! Send us a note or contact us anytime at hello@handmakery.com! Much love and happiness creating! xo Ami