DIY Cardboard “Candy” Cottage + First Friday Crafting

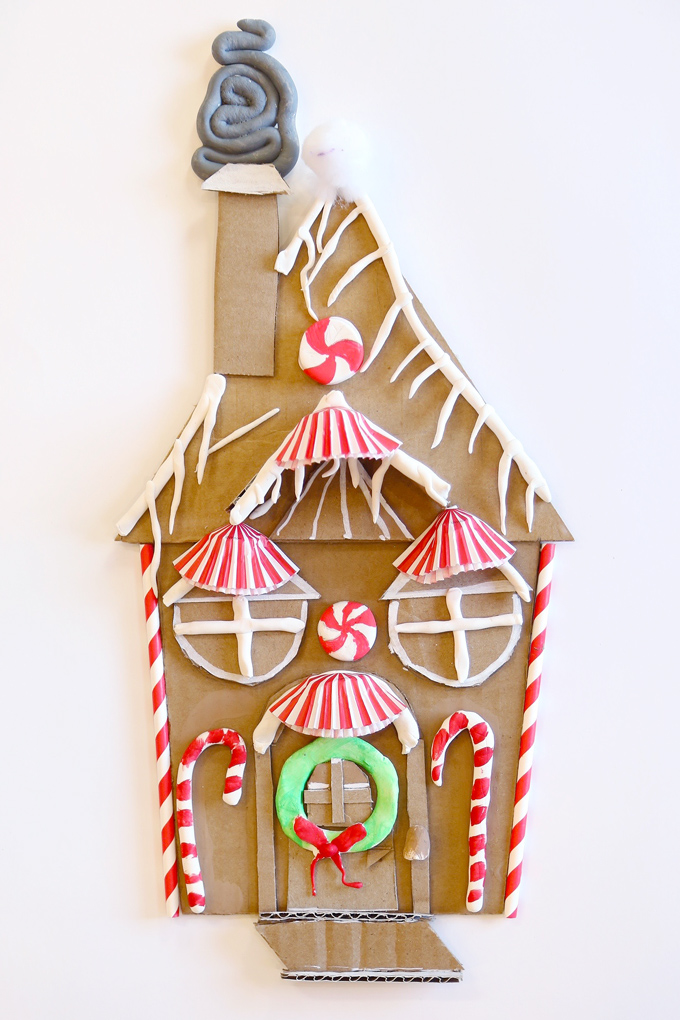
Happy December + Happy Holidays! Save yourself long hours in the kitchen spent mixing, rolling, cutting and baking gingerbread dough – use cardboard instead for a ~ DIY CARDBOARD “CANDY” COTTAGE!
This fantastic upcycled material is abundant and easy to use. Plus, you can avoid a sugar melt-down by skipping the temptation (and expense) of supplying bags of candy, sprinkles and royal icing – and sculpt your own candy cane columns and gumdrop windows using modeling dough.
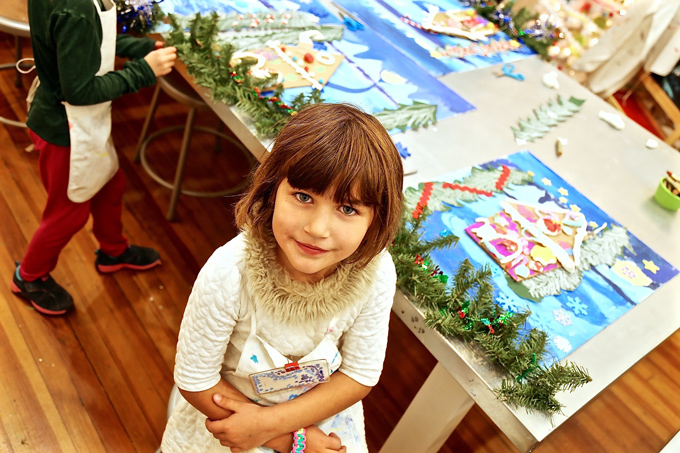
This open-ended, creative process is fun for ages 5-12 (or, say, age 35+, if Mama is so inclined). These cottages can be used as holiday ornaments, wall hangings, or added as a 3D element to a canvas painting, as shown here. You can even make a village; a timeless, long-lasting heirloom, completely made by – hand from the heART!
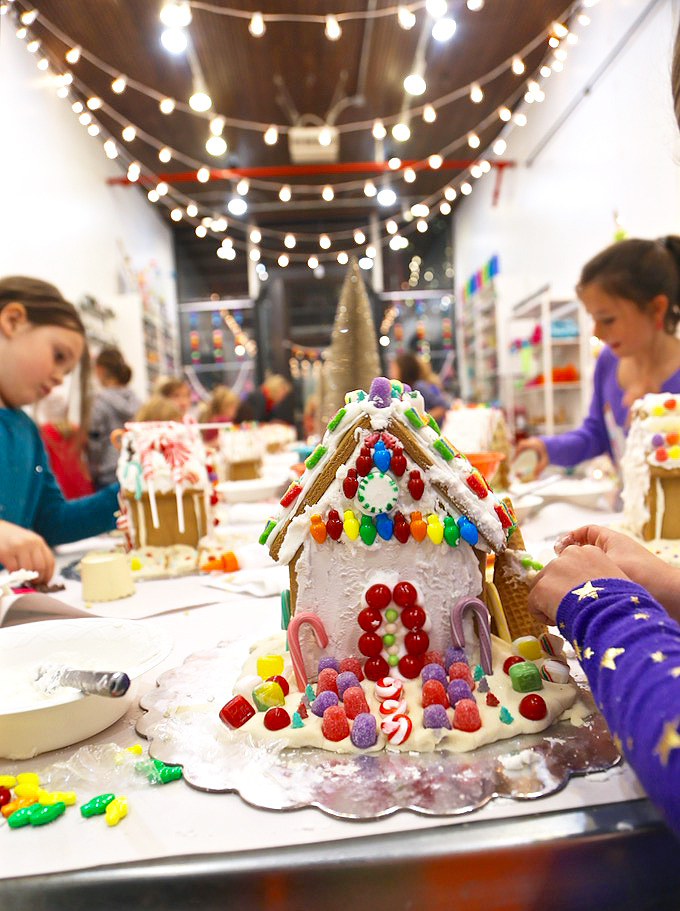
Traditionalists who want a classic edible gingerbread house (complete with candies galore) can skip the inevitable sticky cleanup at home, and instead, deliver their children to December’s FIRST FRIDAY ~ CANDY COTTAGE WORKSHOP at HANDMAKERY, where crumble-proof walls and every sweet adornment will be provided.

See the full CARDBOARD “CANDY” COTTAGE article in Winter Edition | Issue 10 of the MOUNTAIN PARENT magazine offered FREE throughout the Roaring Fork Valley in print (oh SO beautiful) and/or online throughout the world!
SUPPLIES FOR CARDBOARD “CANDY” COTTAGE:
- Printable download
- Pencil + eraser
- Cardboard
- Scissors
- White school glue
- Hot glue (adult use)
- Clear wrap
- Masking tape
- Modeling dough: Crayola Model Magic (white)
- Tempera paint + brush
- Glitter (fine white)
- Chalk markers (optional)
- Embellishments- white pom-poms, red & white paper straws, striped cupcake papers, wire stars, & white string.
PROCESS FOR CARDBOARD “CANDY” COTTAGE:
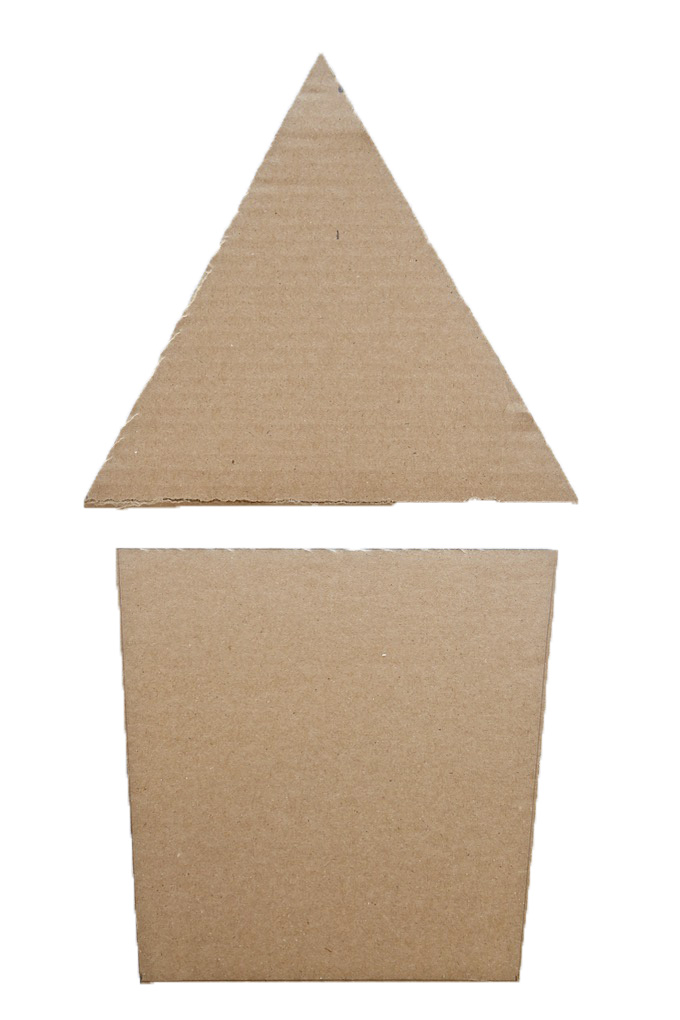
ONE Download a FREE printable template on handmakery.com/blog. Prepare a cardboard cottage cut-out ahead of time by cutting out two shapes: one will be the cottage, the other will be the roof. Using white glue, attach the cardboard cottage to the cardboard roof by overlapping just a bit and gluing in place. Dry.
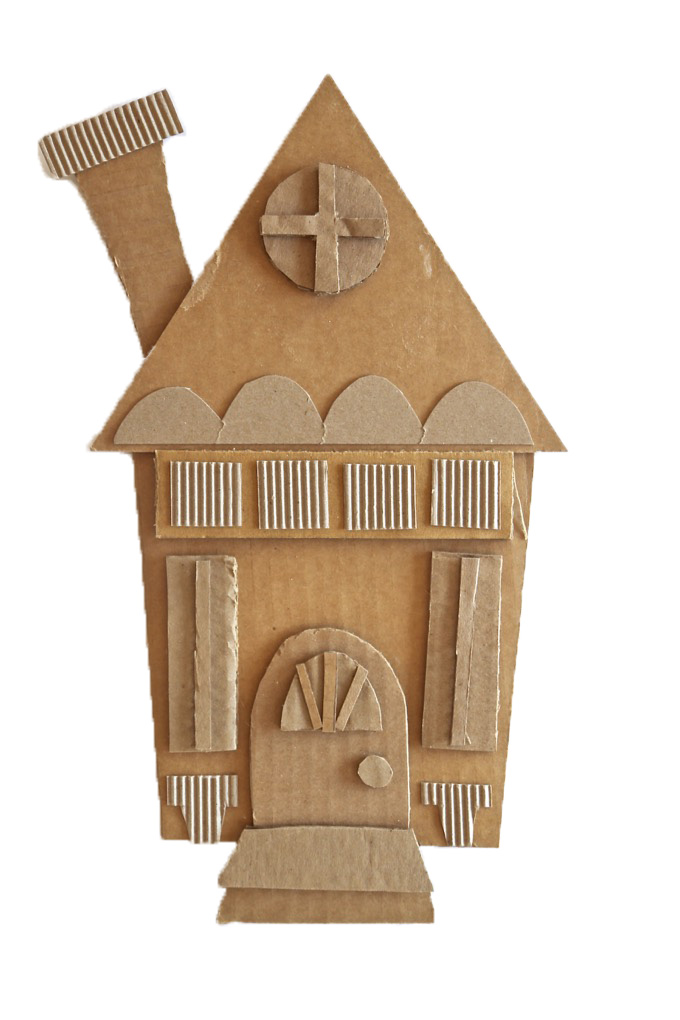
TWO Have a mixture of smaller pieces of cardboard scraps available that can be cut and used for pop out details. Lighter weight cardboard is ideal as it’s easier to cut. Corrugated cardboard adds a wonderful texture and is also easy to cut. Architectural pieces can be drawn and cut to create doors, windows, porches, fences, shed roofs, steps, a chimney, and more. Draw, cut, arrange, and glue down detail pieces using white glue. Dry. Cottages will become one-of-a-kind mini-relief sculptures!
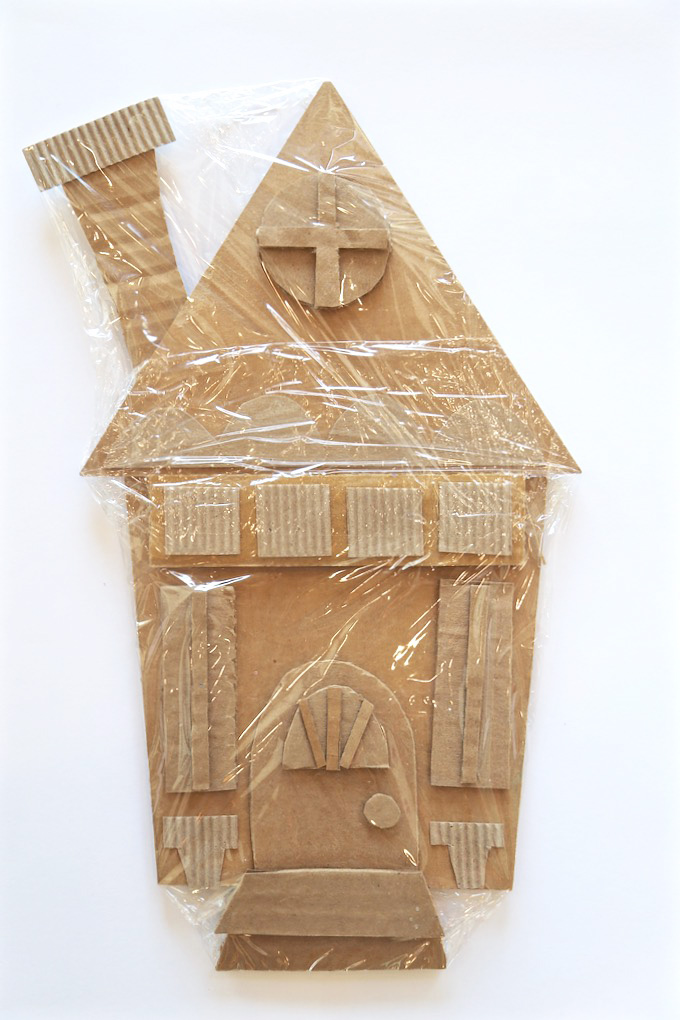
THREE Cover completed cardboard cottage with clear wrap and use masking tape on the back of the cottage to temporarily secure. This protected surface will allow modeling dough pieces to be placed on the house to dry without attaching to the cardboard cottage and will keep the cardboard protected from paint.


FOUR Keep cottage covered with clear wrap. Move into making accents using Crayola Model Magic which is a fantastic product for use, flexibility, and simple drying. Start by rolling coils to imply snow and icicles. These pieces will take on the look of white icing. These snowy details can run along the edges of the roof, cottage, above the door + windows, and atop the chimney. Use modeling dough to also make candies such as gumdrops, mints, candy canes, and other savory + sugary treats. Wreaths, snowballs, and snow piles can also be fun additions. Allow pieces to air dry in place, on top of the clear wrapped house.
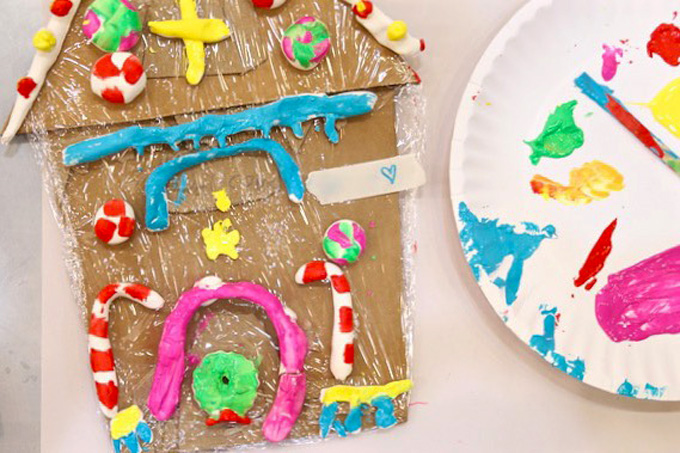
FIVE Paint dry modeling dough candies using paint and a small brush. Allow painted pieces to dry on top of the clear wrapped cottage. Pieces that are to remain white are beautifully painted with white glue and sprinkled with fine white glitter for added sparkle. Dry.
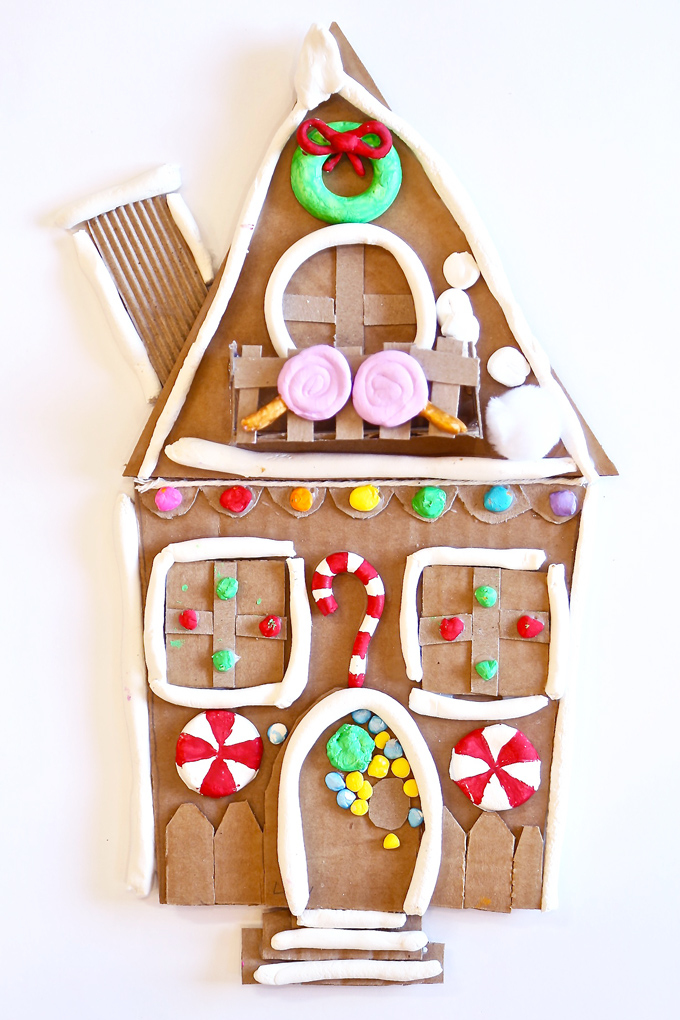
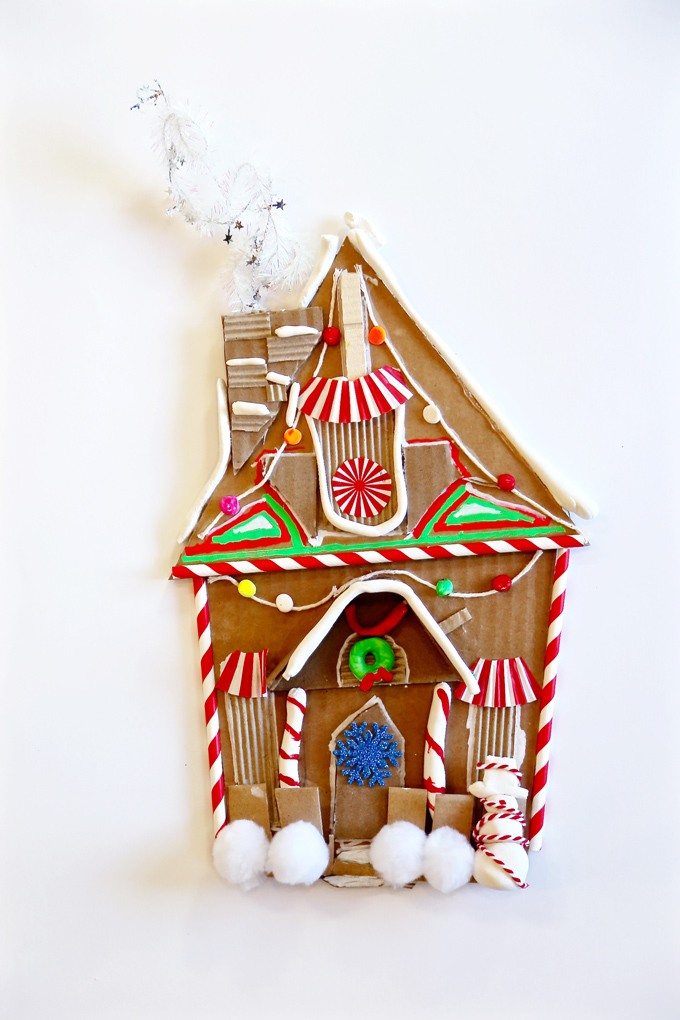
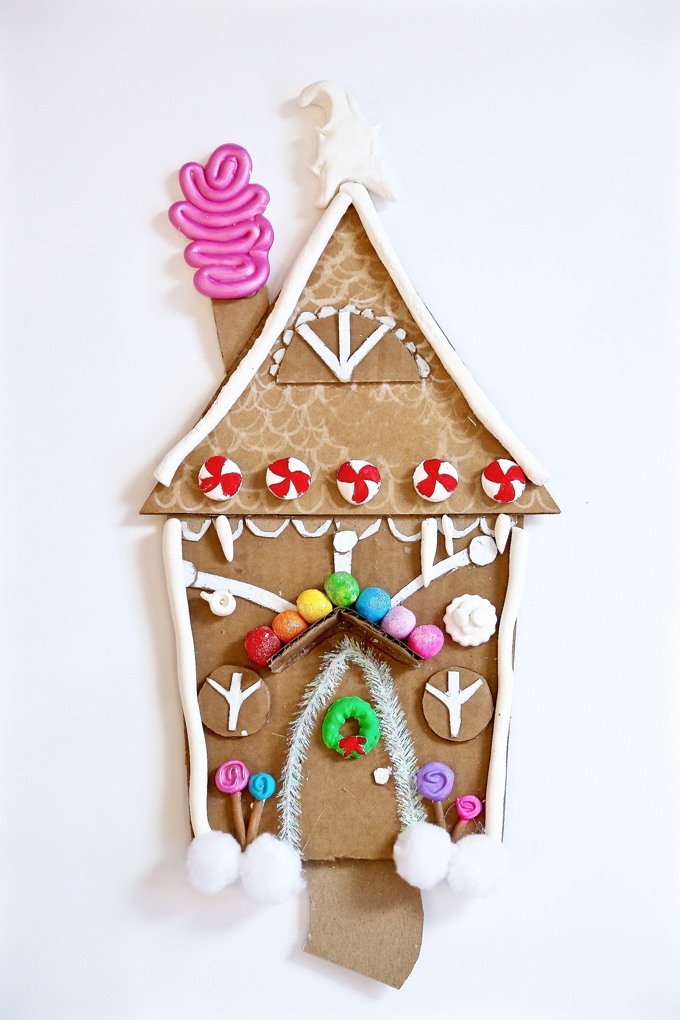
SIX Carefully set all modeling dough piece aside and remove the clear wrap. Arrange pieces in place for gluing down onto cardboard. Most dough pieces can be glued with white glue. It can be helpful for an adult to hot glue fragile icing pieces for strength and a quicker dry time. Use chalk marker to add small details of color on the cardboard cottage. White chalk marker can imply small areas of icing and colored chalk marker can add vivid details to the cardboard pieces. Now, you can add your embellishments including, white pom-poms, red & white paper straws and striped cupcake papers, wire stars, and white string for lights. Most embellishments can simply be glued in place onto the cardboard.
Be sure to tag @handmakery on Instagram with your Cardboard “Candy” Cottage creations as we’ll be featuring your work on our feed! #candycottage
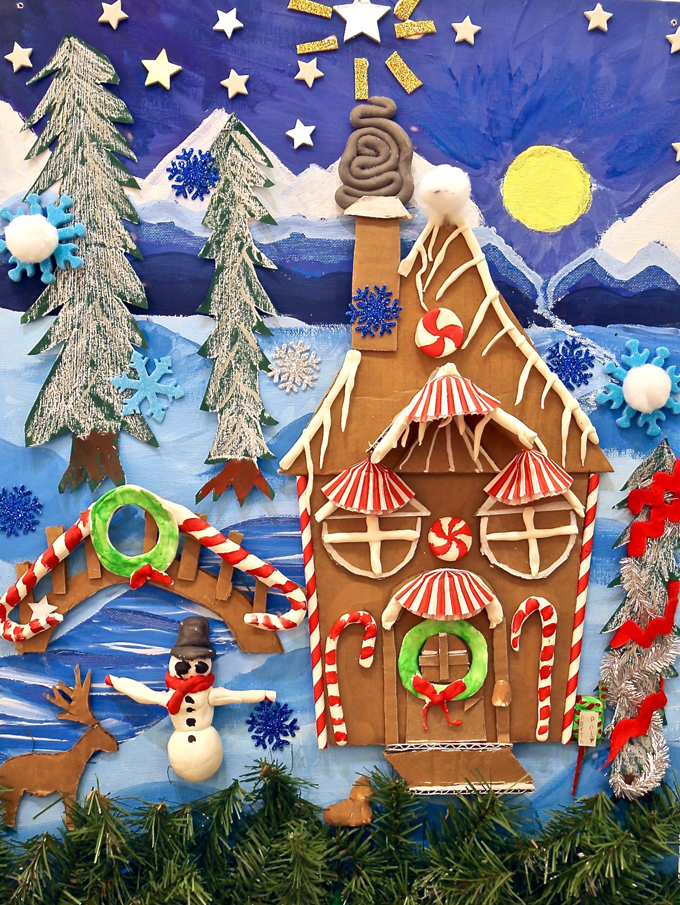
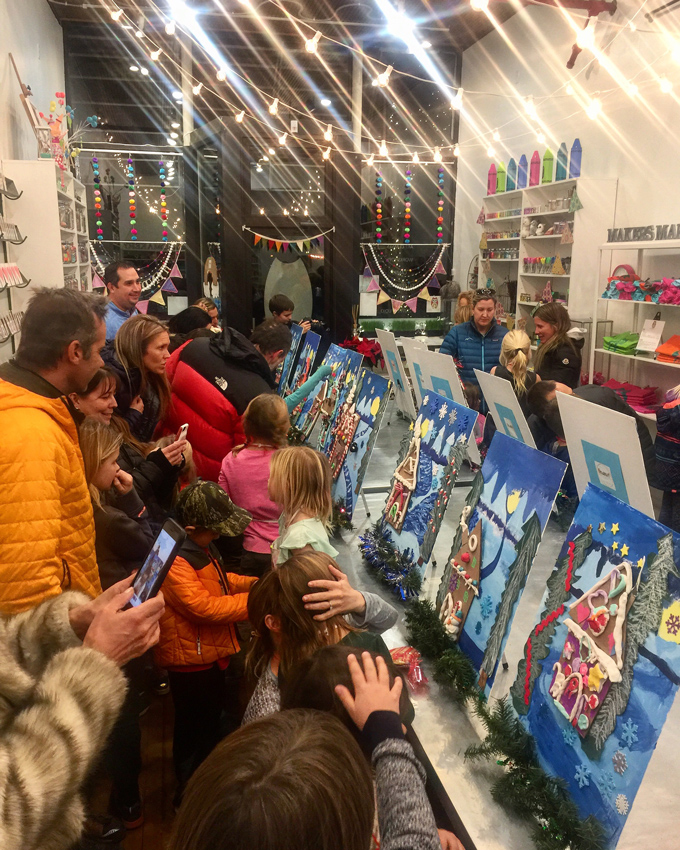
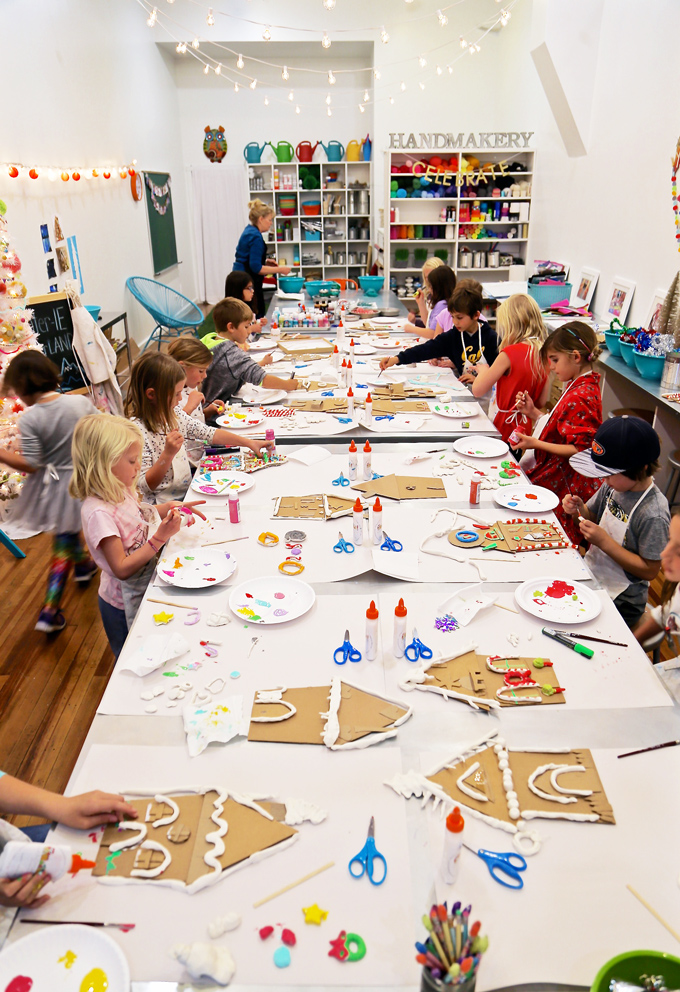
A peek inside the studio at a mini-exhibit + recognition ceremony for our Winter-IE Wonderland Workshop as family and friends gathered to celebrate Cardboard “Candy” Cottages atop a wintery landscape!
JOIN US IN THE STUDIO ~ FIRST FRIDAY, DECEMBER 7TH:
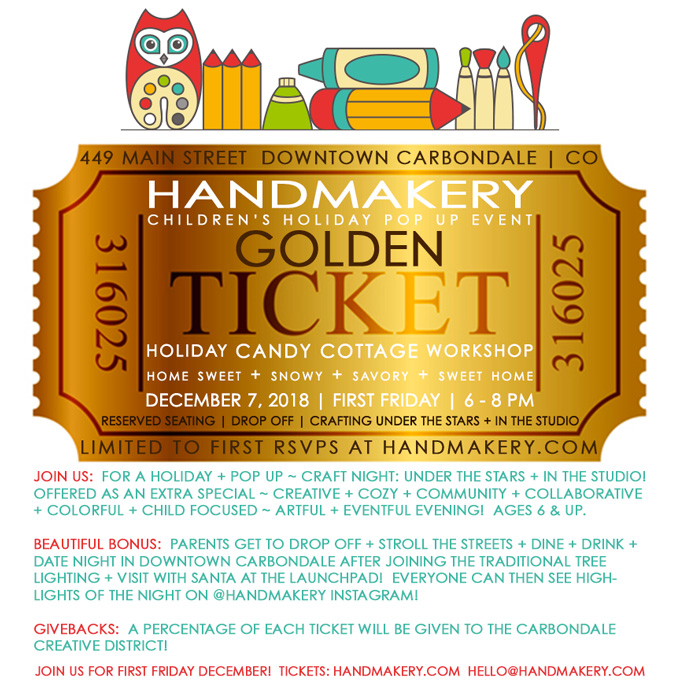
>>>>> RESERVE TICKETS for DECEMBER 7TH!
Happy Holidays! Tag us @handmakery with your creations on Instagram! Follow our blog for more inspiring process-based art projects! As always, thank you for following along on this artful adventure! Send us a note anytime! We’d love to hear what you’re thinking and dreaming! Much love and happiness creating in this creative + colorful world full of collaboration + connection + community!
xo Ami